Bachmann Tram RC Conversion

JimmyB

Now retired - trains and fishing
Country flag
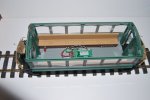
I picked up an enclosed Bachmann Tram at Peterborough, and an in the process of converting to battery, and as part of that I wish to strip and refurbish.

Motor and lower parts removed
Roof removed
Seats removed
End partitions (with sliding doors removed

As you seem most parts are off, but the windows are badly fitted, and though I have loosened the pips on the sides I cannot get the two/one pane(s) (pains ;)) at the front and rear to move, and I was wondering how other have managed, and any pitfalls.
 
Jimmy,

I was looking at this last night for a tram which is going to receive a complete repaint, I trimmed the pipes which locates the glazing with rail cutter cutters, then trimmed a wee bit more with a flat end blade, to finally free the glazing I took my trusty battery mini hand drill and with a trimming bit slowly and carefully ground out the pip in the glazing.
A wee bit of time later and it came free.

David
 
Last edited:
Jimmy,

The internal end panel can gently be persuaded off the outer, it's the internal end panel which holds the ends of the windows in place.

Free and remove the internal roof handrails before touching the internal end panels.

David
 
Jimmy,

If you are planning to do anything with the roof, removing the lights is a real firgin gurkin to do and you need something to hold the roof while you prize the light brackets out.

David
 
Jimmy,

If you are planning to do anything with the roof, removing the lights is a real firgin gurkin to do and you need something to hold the roof while you prize the light brackets out.

David
David thanks for that, I will be replacing the lights with LEDs as part of the refurb :) I just need to source my battery pack, thinking of a 3S Li-Ion based on 3 14500 (AA) type batteries with protection (of course) :)
 
Jimmy,

I'm sure you've seen what I did on another thread, I cut a hole in the floor, removed the seat fixing points and glued the seats in situ.
I have used the recess created by cutting a hole in the floor to put 4 AA batteries each side, resetting fuse glued to the underside of the drivers floor.

Hopefully the attached shows what I've done.

Depends which version of the tram your working with, but if it's one of the later ones I put the LED resistor in the roof, I have used micro LEDs with a dod of evo stick to hold the tiny LEDs inplace, the theory being if i need to replace them it's not too difficult to remove a dod of evo stick.

I'd be interested to see what your doing, not just the finished article but how you get to the final model, pictures as the say say things better than words.

David
 

Attachments

  • 20210716_155711.jpg
    20210716_155711.jpg
    314 KB · Views: 0
Last edited:
David, I did ool at yours and the battery pack will go under 1 seat, 11.1 volts should be enough. Not sure if I should go for strip LED or single SMT. I have been decorating lately and stripping this down was my evening relaxation. My next step is batteries, then RC, thinking about a LED driver for this, as I happen to have one. I will photograph everything when I start in earnest and do a a detailed blog.
 
As a complete newby to this scale it's been nice to be able to offer help to someone else after getting help with things myself.

I look forward to seeing the photos of your progress.

David
 
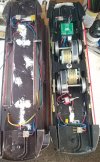
Finally got the tram stripped down in to its component parts, now starts the re-assembly with the battery RC equipment:

First the balance charger and powers switch, a Micron proprietary item:
Tram-08.jpg

Next the 4S Li-Ion battery pack with BMS courtesy of RC Trains:
Tram-09.jpg

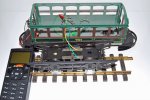
Now to see if it will run, using a Revolution Micro Receiver w/Sound, Rx/ESC/Sound all in one:

Tram-10.jpg

All seems fine, now starts the rest of the upgrade and assembly.
 
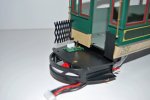
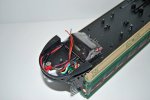
Conversion going slowly but well. motor assembled and fitted and all the electronics are fitted, decided to skip the roof lights, but i do have the directional lights, just awaiting some 1.2mm self tappers to assemble the bogie frames.

DSC_0204.JPG

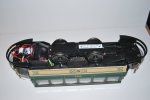
A few seated people and from the normal viewing angle the Rx won't be seen.

DSC_0206.JPG

Cables threaded under the seats, keeping them clear of the wheels.
 
Conversion going slowly but well. motor assembled and fitted and all the electronics are fitted, decided to skip the roof lights, but i do have the directional lights, just awaiting some 1.2mm self tappers to assemble the bogie frames.

View attachment 291861

A few seated people and from the normal viewing angle the Rx won't be seen.

View attachment 291862

Cables threaded under the seats, keeping them clear of the wheels.
It's all very neat and tidy - if only my battery conversions looked like that :worried::worried::worried:

As an observation - is the weight of the battery pack going to give a riding issue, or is it not heavy enough to worry about?
 
The Revolution is a well worked out system, uses 2.4 GHz, consisting, start speed trim, easy to see LCD with lots of information, and is inexpensive.

I'll let Jimmy answer for himself, but for what you get, it is a great deal. Also, notice Jimmy is using the micro receiver, even less expensive.

Greg
 
I'm interested to know why you went for the Revolution system, your pros and cons for the system would be interesting to know?

David

I have a revolution Tx gifted by GAP GAP which I use for my points (switches) control.

The Revolution is a well worked out system, uses 2.4 GHz, consisting, start speed trim, easy to see LCD with lots of information, and is inexpensive.

I'll let Jimmy answer for himself, but for what you get, it is a great deal. Also, notice Jimmy is using the micro receiver, even less expensive.

Greg
As Greg has pointed out I using the micro (cira £100) Rx; ESC and sound and very small. Can't knock something if you don't have any information, so decided to give it a go. So far not disappointed, will report in more detail after a test run.
 
Conversion going slowly but well. motor assembled and fitted and all the electronics are fitted, decided to skip the roof lights, but i do have the directional lights, just awaiting some 1.2mm self tappers to assemble the bogie frames.

View attachment 291861

A few seated people and from the normal viewing angle the Rx won't be seen.

View attachment 291862

Cables threaded under the seats, keeping them clear of the wheels.
Jim, what is the red push button switch for ? In it's location, won't it be inaccessible once the roof is refitted ?
 
Back
Top