BOSTON LODGE
Link to more on Mikes line.
 www.gscalecentral.net
I have been helping my good friend Mike build his Garden Railway since he moved to Somerset in 2017. There was a long term loose plan for the line including Garden Sheds, Garage and Mountains. Once we had got to the stage of actually putting in the line with help from me before the dreaded C kicked in, holidays of 2 trips a year generally matching WSR Gala’s and much work in between by Mike. As we got to height of roughly 2-3 ft from the ground an area in front of one of the Sheds was allocated to be a Steam Up Bay, somehow by general consensus it became known as Boston Lodge as there was to be a connection from the Portmadog Station. The rest of the line is Swiss based!
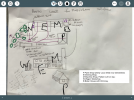
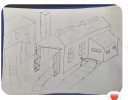
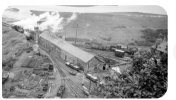
Thus after my in between lockdown visit last year a loose concept was thought out and a diagram scribbled on paper with many pics of the Lodge being downloaded from the internet to my iPad. These are such useful devices as the pics can be taken to wherever work is being carried out and was open in the Garden, Garage and Workshop when working on Lodge projects. Has to be said that things are not completed as yet but a good start has been made and hopefully much more on my next visit hopefully sometime later this year. A bit of honesty about a bo bo also needs to be made, the picture that I mostly used was discovered to have been printed about face on the net. A fact that I had not realised till looking for more detail and catching just a small part of the elusive in picture terms buildings that I wanted to create. Oh well it was never intended to be a slavish copy of the real site but a sort of ‘get the feel of the place’ cameo.
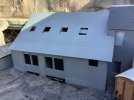
Mike had ordered some white plastic coated foamboard prior to my visit and I spent a lot of time in the evenings scribing slate and block-work into the sides that had been cut in the garage during the day. So far 2 buildings have been put together and are now living in the garden, one has been scribed but awaits construction after the final side is scribed and the roof made. A final building has not yet been started. All this was created during my 2 weeks stay plus completing many feet of Concrete Mountains during the day whilst the weather was hot and sunny.
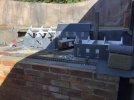
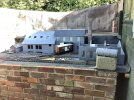
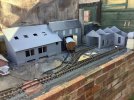
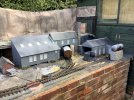
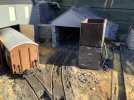
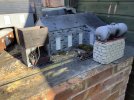
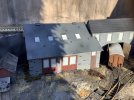
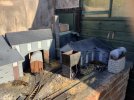
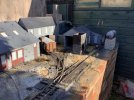
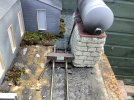
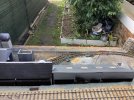
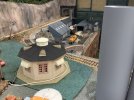
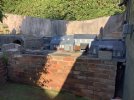
The buildings so far planted, once completed were placed where they will go with Silver Kitchen Foil on the base and concrete ground built up to about 10-15mm to represent the typical Lodge landscape. As there are tracks behind at the same level and higher the buildings need to be removable for access to the low level ones. A planter has been added over the low level one to disguise the line and the outbound line crosses this on a Mike built x xing before going under the high level to emerge at Portmadog. Both lines have concreted entries, one as a tunnel and the other as just a rough edge to help disguise things from the normal Lodge view. A Steam Up storage area for junk (gas oil etc) has been made out of brick clean off Chipping's generated during cleaning up of recovered bricks from varying house renovation works. The cleaned up bricks themselves plus any other salvaged have been used for the raised rockeries that the line sits on. At the exit to the Lodge a bit of old Celcon Block has been sawn with lines joined up to make stonework. A similar tactic was used on a square to make a chimney and some more made a boiler house. All seen in the pictures. Colouring is by a liquid Black Brick Dye sourced locally from a builders yard mixed with SBR Bond, water and some concrete.
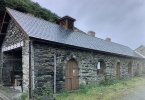
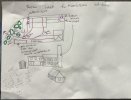
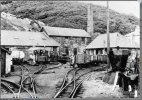
The rough plan that I created and the picture that was used for the inspiration.
Here is a picture of the site after Mike has laid track showing roughly where the fake Turntable will be. Rail is predominantly LGB, but the 2 sidings of the TT use Gauge 1 Rail as this was kicking around spare and these tracks are only meant to be cosmetic.
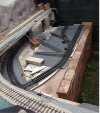
Here you can see that the Turntable has been roughed in with the use of an unwanted Music CD, I think it was Pink Floyd not one of my favorite bands! Oh that bit of Celcon was squared up and scribed for the Chimney seen later.
 I roughed out some of the buildings in card board and old boxes to get a feel of how things would look. These were used for taking dimensions before the Foamboard was cut.
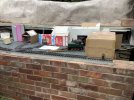
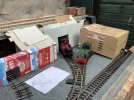
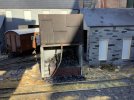
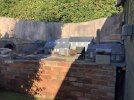
Then the building work started with the Steam Up utility in place first. This has been placed to put all of that junk associated with steaming up a loco out of the way rather than on the track As often happens at Steam Ups. It has used the old brick clean offs, previously mentioned. These are glued together with no-nails of cheep and dubious makes then cemented behind to make secure when dried. It helps to keep the white of the no-nails to the rear of the blocks as it is unsightly when seen.
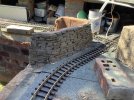
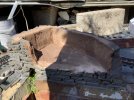
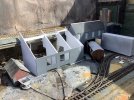
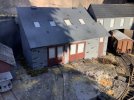
This was the first if the FR Lodge buildings to be completed, a standard plasic coated foamboard job using 5mm thick foamboard. you can see the Silver Kitchen Foil used to ensure that the cement base does not adhere to it so that the building can be removed.
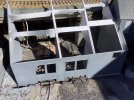
The first of the larger buildings part built is seen in the second picture.
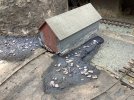
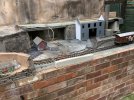
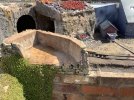
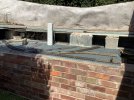
Here is the planter that goes over the track behind to disguise it, as there are hills behind the real Lodge this seamed like a reasonable ruse. It is a piece of UPVC soffit board plonked on a couple of off cuts of cement blocks and cemented over. The pipe is for drainage of the top which will be planted out. The remaining gap when the other buildings have been added will likely be a removable scribed building flat to disguise the track behind.
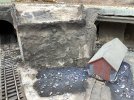
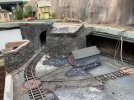
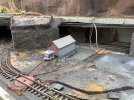
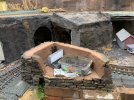
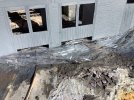
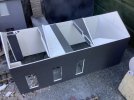
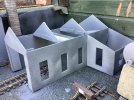
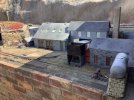
Now the second building is in place with the Chimney next to it. The final picture shows the bigger bulding in scribe mode with my chosed scribing tool and flat working surface. All scribing done when supported on my knees.
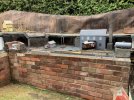
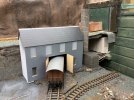
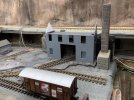
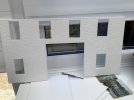 You will I am sure see the liberties taken at attempting a cameo of the real place, but space was tight and who would have the time to build all of the ram-shakled joy that is or was Boston Lodge of the 50’s?
My next update to this project will be after my next visit to Somerset sometime in the Autumn.
Link to more on Mikes line.
Some work on Mountains and a Concrete Viaduct
I have a very good friend that lives in Somerset and have helped him over the years with his varying Garden Railways, not least in demolishing 2 or them. Hopefully this latest one will get completed as it is in his retirement home and a super start has already been made by both he and his lady...
I have been helping my good friend Mike build his Garden Railway since he moved to Somerset in 2017. There was a long term loose plan for the line including Garden Sheds, Garage and Mountains. Once we had got to the stage of actually putting in the line with help from me before the dreaded C kicked in, holidays of 2 trips a year generally matching WSR Gala’s and much work in between by Mike. As we got to height of roughly 2-3 ft from the ground an area in front of one of the Sheds was allocated to be a Steam Up Bay, somehow by general consensus it became known as Boston Lodge as there was to be a connection from the Portmadog Station. The rest of the line is Swiss based!
Thus after my in between lockdown visit last year a loose concept was thought out and a diagram scribbled on paper with many pics of the Lodge being downloaded from the internet to my iPad. These are such useful devices as the pics can be taken to wherever work is being carried out and was open in the Garden, Garage and Workshop when working on Lodge projects. Has to be said that things are not completed as yet but a good start has been made and hopefully much more on my next visit hopefully sometime later this year. A bit of honesty about a bo bo also needs to be made, the picture that I mostly used was discovered to have been printed about face on the net. A fact that I had not realised till looking for more detail and catching just a small part of the elusive in picture terms buildings that I wanted to create. Oh well it was never intended to be a slavish copy of the real site but a sort of ‘get the feel of the place’ cameo.
Mike had ordered some white plastic coated foamboard prior to my visit and I spent a lot of time in the evenings scribing slate and block-work into the sides that had been cut in the garage during the day. So far 2 buildings have been put together and are now living in the garden, one has been scribed but awaits construction after the final side is scribed and the roof made. A final building has not yet been started. All this was created during my 2 weeks stay plus completing many feet of Concrete Mountains during the day whilst the weather was hot and sunny.
The buildings so far planted, once completed were placed where they will go with Silver Kitchen Foil on the base and concrete ground built up to about 10-15mm to represent the typical Lodge landscape. As there are tracks behind at the same level and higher the buildings need to be removable for access to the low level ones. A planter has been added over the low level one to disguise the line and the outbound line crosses this on a Mike built x xing before going under the high level to emerge at Portmadog. Both lines have concreted entries, one as a tunnel and the other as just a rough edge to help disguise things from the normal Lodge view. A Steam Up storage area for junk (gas oil etc) has been made out of brick clean off Chipping's generated during cleaning up of recovered bricks from varying house renovation works. The cleaned up bricks themselves plus any other salvaged have been used for the raised rockeries that the line sits on. At the exit to the Lodge a bit of old Celcon Block has been sawn with lines joined up to make stonework. A similar tactic was used on a square to make a chimney and some more made a boiler house. All seen in the pictures. Colouring is by a liquid Black Brick Dye sourced locally from a builders yard mixed with SBR Bond, water and some concrete.
The rough plan that I created and the picture that was used for the inspiration.


Here is a picture of the site after Mike has laid track showing roughly where the fake Turntable will be. Rail is predominantly LGB, but the 2 sidings of the TT use Gauge 1 Rail as this was kicking around spare and these tracks are only meant to be cosmetic.

Here you can see that the Turntable has been roughed in with the use of an unwanted Music CD, I think it was Pink Floyd not one of my favorite bands! Oh that bit of Celcon was squared up and scribed for the Chimney seen later.
 I roughed out some of the buildings in card board and old boxes to get a feel of how things would look. These were used for taking dimensions before the Foamboard was cut.

Then the building work started with the Steam Up utility in place first. This has been placed to put all of that junk associated with steaming up a loco out of the way rather than on the track As often happens at Steam Ups. It has used the old brick clean offs, previously mentioned. These are glued together with no-nails of cheep and dubious makes then cemented behind to make secure when dried. It helps to keep the white of the no-nails to the rear of the blocks as it is unsightly when seen.


This was the first if the FR Lodge buildings to be completed, a standard plasic coated foamboard job using 5mm thick foamboard. you can see the Silver Kitchen Foil used to ensure that the cement base does not adhere to it so that the building can be removed.
The first of the larger buildings part built is seen in the second picture.


Here is the planter that goes over the track behind to disguise it, as there are hills behind the real Lodge this seamed like a reasonable ruse. It is a piece of UPVC soffit board plonked on a couple of off cuts of cement blocks and cemented over. The pipe is for drainage of the top which will be planted out. The remaining gap when the other buildings have been added will likely be a removable scribed building flat to disguise the track behind.


Now the second building is in place with the Chimney next to it. The final picture shows the bigger bulding in scribe mode with my chosed scribing tool and flat working surface. All scribing done when supported on my knees.


 You will I am sure see the liberties taken at attempting a cameo of the real place, but space was tight and who would have the time to build all of the ram-shakled joy that is or was Boston Lodge of the 50’s?
My next update to this project will be after my next visit to Somerset sometime in the Autumn.
Last edited:

