David1226
Registered
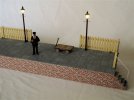
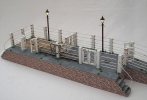
The Claptowte Railway has a requirement for a number of platform lamps. Although the building of a passenger platform is still a little way in the future there is an immediate need for some lamps to mount on both the goods loading dock and the cattle loading dock under construction for Gernise End Station. Although trains would not normally be run at night there is a need to shed a little light on the loading and unloading of goods wagons during the dark Winter mornings and evenings. As it is intended that everything above rail height must be removable for storage, lights wired to permanent low voltage feeds, or to the track, would not be an option. I intended from the start that the lamps would all have to be battery powered.
The cheapest option by far would be to utilise the cheap 3.0 volt LED offerings, originating from China, frequently found on eBay, that work out at less than a £1.00 each. I actually paid a little more to buy eight from a UK supplier rather than direct from China, as they were delivered in days rather than weeks. My immediate requirement was for four lamps, two each for the goods dock and the cattle dock. I also purchased two 2xAA switched battery boxes to power them.
Although advertised as G Scale (or 1/25th scale) I felt that they were rather on the short side.

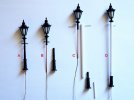
Fig A. Unmodified lamp post as purchased, height 85mm.
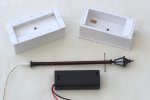
Fig B. Lamp post pulled apart.
Fig C. Top modified by cutting off plastic ladder stanchions and carefully cutting off the moulded ring at the bottom end. The bottom of the post is modified by sawing through the pole just below
the first moulded ring and discarding the top part. A new pole is fabricated from a 95mm length of 3/16” polystyrene tube (Evergreen item 226). The top and bottom of the new pole was
countersunk by running a scalpel blade around the internal bore. Two holes were drilled 5.0mm from the top to take new ladder stanchions. The pole is threaded over the wires, brass tube and
the remaining section of the original pole and glued in place. The diamond shaped moulding sits in the top countersink. The original base is then threaded over the wires and the top part glued
into the bottom of the new pole with the bottom countersink covering the moulded ring at the base top. A short section of 3/32” polystyrene tube (Evergreen item 223) is then threaded over
the wires and glued up inside the base to make a new extension with which to ‘plant’ the lamp post. The last thing is to glue in the new ladder stanchions which are cut down dress making pins.
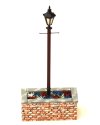
Fig D. The completed modified lamp post, now 150mm high.
A comparison between the original and modified lamp post

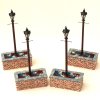
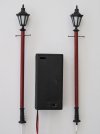
Two completed modified lamp posts with 2xAA switched battery box to power them.
David
The cheapest option by far would be to utilise the cheap 3.0 volt LED offerings, originating from China, frequently found on eBay, that work out at less than a £1.00 each. I actually paid a little more to buy eight from a UK supplier rather than direct from China, as they were delivered in days rather than weeks. My immediate requirement was for four lamps, two each for the goods dock and the cattle dock. I also purchased two 2xAA switched battery boxes to power them.
Although advertised as G Scale (or 1/25th scale) I felt that they were rather on the short side.


Fig A. Unmodified lamp post as purchased, height 85mm.
Fig B. Lamp post pulled apart.
Fig C. Top modified by cutting off plastic ladder stanchions and carefully cutting off the moulded ring at the bottom end. The bottom of the post is modified by sawing through the pole just below
the first moulded ring and discarding the top part. A new pole is fabricated from a 95mm length of 3/16” polystyrene tube (Evergreen item 226). The top and bottom of the new pole was
countersunk by running a scalpel blade around the internal bore. Two holes were drilled 5.0mm from the top to take new ladder stanchions. The pole is threaded over the wires, brass tube and
the remaining section of the original pole and glued in place. The diamond shaped moulding sits in the top countersink. The original base is then threaded over the wires and the top part glued
into the bottom of the new pole with the bottom countersink covering the moulded ring at the base top. A short section of 3/32” polystyrene tube (Evergreen item 223) is then threaded over
the wires and glued up inside the base to make a new extension with which to ‘plant’ the lamp post. The last thing is to glue in the new ladder stanchions which are cut down dress making pins.
Fig D. The completed modified lamp post, now 150mm high.
A comparison between the original and modified lamp post

Two completed modified lamp posts with 2xAA switched battery box to power them.

David
Last edited:

