PatsRailway1
Registered
I recently bought 3 Lionel christmas coaches. The couplers dont line up exactly with my lgb loco. Any ideas please
In what way do they not line up? Too high? Too low? If all your other stock is LGB, or can be used with it, then Lionel is the one to change.I recently bought 3 Lionel christmas coaches. The couplers dont line up exactly with my lgb loco. Any ideas please
yes its the Lionel. they are a little too low. any idea how I fix this pleaseIn what way do they not line up? Too high? Too low? If all your other stock is LGB, or can be used with it, then Lionel is the one to change.
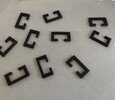
are 3d printers hard to useI have a feeling there is a 3D print fix for this, sometime ago, my daughter bought me a tanker where the couplings didn’t match the LGB ones but I found a file, printed it and fixed the problem.
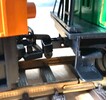
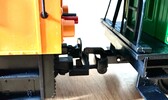
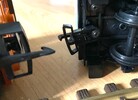
If you can give us some more details, possibly a photo, I will see if I can do something to fix it for you!
Cheers
Dave
It depends.... On the printer.are 3d printers hard to use
what about downloading models from the net are they easy to print. would you have to use cad for that. im looking at ba bamboo lab printerIt depends.... On the printer.
Harder, I would suggest, is mastering the CAD software to generate the 'image' of the thing you want to print..
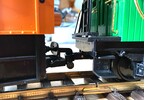
Looking at your photos:
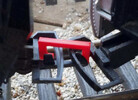
I think if you were to fit an LGB coupling, you would just need to fit a spacer between the coupling and the Lionel mounting? - Probably need a slightly longer screw?
You could then keep the Lionel couplings within the rake of stock, with possibly the same at the rear, for adding extra vehicles..
PhilP.
I have the Ender3V3 it is really plug and play auto bed mapping and levelling.what about downloading models from the net are they easy to print. would you have to use cad for that. im looking at ba bamboo lab printer

 riksrailway.blogspot.com
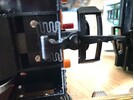
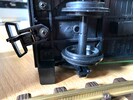
That was my thinking as well. Either a few washers or a short length of plastic tubing with a longer screw should fix the problem quickly and cheaply.Now we can see the issue, my suggestion would be a small block mounted to drop the coupling down. May nee a longer screw or nut and bolt. Much easier than faffing with a 3D printer that you have not got!