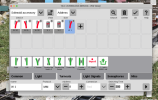
OK this may not be the most elegant but it works!
1. I recommend you disconnect from your layout before proceeding.
2. You can do this on the CS3's screen but I highly recommend you use VNC on your desktop or laptop. The curser and data entry is MUCH easier to control with a mouse and keyboard! Go here if you don't know how to use VNC:
CS3 on computer.
3. connect a turnout motor, preferably a LGB EPL model, to the 4K II SW1 output as per the Massoth manual. The CS3 will not be able to read/program the decoder without doing this.
4. connect the 4K II's DCC in to the CS3 programming track out.
5. Hit the (un)STOP button to power up the programming track.
6. Go to the upper EDIT menu and using Add Article add a turnout.
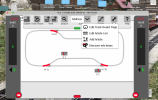
7. You'll see something similar to this:
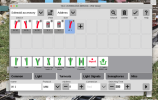
8. Change the turnout name to something you like and select DCC under Protocol. Note that you can change the name again later if you want. Edit added: don't worry about the DCC address yet.
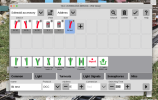
9. Now hit OK. You will not be able to change the 4K II settings unless you have the item actually added to your list which OK does.
10. Go back to the edit menu and select "Edit Article List".

11. The turnout you just added will probably be highlighted in blue. If not, click on it.
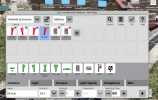
12. click on the more arrow in the lower right corner and this screen will appear:
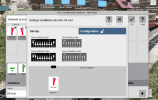
13. Click on the "Configuration" menu bar. The CS3 will read these default CVs. You'll see the "OK" appear in the right column as the CVs are read.
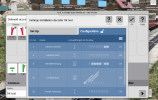
14. Now we're going to modify CVs 32, 34, 36, and 38, the DCC address registers of the 4K II. In the following example I chose the addresses 45-48. Double click on the CV column of the first line.
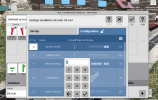
Enter "32"
15. Double click on the "Actual/Target" column of the first line.
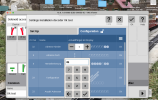
Enter your first address. 45 in example. As soon as you hit the check mark the CS3 will change the CV. The "OK" will disappear and reappear once the value is written.
16. At this point I recommend you go to the next few lines and repeat 14 and 15 for CV34, CV36 and CV38. You can use the first line again but you will not be able to see what you've done.
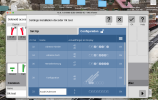
17. Click on "Close" then change the turnout address to the first address you entered. 45 in the example.
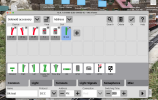
18. At this point you can click on the turnout and should be able to trigger the turnout motor to test its operation. Click "OK" and you are done with the first turnout on you new 4K II.
19. The next three only require you to add the article, set the protocol to DCC and set the appropriate address.
You will need to repeat the above for you next 4K II.
Hope this helps!
Edited to correct the module name to 4K II


