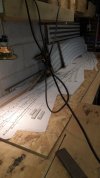
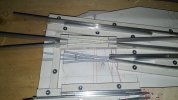
How i make my frogs, easy, simple and accurate?

justme igor

Registered
Country flag
Aldo i used the wrong material for those frogs: hard top foam pvc, these frogs are going to be used inside in the sheds "parking lot"
I am waiting for my uv resistant extruded pvc, really hard stuff.
I have made several mistakes with frog making, but if you dont shoot you will always miss.

I cut up some pvc sheet into strips ~1 inch and ~1.5 inch.
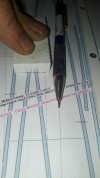
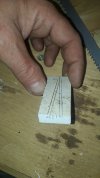
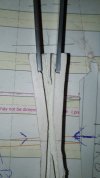
I mark the lenght on the strip to get the body of the frog.
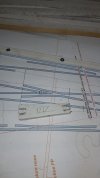
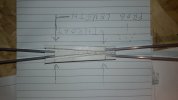
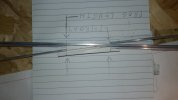
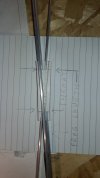
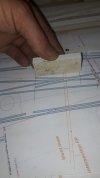
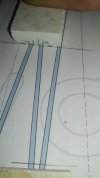
Then i place the frog on the drawings to mark where the rails are going to be, you will see that on one end i left the frog longer to insert the rails more convenient.
Was copied from some real life frogs btw.
20200621_182901.jpg
20200621_183032.jpg
20200621_182959.jpg
20200621_183905.jpg


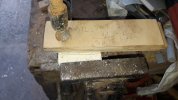
Mark your cuts as precise as you can, a tenth of a millimetre off can give odd results
20200621_183957.jpg
20200621_184315.jpg
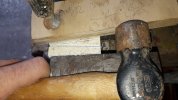
Little bit of fine tuning.
20200621_184019.jpg
2.2mm in width.
keep it as strait as possible.20200621_184152.jpg
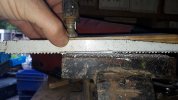
To finish i use a finer blade to level it better and make it a flat bottom.
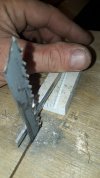
20200621_184503.jpg

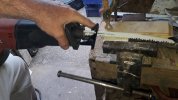
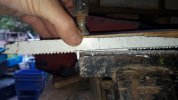
I mounted my jigsaw upside down in a jig for a lot of reasons.
I use a strip as a guidance on the saw blade, be very aware on with slot you put the strip in and be very aware on witch side you make your cut.
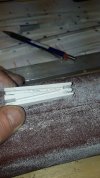
20200621_185232.jpg
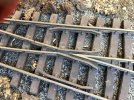
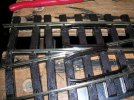
Not the best frog in the house!!!!
Cut off the edges, sand and number him.
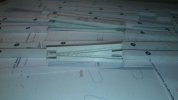
20200622_115512.jpg20200622_115823.jpg

I hope this is helpful to someone for ideas to create your own.
It does not matter if some fail or look miserable? right? i improve along the way as a taking my walk and get much better.
When i have my good materials i will post a small update.
Any comment thoughts or ideas are very appreciated.

With best regards, thanks for reading.
 

Attachments

  • 20200621_185310.jpg
    20200621_185310.jpg
    149.3 KB · Views: 0
  • 20200621_184207.jpg
    20200621_184207.jpg
    264.7 KB · Views: 0
First thing I noticed is that your wing rails are not a constant distance from the frog.

There should also be a "lead in" to the wing rail.

frogs.png
 
That is why i made my throat longer, but it crossed my mind to make it longer.
The wing rails are in the throat for 0.5 inch.
To be sure i will check tomorrow.
Thanks for the sharp eye
 
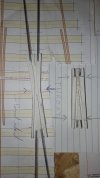
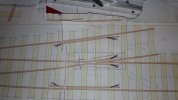
I'm very impressed with your workmanship and your detailed plans. That's quite a complex array of points on those plans in the last picture. Thanks for taking pictures of all the steps, I'm sure they will help someone.
 
Last edited:
You people are evidence of gods
Over the years (30+)i learned some skills, gathered some tools for work and hobby's.
I am a professional carpenter, but you can do this to! with some cheaper tools, take your time and allow yourself to make mistakes, learn along the way.
The main difference between my tools and the cheaper ones is durability, if i would work with a jigsaw, lets say 50 euro, i wont survive for 6 weeks at the most.
Thanks and best.
 
Last edited:
Looking good Igor, but you might still need a lead into the points to make sure the wheels are in alignment
 
I'm very impressed with your workmanship and your detailed plans. That's quite a complex array of points on those plans in the last picture. Thanks for taking pictures of all the steps, I'm sure they will help someone.
I am regretting that i did not make pictures of the full process, incl did not make pictures of some very important measurements.
There will be coming some more much more difficult arrays, incl diamonds double slips ect, thanks for the hint! i will remember this and add some pictures that are important.
Thanks for your comment.
 
Looking good Igor, but you might still need a lead into the points to make sure the wheels are in alignment
Thanks Paul, i was thinking about this, if i would make the frogs longer at the throat side for the wing rails, it will be "automatically" machined out.
This is what you ment?
Thanks for sharing your thoughts, it is appreciated!
Best
 
For wings you could add a little rail to be a wing on the lead into the frog, as you appear to be making things for live steam and or battery power a welded set of additional bits of rail should be no problems for you. Interesting way of doing things ideal for inside sidings not used that much but I guess that time will show how robust they will be in main line service.
 
If you are not using track power why make plastic frog. Why not make them photo typical with your Ali rail. Be a lot more robust
 
You can solder Aluminium with a low temp rod so making sharp part of frog is possible Also soldering bars under points to keep them in gauge is possible Alumifix is one product Only need a reasonable gas torch and a stainless steel wire brush to do it. A bit of practice with some scrapes and u away
 
For wings you could add a little rail to be a wing on the lead into the frog, as you appear to be making things for live steam and or battery power a welded set of additional bits of rail should be no problems for you. Interesting way of doing things ideal for inside sidings not used that much but I guess that time will show how robust they will be in main line service.
Yes i am making for live steam and battery operated, for the lengths i would like to have, electrification can be done, but with a lot of trouble:
Messing or copper strips, cleaning, higher voltage(to counter conductivity loss and resistance), more connection points
I enlarged the frog for the wing rails, as you and Paul m suggested.
Welding alu is something way out of my ball game, i have a tig machine with alu rod, somehow i can not do it, believe me i tried.
@ Tinker.
Yes those alu soldering rods are very promising, but i would set fire on my jigs, it is al paper, low temp plastic and very dry wood.
Some jigs are meant for several times of usage and some for 1 time only
Those 3 3 way switches are the first set needed of 8!, those ones will come last in the parking lot.
As soon as i receive my hammer hard pvc the durability will improve by a factor of 100.

@ Dunnyrail and Paul m.
This is what you wanted to suggest, or i understood you wrong?
20200623_094845.jpg
20200623_095010.jpg

I slip with the saw blade as you can see, did not payed enough attention, was for a example anyway.
Thanks for sharing your thoughts, is really welcome.

Best
 
At this Peco frog you can see 6 of the so called lead ins, these allow the wheels to be pulled off or into the frog when running if at the limit of travel. Sorry but cannot see all of this on your pictures, though your drawing shows it on the dedicated check rails thus full-filling 4 of the 6.
image.jpg
 
Must admit I'm surprised to see plastic as the frog. I made a simple mod to my Peco G45 points a long time ago, replacing the frog tip with rail to create a "live frog" point. Similar to JonD's post above.

DSCN0521.JPG
 
Aha....the zloty has falling.
The bend corners in the guard/check rail must also be in the frog to guide the wheel in.
20200623_193116.jpg
The thick blue pen marks you where referring to?
Thank you very much, indeed it would be very good for on the mainline to guide the wheels better.
 
Must admit I'm surprised to see plastic as the frog. I made a simple mod to my Peco G45 points a long time ago, replacing the frog tip with rail to create a "live frog" point. Similar to JonD's post above.
I must admit that i did not even notice that, sorry
But i tried that, and it was a small failure for the radii i am after at, in general 2.8m, 3.0m, 3.2m, 3.8m and 4.0m
The angle is simply to long, after trying to cut them like this i tried to bend and swage them, it give some better results.
Probably if i would combine? make a inner v and force them into it.
But the soft plastic you see now will be replaced with a much harder plastic, much harder.
For frogs made out of a single block of aluminium: i must buy pretty expensive tools for that, the tools must be adoptable as well, i can not go with 3 or 4 "standard" frogs.

Thanks for the head up and your thoughts!

Best
 
By goodness I think he has got it. Yup that is the solution, glad to have been of help.
 
Back
Top