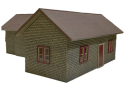
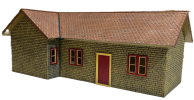
Jackson's Miniatures - "Raven Square" Station

JimmyB

Now retired - trains and fishing
Country flag
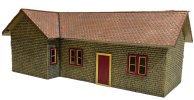
This is my build of the Jackson's Miniatures (JM)- "Raven Square" Station. I will work my way through the build, giving my thoughts, and deviations from the instructions:

First though, the kit was bought second hand through the well known auction site, and it was untouched.

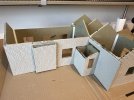
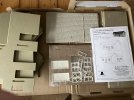
On opening the boxes though, I did find some additional parts. The parts in the box were all the wood (MDF) for the station, plastic stone embossed sheets to clad the walls (no roof sheets) JM doors and windows for the station an eight page instruction booklet, and a number of additional pieces of wood, which will make up a signal box.

IMG_2625.jpeg

IMG_2626.jpeg

The first part of the instruction is to read ALL the instructions before starting, and dry fit before assembly. It does suggest painting before assembly, but as I was cladding the building, and having previously had problems sticking paint components together I decided not to. The recommended adhesive is EvoStick "Wet Grab", which is a polymer panel adhesive, which is what I have used, however the cure time being 24 hours, and the "messiness" of the adhesive for this use, I might not use it on the signal box.

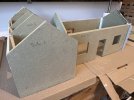
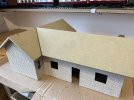
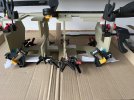
Assembly does go together easily, but with anything of this nature "you can't have enough clamps" the white bits are pieces of paper to stop the adhesive sicking to my clamps and square corner pieces. This is the main building, the leg was just more adhesive, more clamps and more waiting once this had dried.
IMG_2627.jpeg

Endnote: to add strength I did run fillets of adhesive on all internal corners.
 
Last edited:
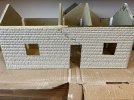
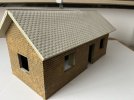
With the wooden wall items assembled (roof to be fitted later), I turned my attention to the cladding. The instructions inform that the MDF manufacturer recommends waterproofing the wood with PVA, the instruction actually recommend glass fibre resin diluted with thinners. I had a large pack of 2 part epoxy resin that is waterproof, and as there were no instructions on how to attach the cladding, I decided to use this, 30 minutes handing time, 30 minutes set time, 8 - 12 hours curing time. As the cladding is embossed then a good amount of the resin is required, and like the building assembly slowly bit by bit.
Two days and I have 2/3 clad:

IMG_2629.jpeg

IMG_2630.jpeg
 
The fact that the JM buildings are an MDF core, which you have to clad, has always put me off.

Possibly, because I know I would leave buildings out for extended periods of time.

It will be interesting to see how the building fairs over time.

PhilP
 
If anybody needs aerial views of the real thing - I have aerial photography taken in 1999. Each end of the railway is surprisingly long. Mind you, with GE now available at the merest click of a key, why would you need my old stuff?
 
The fact that the JM buildings are an MDF core, which you have to clad, has always put me off.

Possibly, because I know I would leave buildings out for extended periods of time.

It will be interesting to see how the building fairs over time.

PhilP
I won one of the stations on the previous G Scale Mad forum in a competition.

I painted it as per the instructions to seal the MDF and made a tiled roof from shed felt.

It lasted about 5 or 6 years and disintegrated when I took it up when lifting my old line prior to moving home.

I would recommend not leaving these buildings outside during wet winters as the damp will still get into the MDF.

It was a nice building though. I have an unmade Jacksons Miniatures Engine Shed here somewhere as I eventually brought a PIKO one to replace it....
 
Last edited:
MDF + Damp= pile of wet wood. It will definitely appreciate a very good water repellent of some kind on it's underside, or any exposed unclad surfaces.
Mind you a great looking model, so don't be put off by the MDF
 
Have to say that is my view, I would have been tempted to get Plastic Coated Foamboard to replace the MDF using those parts as templates to cut out the required parts. Bit more work but you could leave out all the time then, nothing worse than having to lump in buildings to a shed or the house after a running sessions…I am a lazy garden railway modeller!
 
MDF + Damp= pile of wet wood. It will definitely appreciate a very good water repellent of some kind on it's underside, or any exposed unclad surfaces.
Mind you a great looking model, so don't be put off by the MDF
Have to say that is my view, I would have been tempted to get Plastic Coated Foamboard to replace the MDF using those parts as templates to cut out the required parts. Bit more work but you could leave out all the time then, nothing worse than having to lump in buildings to a shed or the house after a running sessions…I am a lazy garden railway modeller!
I am looking to coat the whole thing in resin to water proof, I will just see how it goes :)
 
Have to say that is my view, I would have been tempted to get Plastic Coated Foamboard to replace the MDF using those parts as templates to cut out the required parts. Bit more work but you could leave out all the time then, nothing worse than having to lump in buildings to a shed or the house after a running sessions…I am a lazy garden railway modeller!
The price of the foam board would have been more than I paid on ebay for it, my fun is in building, and not running, though the odd play now and then can be fun.
 
I am looking to coat the whole thing in resin to water proof, I will just see how it goes :)
The resin thing may elongate the survivability some. Many moons ago I build a few planter out of thin play, coated all of it with clear resin. Planted it up and it was left in a shady place in the garden to ensure the plants did not dry out. Were used for quite a few years at shows in the Ridgmont probably lasting a decade or so.
 
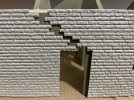
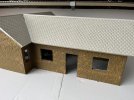
During fixing the the cladding, some sheets were too short for the full length of a wall, so a staggered cut (around the stone blocks) above the door were used to blend them in the first sheet was fixed in position and allowed to dry.

One thing I did find out (the hard way) is when fixing using resin, apply to the embossed sheet and not wall, could not get it thick enough or even enough on the wall, also use a hair drier to gently warm the mixed resin, it thins it and allows it to flow better.

IMG_2633.jpeg

The second sheet was then fitted, not perfect, but when cleaned up and painted, I think it was hardly show:

IMG_2634.jpeg

I built the roof next, not fixed in position just resting in place, however I decided to use Cyanoacrylate (super glue) with the appropriate activator, once held a fine bead run along the seem to 'wick" in.

IMG_2635.jpeg
 
During fixing the the cladding, some sheets were too short for the full length of a wall, so a staggered cut (around the stone blocks) above the door were used to blend them in the first sheet was fixed in position and allowed to dry.

One thing I did find out (the hard way) is when fixing using resin, apply to the embossed sheet and not wall, could not get it thick enough or even enough on the wall, also use a hair drier to gently warm the mixed resin, it thins it and allows it to flow better.

View attachment 337098

The second sheet was then fitted, not perfect, but when cleaned up and painted, I think it was hardly show:

View attachment 337099

I built the roof next, not fixed in position just resting in place, however I decided to use Cyanoacrylate (super glue) with the appropriate activator, once held a fine bead run along the seem to 'wick" in.

View attachment 337100
Don't worry - that's the perfect spot for a settlement crack ;);)
 
Back
Top