Modifying LGB Toy Train Wagons

dunnyrail

DOGS, Garden Railways, Steam Trains, Jive Dancing,
Staff member
GSC Moderator
Country flag
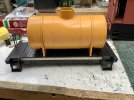
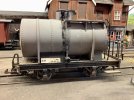
Over the years I have done a few, I am currently doing a Tank Wagon mod. So I thought I would start this thread to show h election of Wagons I got from funandtrains funandtrains of this parish back in I think October 2010. You can see the Tank clearly in this pic and it is the last one to get modified.
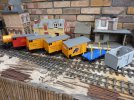
TOY-TRAIN.jpg
Some have already appeared on here with their mods so will try to link their mods with a picture.
 
I shall follow this with great interest, Jon. I am going down the same route, although poor weather for spray painting in 2022 has stalled things for a time.
 
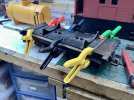
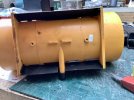
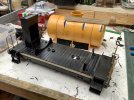
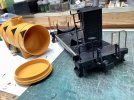
This one has been in the loft dumped on this former LGB Caboose chassis for some time now. The base below the tank a little short so it has been lengthened and plonked on some rocket sticks to raise the height to match the step-boards. I have done some work with the Steps at each end, the inside had some superfluous plastic chopped off so that they would sit flat on the chassis. I still had to use a couple of very long 12ba nuts n bolts to hold 1 end‘s steps in place. The part of the Tank chassis was screwed to the Caboose chassis where it nicely matched some LGB holes in the tank base one end, but the other end needed some 10ba nuts n bolts to hold it in place. I have the tank removable and to facilite that a couple of big holes in the caboose chassis have been drilled using my tapered drill to acces the screws for removal and fit. I currently have Diamond Frame Bogies on this, I will need to raid the spares box in the loft to see if any others available and fit. This raid will also hunt for some handrails to replace the broken ones. Also as the tank is not on central I rather fancy a brakeman's caboose at the longer end. This will likely need to be scratch built, that is unless I rob the one I have on an old Austrian Bogie Van body.

Below, rocket sticks glued on with UHU Power after being scribed with a bit of old broken hacksaw blade to represent rough chassis timber.
CA5F49C1-4B63-44F2-A6D4-65C0688343FB.jpeg
Below you can see the difference at each end. A bit of the Tank air space has had some over-scale detail cut off, a new round top will need to be made as this was missing on the purchase of the broken wagons. Also note the detail broken or taken off the Caboose Steps, clearly the ladders had to go.
0527F515-A908-414E-B13E-8D88BB75B8E6.jpeg
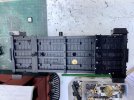
Below the underneath showing where the odd screws have been fitted and the oversize holes to access the screws that hold the tank in place.
5DB3E85C-9DC6-4A0D-8C83-51FE2FC7970B.jpeg
 
I shall follow this with great interest, Jon. I am going down the same route, although poor weather for spray painting in 2022 has stalled things for a time.
During the seasonal break I spray painted a couple of things which seem fine, paint and models were inside for a few days, taken out during a brief non-raining spell, and brought back in the house, I suspended the models under the extractor hood with the intention of not filling the house with the smell of paint, unfortunately someone came home earlier than planned and I got caught, so the primed parts were moved to my room, the idea in worked and allowed some painting to be progressed.
 
During the seasonal break I spray painted a couple of things which seem fine, paint and models were inside for a few days, taken out during a brief non-raining spell, and brought back in the house, I suspended the models under the extractor hood with the intention of not filling the house with the smell of paint, unfortunately someone came home earlier than planned and I got caught, so the primed parts were moved to my room, the idea in worked and allowed some painting to be progressed.
Ah, the key words are "extractor hood". I work outside if it is low humidity, still and warm enough (three criteria Scarborough rarely meets) and if not in the garage, although the first and third criteria still apply. I've tried Humbrol acrylic with a brush and am quite pleased with the result so far.
 
During the seasonal break I spray painted a couple of things which seem fine, paint and models were inside for a few days, taken out during a brief non-raining spell, and brought back in the house, I suspended the models under the extractor hood with the intention of not filling the house with the smell of paint, unfortunately someone came home earlier than planned and I got caught, so the primed parts were moved to my room, the idea in worked and allowed some painting to be progressed.
I think young Dafydd likes to live dangerously o_O o_O o_O :rofl:
 
Ah, the key words are "extractor hood". I work outside if it is low humidity, still and warm enough (three criteria Scarborough rarely meets) and if not in the garage, although the first and third criteria still apply. I've tried Humbrol acrylic with a brush and am quite pleased with the result so far.
I did the painting outside, it was only the drying I planned to be completed indoors, and I did use an extractor hood for the drying process, when my domestic manager walked in she didn't she a thing proving my drying method would work, if the items hung drying hadn't been spotted.
If nothing else I proved a theory, that while I am alone I can get things done that I couldn't if someone else was home :rofl: :D
 
I think young Dafydd likes to live dangerously o_O o_O o_O :rofl:
I believe the worst caught in the act occasion was when I had a warehouse laid on the the full length of the ironing board, with the ironing board lowered so I could sit on the sofa while painting, that really didn't go down particularly well, even though I had paper covering the ironing board he he :giggle::D:rofl:
 
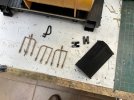
Painting will be what pushes this job back some, but still plenty of other work to do. The trip to the loft found some usable parts.
66465BA4-8761-4E7E-B4E6-DE817F5DE532.jpeg
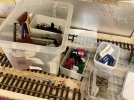
This box full of bits left over from both my and Andy Rush bodges produced the bits.9AD5EAA5-B5F8-495F-9E26-1BD04B61E219.jpeg
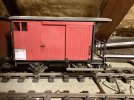
In the meantime, this is one of those vans which has had the original lettering removed and a home printed DR number added.
674FFB50-61B1-45C5-9AAB-B7683D8D8381.jpeg
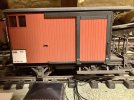
Whilst this one had a full respray, brown first then after a few days drying masked up with the black sprayed. I tend to pull the wagons apart for a respray so that the chassis can be done separately.
1A237D05-BB71-42A5-8A79-B36627C45601.jpeg
 
I did the painting outside, it was only the drying I planned to be completed indoors, and I did use an extractor hood for the drying process, when my domestic manager walked in she didn't she a thing proving my drying method would work, if the items hung drying hadn't been spotted.
If nothing else I proved a theory, that while I am alone I can get things done that I couldn't if someone else was home :rofl: :D
An unnecessary proof of the obvious surely?
 
An unnecessary proof of the obvious surely?
Its not unreasonable to think that, I know one idiot that has tried spray paint in a spare room within the house using a desk fan to try and blow the fumes out of the room, I have learnt over the years many things are not as obvious as you might think, and those with less common sense (or none) are among us to often prove this fact.

But yes your point would generally be a correct one.
 
I can and have on regular occasions spray painted in my workshop using an old cardboard box and newspaper to protect and keep things getting messy. Smell after having done it is my own worry, living on my own. So long as the door remains shut not a real problem. Worked out best when I had a hot water tank, items could be put in the airing cupboard to finish off and that worked real fine till I had to replace the boiler - no tank any more with the combi. Also warnings heeded about using a cardboard box and loose bits thrashing around. As for smell, because I exclusively use Halfords rattle cans, mostly matt undercoats of Acrylic types smell is not that much of an issue as with cellulose and other types of paints.
 
Its not unreasonable to think that, I know one idiot that has tried spray paint in a spare room within the house using a desk fan to try and blow the fumes out of the room, I have learnt over the years many things are not as obvious as you might think, and those with less common sense (or none) are among us to often prove this fact.

But yes your point would generally be a correct one.
Ah, I was setting it purely within the marital context.
 
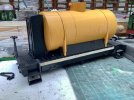
Over the last day or some some more bodgeling occuring with the Tank Wagon. Looking at Swiss and some other NG Wagons there is generally fill between the Tank and the Chassis. My original Toy Train Tank had this and further work.

This does service on the Dunnybahn taking fuel to Gernrode Depot for Diesels, Harzegerode for a Factory that uses Fuel Oil of some sort and on occasion in the Oil Train that runs to Silberhutte for the Power Plant there. When this happens it is used to replace another Tank that is destined to Gernrode Shops for repair. The new Tank will fit in with those duties also.

Original shown below to give a feel if some of the other mods to be done.
1A991928-AEFB-4A13-A979-0E1451EEE61A.jpegSo the fill ins been done on the new Tank Wagon. This below view shows how I strengthen the joins to the plasticard planks.A1B8DF0F-839E-48D7-A92D-BABDB9F7895F.jpeg
Here I have made up the “Bug Box”, this uses in part an old loo from a Newquida Coach that Andy Rush unmercifully cut up to make Swiss Coaches and Railcars with, at the time Trainline45 were not making Swiss RHB Coaches.
DF60EA1B-CD94-4D46-B9CD-8FBC570CC821.jpeg
Bug Box shown in place with Tank loosely fitted.3EA9A9BB-2DA9-4EE0-B748-C546BD3DFD2B.jpeg
Round the other side can be seen the steps salvaged from the original USA Caboose, plus the sundry safety rails fitted. I have also placed the supports for the walkway, the curve of these was cut out using the end of the Tank that is removable as a pattern on the 30thou plasticard used. The white is 10 thou plasticard to strengthen the joint. The walkway itself is a piece of spare planked ply from a kit. This will be left a wood colour and thus not fitted till the rest all sprayed up. It will however get some weathering. Oh and yes the wheel was in one of my spares boxes.
1E41ABE2-D434-447C-8899-392D11F9FD3B.jpeg
 
Last edited:
I had never realised that one end of the tank body was removable. That knowledge could be useful.

Is there any obvious sign which is the removable end?
 
I had never realised that one end of the tank body was removable. That knowledge could be useful.

Is there any obvious sign which is the removable end?
Sort of, a bit of a tight gap that needs a blade inserted to get it going but just look hard at each end and you should be able to notice a shadow at the removable end. It is fairly obvious on the pic above and on the grey one.
 
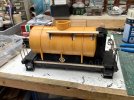
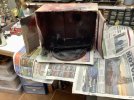
Pretty much all the working detail now added to the base, just Tank Lid to do. So time for some spraying, too impatient to wait for summer so the cardboard box has been brought into action on the workbench. With relavant protection of course. The first pic shows the buffers and Brake Pipes now added with the end shown removed just for Paul.
1BBBE201-B2BA-4E1E-A892-F3BB94D4E6A4.jpeg5614F5B8-9390-405B-A7D1-271E30237821.jpeg
 
I can and have on regular occasions spray painted in my workshop using an old cardboard box and newspaper to protect and keep things getting messy. Smell after having done it is my own worry, living on my own. So long as the door remains shut not a real problem. Worked out best when I had a hot water tank, items could be put in the airing cupboard to finish off and that worked real fine till I had to replace the boiler - no tank any more with the combi. Also warnings heeded about using a cardboard box and loose bits thrashing around. As for smell, because I exclusively use Halfords rattle cans, mostly matt undercoats of Acrylic types smell is not that much of an issue as with cellulose and other types of paints.
As you no longer have a hot water tank it might be worth doing what I did. My airing cupboard is in the bathroom and I fitted a towel radiator in the back of my airing cupboard, I also fitted an electric heating element into this towel rail and the main one for the bathroom and powered them via a two hour run-back timer. This gives me back the airing cupboard and it can be used when the heating is otherwise turned off!
 
"...with the end shown removed just for Paul."

Er, Gordon, but I'll answer to any reasonable name. A buyer has just left me two excellent lots of feedback calling me Mick and for years at work people kept calling me Graham (to balance things out, they also kept calling Graham, Gordon!)
 
Back
Top