Chris Vernell
Three score and nineteen
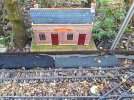
The MDF kit station at Fallowfield Road is crumbling after several summers outdoors despite my best efforts at sealing and covering the material. I decided it was time to replace it with a resin structure and splashed out on a GRS "small country station" kit for Christmas.
Assembly started today, June 14th, 2024.
![IMG_0354[1].JPG IMG_0354[1].JPG](https://cdn.gscalecentral.net/2024/06/thumb/512679_IMG_03541.jpg)
![IMG_0355[1].JPG IMG_0355[1].JPG](https://cdn.gscalecentral.net/2024/06/thumb/512680_IMG_03551.jpg)
Half of the front wall glued to alumin(i)um angle. The angle is intended to line up the two wall sections and brace the butt joint, and to discourage the resin from bowing in the summer sun and heat (a lesson from earlier resin structures). The glue joints will be backed up with 0-80 bolts through the resin and angle: Belt and braces, I know.
Lengths of angle will be attached farther up the wall and at the building corners. The roof sections will be similarly treated.
The adhesive takes at least 24 hours to cure, according to the manufacturer, so I won't be rushing the assembly -- but neither, I hope, stretching it into eternity.

![IMG_0380[1].JPG IMG_0380[1].JPG](https://cdn.gscalecentral.net/2024/06/thumb/512865_IMG_03801.jpg)
![IMG_0381[1].JPG IMG_0381[1].JPG](https://cdn.gscalecentral.net/2024/06/thumb/512866_IMG_03811.jpg)
![IMG_0383[1].JPG IMG_0383[1].JPG](https://cdn.gscalecentral.net/2024/06/thumb/512930_IMG_03831.jpg)
![IMG_0384[1].JPG IMG_0384[1].JPG](https://cdn.gscalecentral.net/2024/06/thumb/513250_IMG_03841.jpg)
![IMG_0385[1].JPG IMG_0385[1].JPG](https://cdn.gscalecentral.net/2024/06/thumb/513252_IMG_03851.jpg)
![IMG_0386[1].JPG IMG_0386[1].JPG](https://cdn.gscalecentral.net/2024/06/thumb/513480_IMG_03861.jpg)
![IMG_0388[1].JPG IMG_0388[1].JPG](https://cdn.gscalecentral.net/2024/06/thumb/513484_IMG_03881.jpg)
![IMG_0394[1].JPG IMG_0394[1].JPG](https://cdn.gscalecentral.net/2024/06/thumb/513644_IMG_03941.jpg)
![IMG_0391[1].JPG IMG_0391[1].JPG](https://cdn.gscalecentral.net/2024/06/thumb/513646_IMG_03911.jpg)
![IMG_0395[1].JPG IMG_0395[1].JPG](https://cdn.gscalecentral.net/2024/06/thumb/513656_IMG_03951.jpg)
![IMG_0396[1].JPG IMG_0396[1].JPG](https://cdn.gscalecentral.net/2024/06/thumb/513658_IMG_03961.jpg)
![IMG_0408[1].JPG IMG_0408[1].JPG](https://cdn.gscalecentral.net/2024/06/thumb/514212_IMG_04081.jpg)

![IMG_0409[1].JPG IMG_0409[1].JPG](https://cdn.gscalecentral.net/2024/07/thumb/514388_IMG_04091.jpg)
![IMG_0425[1].JPG IMG_0425[1].JPG](https://cdn.gscalecentral.net/2024/07/thumb/515979_IMG_04251.jpg)
![IMG_0433[1].JPG IMG_0433[1].JPG](https://cdn.gscalecentral.net/2024/08/thumb/517435_IMG_04331.jpg)
![IMG_0434[1].JPG IMG_0434[1].JPG](https://cdn.gscalecentral.net/2024/08/thumb/517929_IMG_04341.jpg)
![IMG_0437[1].JPG IMG_0437[1].JPG](https://cdn.gscalecentral.net/2024/08/thumb/517931_IMG_04371.jpg)

![IMG_0438[1].JPG IMG_0438[1].JPG](https://cdn.gscalecentral.net/2024/08/thumb/517989_IMG_04381.jpg)