PDF Models Baldwin build log

alcashj94

Registered
Country flag
I’ve started the build of the WD Baldwin gas mechanical loco from PDF Models. Nice clean prints and laser cut components, should make a nice model with a bit of care and time !

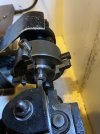
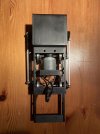
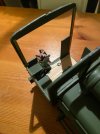
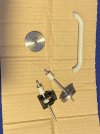
Spent the last few weeks doing the chassis, as it comes it is meant for battery power and the wheels are not insulated but I want it for track power so have bored out the wheels on one side and put in insulating bushes. Made up a simple pick up for the now insulated wheels and using the chassis for the other side. I found the ‘top hat’ bushes for the side rods were a little short so had to make up some spacers to overcome this. I’ve now got the chassis assembled and rotating without binding so it’s time to run it in on blocks for a while in each direction and see what falls off !

Start the bodywork next and have been looking at prototype pictures to see what I might add to what is a ‘basic’ kit.

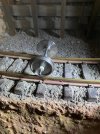
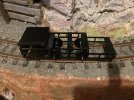
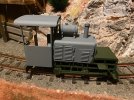
Here’s a selection of pictures of progress so far.IMG_2473.jpegIMG_2475.jpegIMG_2477.jpegIMG_2480.jpegIMG_2482.jpeg
 
Last edited:
A lovely model, too, with plenty of opportunity to improve the somewhat bare 'cab'. I build one before they made the frames from laser-cut s/s steel, and it was VERY light on it feet in spite of a decent battery load. Another one? Maybe, I might be tempted to copy the model they have over at Apedale in Staffs - always worth a visit.

When putting mine together, I found this video very useful -

 
Last edited:
If you decide to add sound, a MyLocoSound light diesel soundcard would do the job. It has a choice of seven engines, several of which are close to what we hear in the video. it has a very good quality 31mm x 28mm x 15mm speaker which would fit in the loco. Details are at MyLocoSound Light Diesel
Regards
Peter Lucas
MyLocoSound
 
That sounds like a really great addition to the range, Peter. The video is very impressive.
All I need to do now is construct another loco ....

Rik
 
A bit more progress today, I was right about things falling off !

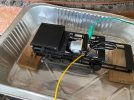
Having wasted time searching for 2mm nuts and top hat bushes on the floor which unwound themselves whilst running on blocks I ‘borrowed’ a foil baking tray from the kitchen that caught them, should have thought of that first.

The main problem I had was the cranks coming loose and binding up, the 2mm grub screws supplied in the kit don’t seem to have a very good hex socket, I have the correct size Allen key but it slipped with a small amount of tightening which was not enough to lock them in place well. The solution was to replace them with 2mm cross head screws which I can tighten successfully.

Make a start on the bodywork next.

IMG_2486.jpeg
 
Looking good.
But, could I suggest you obtain a wooden or plastic tray?

We are all guilty of 'just' quickly trying something..
Especially if using a Lithium battery, and 'just' trying to run the motor.

An aluminium tray, and (I am guessing) a direct connection to a battery, is fine. - Unless those wires end up in the tray, and no fuse.

PhilP.
 
A bit more progress today, I was right about things falling off !

Having wasted time searching for 2mm nuts and top hat bushes on the floor which unwound themselves whilst running on blocks I ‘borrowed’ a foil baking tray from the kitchen that caught them, should have thought of that first.

The main problem I had was the cranks coming loose and binding up, the 2mm grub screws supplied in the kit don’t seem to have a very good hex socket, I have the correct size Allen key but it slipped with a small amount of tightening which was not enough to lock them in place well. The solution was to replace them with 2mm cross head screws which I can tighten successfully.

Make a start on the bodywork next.

View attachment 338731
There are a number of Loctite products with different numbers. Years ago, I bought one for my Bachmann Connie that had the reputation of losing all of its motion screws, and I still use it on jobs like this. It's a blue, waxy consistency and binds the threads, but doesn't lock them solid enough to prevent undoing if necessary :nod::nod:
 
There are a number of Loctite products with different numbers. Years ago, I bought one for my Bachmann Connie that had the reputation of losing all of its motion screws, and I still use it on jobs like this. It's a blue, waxy consistency and binds the threads, but doesn't lock them solid enough to prevent undoing if necessary :nod::nod:
Yep, this replaced one of the old fluid loctite products, and locks, but will "crack" open with little force, but stops unwanted loosening.
 
I've always had a yen for one of those - maybe if I can sell the live steamer I might be tempted :think::think:
 
I ought to get round to sorting the one I have..
But mine is an old Andel model..

PhilP.
 
Nice build. I have one still to build, bought 3-4 years ago. I have it slated for battery, r/c and sound - Fosworks and MLS. Thinking of adding a front ponytruck and building as Molwyn (nameplates are made !). I'll have a good look at this build log. Max
 
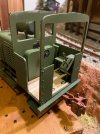
Last night’s learning curve was that the cab back is a little bit brittle, managed to snap both of the roof supports at the top of the rear sheets whilst handling the model.
Glued it back together but thought it needed a bit of support so I’ve put a brass strip up each side, feels much firmer now and once their painted shouldn’t show.
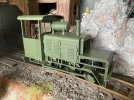
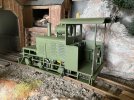
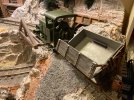
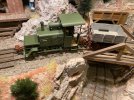
Wooden floor put in and first go at couplings, not entirely happy with them so may think again. As you can see I’m fitting knuckle couplers as I intend to use the loco on my mine car shuttle.
Also chopped up a military figure to fit in the cab so moving forward !

IMG_2501.jpegIMG_2504.jpegIMG_2506.jpegIMG_2507.jpeg
 
Back
Top