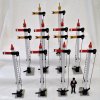
Signals!?

Tony Hunter

Tony - He/They - on long term break
Country flag
As we slowly progress with the building of Cherry Tree Jct Railway, signalling has obviously crossed our my mind....

I'm struggling to find any signals online that are of the g scale & suitable for low budget, then of course they seem overly large which isn't ideal for me, with Cherry Tree Jct Railway being 3ft gauge based (but all made up & fictional really, creative licences & whatnot) & having travelled on IOMR, i know that the signals should / could be smaller. And I like the idea of smaller signals.


I have considered the idea of 3D printing signals, but then you got different print materials & all that stuff....

Then there's the whole process of making the colour lights, making the signals automatic etc.

Essentially, what I'm trying to ask is, would anyone know the best way of going round a budget friendly automatic colour light signals? - even if its for O gauge, I could probably adapt them for g scale.

My ideal signal is a low budget, three or two aspect colour light signal with the option for a feather light & automatic switches from a track button or magnetic pass over with manual override.

(Sorry for rambling!)
 
Well it depends on how seriously you want to play trains?
Being 'dead-rail' if you had metal track, then occupancy detection is easy.. :nerd:

As you have surmised, you will either need to use magnets and something to detect this, or IR, or RFID chips and detectors.
Guessing you want to keep it simple, I would suggest 'potted' home security reed-switches, activated by loco-mounted magnets.. These would cause the signal to change to 'danger', and the signals release after a time-period. - If you try and make it any more complicated than that, you will be creating a world of pain and angst for yourself.
Our garden railways are supposed to be fun, and spending hours wrangling a complex signalling system, is probably not what you are looking for?

If you can make a self-contained unit, preferably removable, then it will be easier to deploy and maintain.

My two-penneth, you may have different ideas?

PhilP
Won't be going too mad with seriousness, it's more for the looks & feeling the part. The trains most likely be going around in loop circuit with the odd time with full control, hence the want for automatic signals. :)

I like the idea of magnetic activated ones.

Thanks for the suggestions, I especially like the 'potted' home security reed-switches one,it's certainly peaked my interest!

Definitely want to be fun & not fighting with more elements than I have too.

Nope, same ideas!

Any suggestions on getting the actual signals? :sweatsmile:

That's the main part I'm struggling with. I feel like I should get o gauge signals & custom 3D new parts for them to make it a bit easier? :grimacing:
 
I would be tempted to print the signal head, then use (probably metal) overscale pipe as the mast. - You can thread the wiring through it. It should be strong enough.?
A lump at the bottom (with a battery and the electronics..
Plasticard strip with sensor. - Sized to slip between a pair of sleepers.

PhilP
 
Laser-cut plywood, in small-section, in the UK climate?


How about this:


PhilP
 
Here's what I did on my line. The signal was something I picked up at a hobby shop in Omaha.
It actually serves a practical function, too.... read on


Extract from the Taita Gorge Garden Rail Working Timetable (Dated 23 Sept 2014)

Petticoat Junction

Signalling

A signal, numbered 990, has been installed on the Reverse Loop at Petticoat Junction.
This signal is for the assistance of Eastbound trains running on the Reverse Loop, and will indicate the polarity setting for trains entering the Mainline.
When a Danger, Stop (Red) indication is showing, the Mainline polarity for Eastbound trains is incorrectly set. Trains must NOT pass this signal at Red.
A Clear, Proceed (Green) indication will show that polarity is correctly set, and trains may pass in accordance with operating procedures.
This signal will NOT be lit when there are no trains running under track power.


I need to get a smaller red bulb (that one was the only replacement I could find at the time).
The signal runs off track power, and uses two diodes to set the correct indication.

It's been outside for 8 years now. I place a plastic bucket, held down with a rock, over it when not in use.
The wiring is so simple that it is easily done, just a matter of getting the diodes the right way around when hooking the power feed from the running rails.
 
Last edited:
Laser-cut plywood, in small-section, in the UK climate?


How about this:


PhilP
I have a dozen customised North Pilton Works signals outside, the colour light version rather than semaphore. They have been well primed, painted and varnished and with a couple of exceptions, the plywood signal head, ladder and base have so far coped OK with British weather. But on several of them, the small semicircular shrouds/cowls (can't think of the right technical term) over the LEDs have indeed delaminated and dropped off after just one season and will need to be replaced with halved plastic tube shortly, when I've found some the right size. So, plywood could be a cheap starting point, but has its downside and no matter how well you try to avoid it, the ply itself most certainly lets you down occasionally! All-plastic, resin or metal have to be better for outside use. The poles are metal.

These ones have red and green LEDs, lit alternately via DPDT polarity change through 2 wire connections to a manual control panel.
IMG_3309 (Medium).jpg
 
Last edited:
Not really answering your requirements, just an excuse for a gratuitous photo, the signals on the Claptowte Railway are non-functioning, purely cosmetic. Modified resin/plastic/steel models from Model Town. Everyone expects to see lineside signals, but it is not important to me, that they do not actually work.

dig 201015006.JPG

David
 
Mike (Duffy) posted a description a few years ago of how he made 2 aspect colour light signals using a couple of LEDs, the tube from a ballpoint pen and a choc-block connector from which the brass connectors and screws had been removed. They looked good and when I mentioned this to him at a G Rail exhibition he kindly donated some of the pens to help me get started!

I struggle with the search facility on the forum so haven’t been able to track the thread down, but I think it must have been around 2008 or 2009 so maybe it was in the days of GSM?
 
For the electronic automation part of your requirement, could I point you to my article in the Summer 2022 G scale journal ( vol36 no 2 ), the one with a BR shunter on the cover.
Magnet on each loco, Reed Switch in the track, a commercial module drives colour light signals.

Malcolm
 
Last edited:
For the electronic automation part of your requirement, could I point you to my article in the Summer 2022 G scale journal ( vol36 no 2 ), the one with a BR shunter on the cover.
Magnet on each loco, Reed Smith in the track, a commercial module drives colour light signals.

Malcolm
This combined with PhilP's is the ideal option I'm looking for! :eek::)

Do you have a link to Summer 2022 G scale journal ( vol36 no 2 ), please?

I would be tempted to print the signal head, then use (probably metal) overscale pipe as the mast. - You can thread the wiring through it. It should be strong enough.?
A lump at the bottom (with a battery and the electronics..
Plasticard strip with sensor. - Sized to slip between a pair of sleepers.

PhilP


------
There is a Playmobil battery lit red/green signal which can be converted - https://playmodb.org/setpics/4/4397.jpg

They crop up on eBay and can be had for a reasonable price.
I did look into this, but playmobil signals aren't quite right for me.... sorry!

Mike (Duffy) posted a description a few years ago of how he made 2 aspect colour light signals using a couple of LEDs, the tube from a ballpoint pen and a choc-block connector from which the brass connectors and screws had been removed. They looked good and when I mentioned this to him at a G Rail exhibition he kindly donated some of the pens to help me get started!

I struggle with the search facility on the forum so haven’t been able to track the thread down, but I think it must have been around 2008 or 2009 so maybe it was in the days of GSM?

I can't get the search function to work either.... :worried: But this sounds very interesting, I'm going have to dive deep into the forums some evening to find it! Thanks! :)

Not really answering your requirements, just an excuse for a gratuitous photo, the signals on the Claptowte Railway are non-functioning, purely cosmetic. Modified resin/plastic/steel models from Model Town. Everyone expects to see lineside signals, but it is not important to me, that they do not actually work.

View attachment 304120

David
Oooh, I like these, they could be interesting to have 'scattered' around the yard or along the line next to a new signal to show the changes....

Here's what I did on my line. The signal was something I picked up at a hobby shop in Omaha.
It actually serves a practical function, too.... read on


Extract from the Taita Gorge Garden Rail Working Timetable (Dated 23 Sept 2014)

Petticoat Junction

Signalling

A signal, numbered 990, has been installed on the Reverse Loop at Petticoat Junction.
This signal is for the assistance of Eastbound trains running on the Reverse Loop, and will indicate the polarity setting for trains entering the Mainline.
When a Danger, Stop (Red) indication is showing, the Mainline polarity for Eastbound trains is incorrectly set. Trains must NOT pass this signal at Red.
A Clear, Proceed (Green) indication will show that polarity is correctly set, and trains may pass in accordance with operating procedures.
This signal will NOT be lit when there are no trains running under track power.


I need to get a smaller red bulb (that one was the only replacement I could find at the time).
The signal runs off track power, and uses two diodes to set the correct indication.

It's been outside for 8 years now. I place a plastic bucket, held down with a rock, over it when not in use.
The wiring is so simple that it is easily done, just a matter of getting the diodes the right way around when hooking the power feed from the running rails.
Looks well! And thanks for the info :)

I'll look into this, as I would like one or so active semaphore signals along with the colour light ones & 'dead semaphore' ones too. Thanks! :D
 
Old pens or even evergreen plastic tube can easily make up colour light signals, much simpler than semaphore ones. As for sundry changing with a magnet I think you would need a timer and a relay to get that to work unless anyone know better.

Searching the forum can be a bit of a task at times, but remember you will not be able to get the search to work with words of 3 letters or less.
If you are wanting to search on a word with three letters, just try adding an "s" to the end, it often works.
 
Me, I run track power, and have 2 signals for E/W traffic at a station. I may eventually have 4-6 total…

You could scour for the old manual unlighted lgb signals on ebay. Item 5030. These can be lighted. Easily. Ive used lgb bulbs and sockets.
perfect fit.


Dont know if/how they might be motorized. Just looked on ebay, very reasonable, i,mho. Dont know in the uk…


i know theyre not cheap, but the older fully electric lgb signals with isolating track sections.
They look great, and are surprisingly durable and reliable. Remote operation. Prices have really gone up….

i find whenever i scratch build, especially with quality materials , robustly, i rarely save much money.

imho, signals add a great railroad feel.

The LGB 5092(0)/5094(0) (as well as the US and RhB versions) signal‘s posts can be unplugged from solenoid bases. This is nice for maintenance, winter, and if youre working near them and want to avoid breaking them with a mis step.

they work, and for me, were worth the old price. I run the lights at 12 volts, and once dusk, they are quite visible . I use this voltage, as opposed to more and brighter to avoid melting the lamp housings and greatly prolong bulb life.
 
Last edited:
Thanks all for the help, very much appreciated!

Think my plan is to use the system in the link below (which was found after many searches!) & for the signal, get some cheap 16mm/O scale signals to strip down, using tubing (like a pen etc) & 3D printed signal heads with a clear plastic insert sealed in. Instead of 12V track power, it'll run off a 12V rechargeable battery system.


Old pens or even evergreen plastic tube can easily make up colour light signals, much simpler than semaphore ones. As for sundry changing with a magnet I think you would need a timer and a relay to get that to work unless anyone know better.

Searching the forum can be a bit of a task at times, but remember you will not be able to get the search to work with words of 3 letters or less.

If you are wanting to search on a word with three letters, just try adding an "s" to the end, it often works.
I can't even get into the search bar, never mind three letters! (mobile device)
 
Thanks all for the help, very much appreciated!

Think my plan is to use the system in the link below (which was found after many searches!) & for the signal, get some cheap 16mm/O scale signals to strip down, using tubing (like a pen etc) & 3D printed signal heads with a clear plastic insert sealed in. Instead of 12V track power, it'll run off a 12V rechargeable battery system.


I can't even get into the search bar, never mind three letters! (mobile device)
If you're using a phone, turn it so it's in landscape mode - search icon should then be visible
 
Back
Top