David1226
Registered
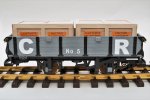
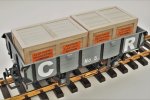
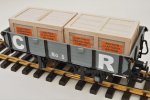
This is a conversion of the LGB Toytrain low sided open wagon. This is one of the first conversions that I attempted, ten or more years ago. I have need of a second wagon of this type, so I have just converted a second, which I bought years ago, in anticipation. This has enabled me to take some photographs which I did not take the first time around.

The process is the same as with the other conversions of Toytrain open wagons that I have carried out, the high sided tarpaulin and coal wagons. I apologise if the initial steps and photographs are, therefore, a bit repetitious, they are for the benefit of those who have not followed my previous threads. The first step is to remove the balcony railing and brake stand. The balcony planking then has to be carefully cut off.


There is a minimum of detail to remove from the wagon body. There is a ‘blob’ on each corner presumably representing a tang for a clevis pin. On each side there is a smooth square which I assume to be a board for chalking destination and/or load details, as on the more expensive LGB model range, this is painted black. This needs to be scraped flush with the planking then scribed to match the planking and wood grain. The next stage is to carefully cut through the body alongside the strapping.


The gaps in the deck and sides are then filled in with plasticard which is scribed to match the planking and wood grain. It is easier to do the scribing before gluing the extensions in place. The detail can now be added. A new length of channel strapping needs to be added to each side, at the join. I drill shallow holes to represent the bolt heads. Once painted, and from normal viewing distances, you cannot tell the difference. On the original sides, the strapping alternates between channel and plain. Adding an extra piece of strapping destroys this symmetry. In order to retain uniformity of appearance, I added thin strips of plasticard to the sides of the plain strapping to replicate channel. Hinges for the new strapping, and the end of the one sawn through when the body was sawn, were made up from rounded off scraps of plasticard.
I have added a photograph of the converted tarpaulin wagon as this better illustrates the alterations to the strapping.

Going back to this conversion, I added two scribed plasticard blocks, to each side, to represent wooden stop blocks, to prevent damage if the sides get dropped on the axle guards. New, larger plasticard tangs, with holes drilled through, are added at each corner to take cotter pins with securing chains. I made a couple of strokes with the razor saw, at each corner top, to represent the fact that the sides and ends of the body are separate pieces. The axle guards are bent and filed from brass strip. There is a short 90 degree bend, at the top of each, to superglue the brass axle guard to the underside of the plastic body. I have found, over the years, that this has not worked well and they are vulnerable to being knocked off. On the new model, and retrospectively on the original, I glued a piece of plasticard on either side of the axle guard, then glued a ‘strap’ of plasticard across the back. I am hopeful that this will be much more robust. The only other addition to the body is a GRS lamp iron, each end. The chassis receives the usual plasticard brake lever, Al Kramer metal wheels, and the Claptowte Railway makers plate.

As with all of my conversions, the biggest alteration in appearance is down to the repaint and lettering.


The new model has yet to go to the paint shop. When completed, I will post some photographs of the two wagons together. Even though built ten, or more, years apart, I am confident, that apart from the wagon numbers, you will not be able to tell them apart.
David

The process is the same as with the other conversions of Toytrain open wagons that I have carried out, the high sided tarpaulin and coal wagons. I apologise if the initial steps and photographs are, therefore, a bit repetitious, they are for the benefit of those who have not followed my previous threads. The first step is to remove the balcony railing and brake stand. The balcony planking then has to be carefully cut off.


There is a minimum of detail to remove from the wagon body. There is a ‘blob’ on each corner presumably representing a tang for a clevis pin. On each side there is a smooth square which I assume to be a board for chalking destination and/or load details, as on the more expensive LGB model range, this is painted black. This needs to be scraped flush with the planking then scribed to match the planking and wood grain. The next stage is to carefully cut through the body alongside the strapping.


The gaps in the deck and sides are then filled in with plasticard which is scribed to match the planking and wood grain. It is easier to do the scribing before gluing the extensions in place. The detail can now be added. A new length of channel strapping needs to be added to each side, at the join. I drill shallow holes to represent the bolt heads. Once painted, and from normal viewing distances, you cannot tell the difference. On the original sides, the strapping alternates between channel and plain. Adding an extra piece of strapping destroys this symmetry. In order to retain uniformity of appearance, I added thin strips of plasticard to the sides of the plain strapping to replicate channel. Hinges for the new strapping, and the end of the one sawn through when the body was sawn, were made up from rounded off scraps of plasticard.
I have added a photograph of the converted tarpaulin wagon as this better illustrates the alterations to the strapping.

Going back to this conversion, I added two scribed plasticard blocks, to each side, to represent wooden stop blocks, to prevent damage if the sides get dropped on the axle guards. New, larger plasticard tangs, with holes drilled through, are added at each corner to take cotter pins with securing chains. I made a couple of strokes with the razor saw, at each corner top, to represent the fact that the sides and ends of the body are separate pieces. The axle guards are bent and filed from brass strip. There is a short 90 degree bend, at the top of each, to superglue the brass axle guard to the underside of the plastic body. I have found, over the years, that this has not worked well and they are vulnerable to being knocked off. On the new model, and retrospectively on the original, I glued a piece of plasticard on either side of the axle guard, then glued a ‘strap’ of plasticard across the back. I am hopeful that this will be much more robust. The only other addition to the body is a GRS lamp iron, each end. The chassis receives the usual plasticard brake lever, Al Kramer metal wheels, and the Claptowte Railway makers plate.

As with all of my conversions, the biggest alteration in appearance is down to the repaint and lettering.


The new model has yet to go to the paint shop. When completed, I will post some photographs of the two wagons together. Even though built ten, or more, years apart, I am confident, that apart from the wagon numbers, you will not be able to tell them apart.
David


