WhitehouseFilms
Registered
The Whitegrove Light Railway
A Garden Railway Journey by Michael White
A Garden Railway Journey by Michael White
Part 1 : A Little History
In 2004 I was introduced to the world of LGB trains at a model railway show at the Ulster Transport Museum. There was a layout that had G scale trains running and I was amazed by the size of them. I was in my early teens then so they were quite big to me compared to now. One of the persons exhibiting the layout was a man called Gordon Archer. Some of you might know him for he used to have a huge outdoor display in Blackpool which LGB photographed and featured in some of their publishings. Anyway. Gordon and my dad got talking and he invited me to his house to see his new outdoor set up since he moved to Northern Ireland. I was amazed by what I saw and spent a good while outside looking at all the buildings, locos and everything else. I was in awe. So that Christmas I got my first Stainz passenger train set (I mean, you've got to start off with that set-it's the law) and I spent a happy year learning about how everything works and what does what. The following Christmas I got another Stainz set, this time the workman's set and a signal. All this time I was thinking of what I could do to make my very own garden set up, but the time didn't come until some years later. Years went by and I packed the G scale stuff away or had them on display in my then workshop.
2011, I was starting to get yearnings to start looking into the garden railway as we had since moved house and the area we were had plenty of space to have a set up. But I needed some more track. I only had straights and curves, but no points or buffers etc. For my Birthday I asked for the two track extension packs from LGB which we got from Garden Railway Specialists. Already my then plan was slowly forming, I had all but some 2nd radius curves that I needed to complete my track set up. Then - depression happened. We had a sudden family bereavement where our family dog had met a sad and unfortunate end. The event left me in a very depressive state for a few months till November time. I got a phone call from Gordon saying that he was moving house again and wanted to know if I wanted to come down to see his railway again before he took it up and see if there was anything that I fancied that he can put aside for me to buy. I came down to see Gordon with a neighbour friend who also liked model trains and while there were some things I had in mind of getting for my own railway, all of the ones I wanted were already sold. At the time I was already saving up for a 7 1/4 gauge loco to run at an engineering club I was part of, so I couldn't buy anything at that time. So with that, I thanked Gordon for inviting me over and left it there.
Christmas Day came and for once, I wasn't in the festive spirit. I was still down about loosing our dog and wasn't in a good mindset to get another despite suggestions from my parents. (We did get another dog some years later) We still did 'Santa Claus', even though I was nearing 18, but I still played along that it was all a big surprise and such. What met my eyes when we entered the living room was, on one side all the presents for my older sister and on the other a huge stack of gift wrapped parcels for me. Suspicious, I started unwrapping the first gift. It was a box of LGB long straight tracks. Interesting. I unwrapped another - mail car with light up interior. Oh wow! I opened a heavy one. Inside was a twin bogie Swiss Diesel locomotive. That was when I started to think. I'd seen this particular diesel on Gordon's railway. I unwrapped the others, all of which were some items from Gordon's railway including another diesel loco and some coaches. The last thing I got was 2 cards from my parents. One of them stated that the 7 1/4 gauge loco I'd been saving up for had been secretly ordered and I was to get it in the new year. Oh wow, how could this get any better? The 2nd card was basically a set of instructions saying that I was to go to my neighbour's house at 12pm sharp. Nothing else. I wondered what it all meant. Anyway 12pm came and I still hadn't worked out what was it all about. I was lead into the neighbour's house to be meet with a shocking surprise. In display format was a mountain of G scale buildings, track, locos, coaches and controls. What happened was during my visit to Gordon's, a secret arrangement was made by him and my dad to buy the whole railway, everything that wasn't already sold, and transported it all to my neighbour's house to surprise me on Christmas Day.
Well, you could have knocked me down with a feather. I was gobsmacked. What was I to do. Well first of all was to discard my old track plan idea. I had a whole railway system to play with. The only issue now was what was the plan to be?
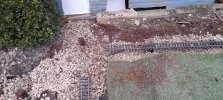
2013 I turned 21 and as traditional with turning 21, you get the keys to the house. Not me. I got the keys to a garden shed!!! The shed was bought for me by my parents to become my railway's control station. All well and good. the only thing though was I still hadn't thought of a plan for the railway. Later that year I had a plan and so come the spring of 2014, I started work on the railway. Now the area in my garden where the railway was to go has a slight slope to it so I wanted to create a sort of raised embankment to the railway that can be handy for friends who want to bring live steam engines to run on to make steaming up more easier. Plus I wanted to to have something of an impression where you can lie on the embankment like you would have done as a kid and watch the trains going by and get a good up close view of the trains. We did some research and used a roundabout that used building site waste as a compound and then earth was pressed around it. Grass seeds are sowed and the roots acted like a net which holds everything together firmly. There was a friend who was helping to clear a site and so we used the rubble from it to build our embankment. The shed was protected by some thick plastic sheeting that was once used for poly tunnels and concrete blocks and paving slabs were used by the shed entrance to act as retaining walls. So far so good.
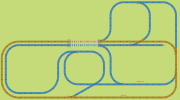
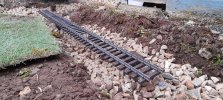
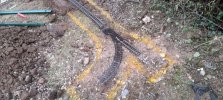
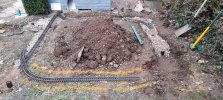
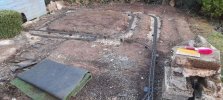
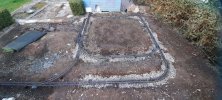
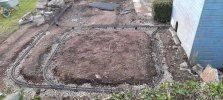
Once the top of the embankment was level, we started getting a track bed made. Concrete blocks were placed on a layer of sand, levelled and laid along the areas where the track's route would go. It started off as a double track leading out of the sheds, curves round before going on another straight and then branching off into separate lines. One line continues round to meet the shed again while the other loops round and goes back in the opposite direction. On the other end there is another loop line which allows two trains to run at the same time, but with the option of choosing 3 different loops lines. All and all it looked promising and we soon had trains running before the summer was over. Gordon's railway used to run on the LGB MTS Digital System and so this is what I used for my railway. At the time I was still a student so buying digital chips for my own engines was quite expensive and I wasn't sure yet how to chip then. So for the time being, I ran Gordon's locos.
Then problems happened. There were a lot of areas where the track lost power and trains didn't run as well as I hoped they would. The problem lay in the rail joiners which were full of mud and gunks which had collected while we were trying to lay the track and plotting the route when laying the track bed. The decision was to tack up the track again, and replace all the rail joiners. We did try cleaning them using methods of cleaning brass, but this was very time consuming. So buying new ones was the best approach. Soon everything was running smoothly again, but when one problem is solved another one occurs. I had just finished relaying a section of track and was running a loco to test that everything was working fine when suddenly everything went dead. The transformer had shorted out. I tried reseting it but nothing seemed to work. I contacted LGB to see if they could provide a repair service on the transformer, but at this time they had since been bought by Marklin and were now using a different digital system, so a repair to the transformer was not happening. So with that the railway was dead again. Or was it?
Luckily I had my own train set controller from my past and this was used as a temporary controller till I could find a way to get the MTS system to work again. By then I was now an uncle of a niece and nephew who had taken a great fondness to the railway. But they were still at a very young age and didn't treat the railway with the respect it needed. The final straw came when I sent a train out for a test run only to find that the track were covered with large rocks, bricks & stones which had been placed/thrown there when I wasn't about. So with that the track was lifted and the trains were packed away until the time came to bring the railway back. At the time my niece and nephew didn't really care, but after time soon realised that they started to miss the trains.
End of Part 1

