Track Brass joiners and best practices

Litninbolt

Registered
Country flag
Ok, so how the heck do you add (and remove the LGB brass track joiners that have the tab that sits down in the plastic sleeper? I get some track (used) and the brass joiners are gone so I have to replace…. How do you pop the sleeper back up on the rail?

Also, is there a best way to pinch , crimp etc the brass joiners before sliding track on so the friction fit is sound?

Is everybody using conductive paste? And if so lots, little?
 
Several threads on this, basically are you trying to preserve the joiner or don't care... one method is easiest but really distorts the joiner (i.e. throw it away), other methods can drive it off.

Don't ever pull the rail away from the sleeper, putting it back is not fun and you have usually already damaged the "spikes"

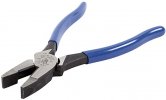
they used to make pliers to crimp the joiner, but you may have to make them yourself now:

track%20pliers.JPG


Yes, "conductive paste", but any good wheel bearing grease will do, the LGB paste is NOT conductive, it helps keep air out, which retards oxidation, thus "keeping conductivity".

Greg
 
Here's a little video from Trainli which shows alternative joiner solutions which may be of use to you:

To remove the standard LGB joiners cleanly it is best to insert a short length of rail into the joiner you wish to remove. Clamp the rail and joiner in a vice, and then using pliers, pull the rail at the opposite end so it slides out of the joiner and plastic fish plate. To fit new joiners, just reverse the process above.

However as the video shows, the screw in clamps are much easier to use, especially outdoors on your layout. I use Massoth brass joiners but the Trainli joiners shown in the video are identical and available in the USA.
 
To remove the LGB joiner I use a screwdriver and spread the open area a little. Then I take a good pair of pliers and just pull the joiner straight off. I do keep one hand on the track pressing down hard on a smooth surface and the other hand on the pliers.
 
Dan, in my experience, trying to pull the joiner straight off makes the right angle tab often tear the tie... twisting the joiner off (as in the extensive discussion and I believe video posted on this site) will ensure no damage to the tie as also with the pulling the rail from the joiner method.

Dan, I use your method because I throw away the joiners and go to clamps.

Greg
 
The last few weeks after poor running on the Wistow Vale Railway I decided to check continuity at each of my track joints; any joint with a resistance greater than 30 ohms was changed-out with a track clamp, and after being down over 10 years there were plenty of them!
Back to the thread - all my track is fixed with ballast mixed with SBR bond (a milky white bonding agent used in the building industry) so lifting the track to change-out rail joiners was not an option; they were removed by prising the joiner away from the rail with a small bladed screwdriver and then gently twisting them off with a pair of narrow-nosed pliers. (I wasn't saving them for re-use) They were very dirty inside and had been installed with a little LGB joiner 'grease' but after time this washes out and dirt gets in - an unfortunate occurrence when modelling outside.
Rails ends were cleaned-up and clamps fitted. (when I installed my points, turnouts, switches, the joiners were removed and clamps fitted for easier removal if maintenance/repair/replacement was required at a later date; not one of these joints had a resistance greater than 0.2 ohm, having been installed 10 plus years ago also)
I have tried 'nipping' poor rail joiners with adapted pliers similar to those in post 2, but this is only a temporary fix and soon become a problem again.
The improvement in running quality was well worth the effort.
 
As I have said in the past, before switching to battery power, all of my rail joints had wire jumpers soldered across them. I my opinion, this is the most secure method of making those little electrons flow. However, soldering jumpers at ground level can be a back breaking task.

That said, I found LGB track soldered more readily than Aristocraft. I believe that is due to LGB rails being a more pure grade of brass, while Aristo rails have alloys mixed in. This is apparent when cutting the rails with a hacksaw. The blade seems to cut right into the LGB brass rail while the Aristo rail takes a bit more pressure to get the blade to bite.
 
To remove an LGB track joiner from set track drill out the dimple on the underside of the joiner that secures it to the rail. Then, with a snipe nosed pair of pliers, pull the joiner off. The securing tab to the sleeper at one end of the joiner, will unfold as you do this. To replace simply place the joiner, with its tab refolded at right angles, into the slot in the sleeper and push the rail back in. As you have drilled out the dimple to extract the joiner you will have minimal resistance when replacing. However it is this method of securing the joiner to the rail that stops the rail sliding in the sleeper chairs.

If you do not mind spending the money, instead of just using a standard joiner replace with a direct to rail rail clamps. There are various makes out there. Benefits of a rail clamp over a regular joiner - more secure track fixing and alignment and, when used in conjunction with a graphite paste or similar, less long term track power conductivity issues. Max
 
Fwiw, i lightly clamp the joiner in a vice, using care not to use so much pressure that the joiner binds the rail inside, and, using a hefty nail set, (any appropriately sized hard metal strike rod would do) place the nail set against the rail end, and hammer the nail set until the rail moves out of the joiner. Joiner remains in great shape, no tearing of the ties or spike heads.
 
To remove the LGB joiner I use a screwdriver and spread the open area a little. Then I take a good pair of pliers and just pull the joiner straight off. I do keep one hand on the track pressing down hard on a smooth surface and the other hand on the pliers.
A little variation to your method. I too, had a bit if trouble. I use a pair of needlenose pliers and bend the sides outward , working both sides out until they are entirely free of the rail. Using the same pliers, I gently bent the joiner down and it pops out.
I have looked very carfully at the end result and I can find fo damage at all. I now use screw connectors, a bit expensive, but I am very Happy.
 
Over the years, I collected all my old brass joiners as I replaced them with clamps.

I took them to a metal recycling centre and I was paid £6 from memory?

Prices for brass have rocketed in recent times....
 
Call me wasteful but once I take a brass joiner off I've no intention of ever putting it back on - it will be permanently replaced by either a Split-Jaw or Massoth type rail connector. Thus, I have no concern about the joiner itself. It's going to be (recycle) binned anyway! I just spread both sides of the joiner wide open with needle nose pliers then bend it straight down from the rail to unhook the tab. It comes off cleanly with no damage to the tie strip. Quick and easy with no drilling or other complex fussing about necessary!

Just an aside: If you do happen to break one of the plastic tie plate hold-downs that secure the rail to the ties Brend Betz makes a repair kit. Turnout repair set – Technical garden rail accessories
 
Last edited:
Call me wasteful but once I take a brass joiner off I've no intention of ever putting it back on - it will be permanently replaced by either a Split-Jaw or Massoth type rail connector. Thus, I have no concern about the joiner itself. It's going to be (recycle) binned anyway! I just spread both sides of the joiner wide open with needle nose pliers then bend it straight down from the rail to unhook the tab. It comes off cleanly with no damage to the tie strip. Quick and easy with no drilling or other complex fussing about necessary!

Just an aside: If you do happen to break one of the plastic tie plate hold-downs that secure the rail to the ties Brend Betz makes a repair kit. Turnout repair set – Technical garden rail accessories
That is an interesting solution, why not flatten the old fishplates cut out a short length to use as a holder and drill to use a 8ba nut and bolt to hold in place. Recycling of the fishplate with little outlay to get a point back to full health again.
 
very interesting solution, the only issue with broken ties is on points (switches) around the blade area.
I have had it on some LGB straights and curves that I got second hand with less than considered removal of fishplates by former and in some cases my own hand. Of course I know better now probably a bit late in the day as pretty well all of my LGB track is now clamps.
 
So, you bolt on little brackets to the ties. Very helpful for switches where this can be critical.


They look like plastic to me, and I would certainly not believe they were "iron" the element, must be a translation issue.

It says the brackets are milled from iron, then "black POM" .... what is POM? Anyone know?


Greg
 
Black POM is a copolymer acetal material manufactured by Ensinger, in standard stock shapes for machining, and is extruded in sheet, rod and tube.

The Black POM material exhibits good chemical resistance, high strength, rigidity and hardness as well good sliding and wear properties.

Additionally this black acetal can be suitable for direct contact with food and has improved UV protection for outdoor use.
 
Back
Top