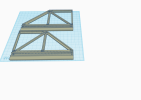
There is only one bridge on my line that has continually given me trouble. The plow on the old #5 c-16 used to scrape, the pilot on the connie too. So I probably shouldn't have surprised that the new plow loco hung up on it... Perhaps it WAS bad planning that led me to put the bridge so close to the curve, or just maybe necessity (drainage of the mine area was my main concern)

So anyway, I decided the best way to solve the problem was to put the trusses underneath making it into a deck bridge. Normal folks might have just flipped the bridge over - of course, I had to do it the hard way. I cut the truss pieces off and remounted them on the bottom of the deck... I used both Plumbing Goop and screws - since a bridge failure usually leads to a Gomez Addams type moment

Cross bracing is Plastruct H-beam

I decided that it probably needed walkway railings (in case of derailment) 1/4" square wood and wire was cheap and easy. And the soft steel wire looks pre- beat up

The spot where things were hanging up required a bit of reconfiguring. A safety platform at the end of the bridge may not make sense prototypically, but it should serve well enough to get the plow swung around.... I may eventually add a flight of steps to give it a 'purpose'.

The other railing. I used nearly 50 screws altogether on one 18" bridge!

quicky paint job. Winter should take care of the 'weathering', lol!

Total conversion time? About 3 hours. Most of it twirling a pin vice.
So anyway, I decided the best way to solve the problem was to put the trusses underneath making it into a deck bridge. Normal folks might have just flipped the bridge over - of course, I had to do it the hard way. I cut the truss pieces off and remounted them on the bottom of the deck... I used both Plumbing Goop and screws - since a bridge failure usually leads to a Gomez Addams type moment

Cross bracing is Plastruct H-beam

I decided that it probably needed walkway railings (in case of derailment) 1/4" square wood and wire was cheap and easy. And the soft steel wire looks pre- beat up

The spot where things were hanging up required a bit of reconfiguring. A safety platform at the end of the bridge may not make sense prototypically, but it should serve well enough to get the plow swung around.... I may eventually add a flight of steps to give it a 'purpose'.

The other railing. I used nearly 50 screws altogether on one 18" bridge!

quicky paint job. Winter should take care of the 'weathering', lol!

Total conversion time? About 3 hours. Most of it twirling a pin vice.


