Bachmann Baldwin 2-4-2 Battery Conversion

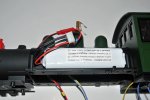
The battery (Li-Ion 4S (14500)) and the Rx RC Trains MR603b wired and bench tested, together with the MLS that came with the loco:
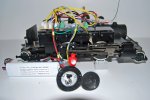
DSC_0147.JPG

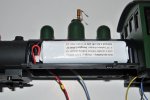
The only item not wired in is the rear lamp, but a connection is available.
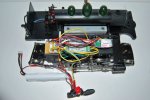
DSC_0148.JPG

I think I may need to re-photograph this with a better depth of field. Full test carried out including bi-colour LEDs and MLS using the chuff trigger, all seems to be in order. Just need to start re-assembly.
 
Fitting the battery pack into the side tank, a hole next to the L/H pillar allows the lead to the switch/charging point to pass trough the boiler, the pack is held in place with Velcro:

DSC_0152.JPG

The leads are safely tucked away prior to fitting the side tanks, a snug fit, but not forced.
DSC_0153.JPG
 
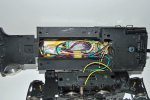
Time to fit the body on to the chassis, the front end engages with the two bosses, however the rear end, though it moves to position feels "springy", my thoughts are the wires are becoming caught or trapped - Plan B.
Though this was originally Plan A, and that is to fit the electronics in the boiler attached to the top of the boiler with Velcro. The advantage of this is the wires can be positioned, and only four wires go from the electronics to the chassis, 2 X motor connections, 1 chuff trigger negative and 1 cuff trigger to the sound card

DSC_0154.JPG
 
As I have now got the body assembled, it is time to think about external changes to make this look like the Lyn, so I have been using images from the Lynton and Barnstable Railway as a guide. What I have found is that the Bachmann Lyn is quite different from the prototype in a number of small ways, and it baffles me as to why, I will be trying to rectify some of these anomalies.
 
What I have found is that the Bachmann Lyn is quite different from the prototype in a number of small ways, and it baffles me as to why, I will be trying to rectify some of these anomalies
Probably cost and robustness. My Accucraft live steamer has multiple parts that ate always in danger of being damaged
 
As I have now got the body assembled, it is time to think about external changes to make this look like the Lyn, so I have been using images from the Lynton and Barnstable Railway as a guide. What I have found is that the Bachmann Lyn is quite different from the prototype in a number of small ways, and it baffles me as to why, I will be trying to rectify some of these anomalies.
Always well worth while to put your own stamp on a conversion.
 
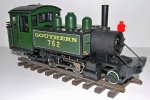
Not yet finished yet but a chopper coupling added and a bimble around the circuit with a couple of coaches, I know these are IOM stock, but I think they go well. Glad I went for the 14.4 volt option and not Bachmann electronics, a good turn of speed, but not overly fast.

IMG_1751.jpg
 
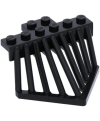
What I am looking for is the cow catchers front and rear, a photo of the original front below, though both are similar. Most of the items sold as "add-on" by the various UK manufacturers are to large.

If one of the many 3-D printers out there has a pattern, I am quite willing to pay a reasonable price for the pair.

image003.jpg
 
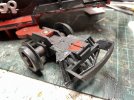
I have at least one from a Big Hauler you can have, if you draw a blank and so resort to butchery. I just had to make a custom one for my Skoda's front truck, out of styrene profile, but I wouldn't recommend it!
skoda_front_truck.jpg
 
Just did a bit of Googling, and it appears that both Lyn, and the 2-6-2s had these very small cowcatchers, although Bachmann chose not to model them :think:

They are quite small and fine - I don't think I have seen anything similar from any of the parts manufacturers - not even when the likes of GRS were in their prime :mm:

It's a bit specialist :worried::worried:

EDIT - GRS do actually list one, but it's for a 2-6-2 and is a different profile
 
Hm looks like scratch building may be the order of the day. I think I would attack it by using some small L brass with old mains wire. Silver solder ends, lower temp at 1/4 with the high solder and lower melt solder to fill in. You may with a bit of innovation manage more than 1 strut on each soft solder. Pain of a job but possible.
 
Hm looks like scratch building may be the order of the day. I think I would attack it by using some small L brass with old mains wire. Silver solder ends, lower temp at 1/4 with the high solder and lower melt solder to fill in. You may with a bit of innovation manage more than 1 strut on each soft solder. Pain of a job but possible.
It would be all soft solder, as I no longer have access to silver solder, make one, and them cast them in resin maybe!
 
I think resin will be too brittle? - One rough-shunt..

Would the Swift Sixteen item be any good?
Not too deep, possibly have to trim a section from each end, but I see they are presently out of stock.

If you hold things in place with lumps of other metal-stock, you should be able to control heat transfer between joints.
That, or lay the job on an old slab, and use a torch to solder in one..

PhilP
 
It would be all soft solder, as I no longer have access to silver solder, make one, and them cast them in resin maybe!
I think resin will be too brittle? - One rough-shunt..

Would the Swift Sixteen item be any good?
Not too deep, possibly have to trim a section from each end, but I see they are presently out of stock.

If you hold things in place with lumps of other metal-stock, you should be able to control heat transfer between joints.
That, or lay the job on an old slab, and use a torch to solder in one..

PhilP
Not sure where the lack of Silver Solder comes from, easily available and a small Kitchen Brûlée torch will do small jobs like this. I think we have been here with this silver solder conversation before?
 
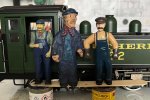
Moving ever closer to finishing my Lyn, I am now considering the "crew". From left to right I have examples from 3 suppliers, G Scale from Clavey Models (no longer supplying G Gauge) 16mm from Modeltown (I think) and the Bachmann supplied item. The G Gauge item looks best fit, so I and looking to buy from Narrow Minded Rail Works.

IMG_1812.jpg
 
Back
Top