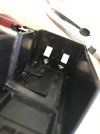
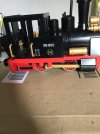
Battery Contact Rebuild Options - Playmobil 99 805 Engine

Whilst Greg got the idea wrong I cannot see why a 9v battery would not work. Perhaps the RC may not like that additional 3v but I doubt it would be an issue?Certainly the motor would have no problem with the extra juice being a near LGB clone motor.
I think the motor would not like it!
 
Thank you for having explained better than me.

One of my loco, bought second-hand, had been sent with big elastic.
The seller used it to block the battery holder.
He did not think to adjust connectors.

I had the chance to buy 2 grey battery holders from Playmobil FR, a long time ago, when they still had it.
I did paint one in black color for locos who have black frame, and the second in red color ( for red frame )
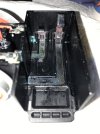
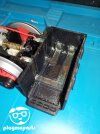
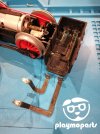
Unfortunately, I do not succeed in adjusting connectors of RC block motor of the loco underneath.

View attachment 306665

View attachment 306666

So this loco does not run with red battery holder, but it runs perfectly with the black.
( And the red battery works fine with other locos :banghead: )

This Playmobil system can be capricious, even for adults...
It is worth reflecting on best solution...
That's an LGB Spremberger body on a Playmobil chassis, clever.
 
The method you prefer would not fix the OP's issue, as it is outside the battery holder that the contacts have corroded.
Agreed. At that point I was addressing a separate issue of the OP introduced in post #4 and touched on in post #11. The 7829 is unavailable to him, his old batteries needed replacing, and he was in the process. I addressed the main issue separately in the thread.
 
Last edited:
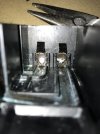
I think the idea from Xav204 is to solder those small metal contacts to what is left of the contacts in this picture. Seems a great idea.

468135_30F367C6-5A4B-4F86-BFD2-B743264C7B28.jpeg
 
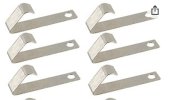
Thank you everyone for the outpouring of suggestions and feedback. I think I will go with the idea of soldering in a new contact to the existing tabs. I was able to order a pack of 10 of these on Amazon:
BD701DD3-7ECF-4EE5-8BB9-77BCCBD76F78.jpeg

I plan to use these in the remote since one tab is also broken:
41F7EC42-8145-4561-806A-3429DE53843F.jpeg

I cannot find a UK site that has any of the Keystone 5209 in stock and others sell them abroad and charge extortionate shipping. I found this, which is similar to the original contact and was thinking I could bend the bottom straight , drill a small hole and solder to the existing strips. Thoughts?

A5CF7602-5530-4B66-AA72-E7DB82E31679.jpeg
 
Hm with new contacts it would appear to be entirely possible to cut up and bend some springy thin Nickel Silver to make the contacts ias the Amazon ones apparently unobtainable in U.K.
 
Slight update. I did some more cleaning with white vinegar and a-tips, but there is still lots of corrosion. It should take a few more passes.

I also received the metal contacts from UK Amazon. Decent quality for £8 and seem to fit behind the original strips without much issue. May need to trim a little off the bottom but seeing as they slot in nicely, a mild amount of solder in the middle should do nicely:
5FFEAEA1-803C-4543-A985-A980392EB9CC.jpeg

8F8349CB-AC90-4601-A1C7-2F00F4851A9A.jpeg
I’m looking forward to getting this all cleaned and soldered. Then onto the battery pack.
 
UPDATE:

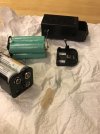
I finally got around to completing his. I initially left the tabs too high so when o put the battery pack in, there was no possible way to make a connection. I then decided to ‘rebuild’ the original batter holder.
F9E58231-5489-41D3-A00B-D18888D6758B.jpeg

05C2D93B-8CE5-4C43-86EA-F4E5BE648188.jpeg

The capacitor and wire wouldn’t solder for me and I didn’t have any assistance clips so I left it out and just put the batteries in plus the original padding. Seems to fine abs work fine:

39C3F847-F6A5-4CA5-8DAA-76354C199B10.jpeg

After cutting down and testing the tabs I think I have the proper height and it all seems to be fine:

32D99731-9F3D-4A13-806D-8B0A1101A666.jpeg

EAE7F68C-8BD0-4E18-ABB8-DED042CD91C5.jpeg


The train seems to be fine once it’s all back together so fingers crossed it holds! Just in time for the holidays.

C268F4DC-C48C-4B6C-944A-952D9E5D295D.jpeg
 
This is a bit of an older thread but thought I'd share my experience.

After someone ordered one of my replacement 7829-B battery holders, they got in touch stating that one of their contacts was broken. Super nice lady so I took pity and offered to swap one of my motor units for her damaged one.
My Nephew's motor unit is similarly affected so I'd geared up to repair the contacts anyway.

I wouldn't call it a mistake making the offer but boy was this thing in bad shape. It also had missing connecting rod pins, a damaged aerial, missing aerial tip and a fair bit more corrosion than I was expecting (I didnt ask her to send a picture before making my offer :() The drive gear has clearly seen some stuff and the slop in the axles is considerable.
3.jpg

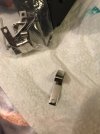
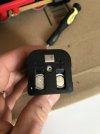
The contacts took some persuasion to remove. They are held in by a small metal tag which is part of the battery contact. This needs to be depressed with a shim down the back of the contact and then the contact strip can be gently pushed up from below through the holes in the housing. Bullnose plyers pulling from above may also be required and a quick soak in contact cleaner prior to the repair helps soften the corrosion. I would also advise to desolder the terminals first.
4.jpg

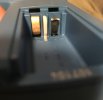
You can clearly see the holes in the housing as well as the retention tabs at the back of the batter contacts.

10.JPG

AA battery contacts are a bit too wide to fit in the recesses at the back of the battery holder but AAA contacts are the perfect width.
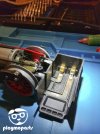
1.JPG

Lots of flux and lots of solder. Both contacts were of course thoroughly cleaned of corrosion down to bare metal and tinned before soldering together. Both the underside and backface of the new battery contact are soldered.

The battery contact repair isn't perfect however. Although the replacment contacts make a good connection with my 7829-B Playmoparts battery unit as well as the 7829 Playmobil battery, it doesn't work as well with the original black Playmobil 4392 battery.

This is because the original battery contacts in the motor unit were very "springy" and so had a greater range of motion. The 4392 battery has more deeply recessed contacts which is where the problem lies.

The replacement contacts you can see in the picture aren't nearly as "springy" so don't reach out far enough to make a reliable connection for the older style 4392 Playmobil battery.

I will continue to look for the "Goldilocks" battery contact to replace the original Playmobil contacts, however the original contacts will always be the best.

To avoid the need for this repair in the first place, always remove the battery holder from the motor unit after each use, and never leave it in place when storing away for longer periods.

I suspect that last bit is preaching to the converted.
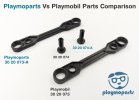
Connecting Rod Comparison.jpg


I did manage to make replacements of both the connecting rods and pins. I've tested this with the additional gold link arms and pins found on some locomotives and its working beautifully.

The pins have enough retention to still work with the varying degrees of slop found in the receiving hole in the wheels caused by general wear.

In instances where the original pin might fall out, the replacement yields a nice positive click.
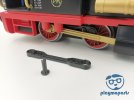

8.JPG

Admins - I saved over my unbranded images so if this counts as advertising, let me know and I'll photoshop my logo out and re-upload.
 
Very useful information. I've always removed the batteries from my locos as don't trust any batteries not to leak, I know that they've improved considerably over the years, but childhood memories of ruined toys still linger!
 
Very useful information. I've always removed the batteries from my locos as don't trust any batteries not to leak, I know that they've improved considerably over the years, but childhood memories of ruined toys still linger!
Believe mne, they still corrode and leak.
 
Believe mne, they still corrode and leak.
Yep! Thankfully not nearly as common with the new rechargeable batteries.

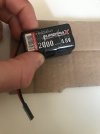
I'm working on a service to sell refurbished 4392 batteries with brand new cells. I believe the original battery was 950mAh. (I think there is also a slightly higher capacity version)

I'm aiming for 2-2.2Ah so substantially more capacity. But I'm not happy with some no-name cells from china. Not sure how viable it's going to be as a four pack of decent 2Ah cells was just under £15. Not sure I'm ready to take the plunge on 1000 cells for a lower per unit cost just yet!

I've had some luck sourcing dead 4392 batteries but I suspect it's going to make more sense to 3D print the housing like I do with my aftermarket 7829 battery holder.

I bought a ready made replacement pack on eBay from akku-wechsel which requires a little bit of soldering. They don't say who actually makes the cells however. There's also a component you have to transfer from the dead pack which can be corroded beyond re-use.

My son is very happy with it. Even using fully charged Amazon basics batteries in the 7829 holder, trains run substantially faster with the refurbished 4392. It has the added benefit of just being able to pop it into the charging base.
 
Back
Top