Almost there now and thinking of the next project. This time some more Lathe work to replicate Lamps. Getting neat ends on Curved Plastic Tube can be a but tricky but with a Lathe Cut Off Tool a complete breeze. I also used some Dividers set to mark the 2 Roof and 4 Front lengths so that all would be the same size.
In the first pic you can see that I have used a Centrering Tool to give some support when cutting off and the Cutting Mark can be seen on the first pic.. 2nd pic shos the swarf created during cutting, go slow as too much heat will melt the plastic.


Tube has been drilled with some Black Wire inserted and a piece of White Wire Insulation to represent a bulb, superglued in place with the wire bent underneath going to some sort of power supply. Also a couple of 0 Gauge Vac Pipes do service as Air Brake Hoses also super glued in place and all held during dry time with Tamiya Lining Tape.

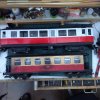
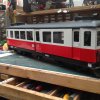
A few pics on the line showing the detail added with the Fuel Filler in red roughly middle. A fuel Tank was previously made by Andy using a couple of Bachman Pot Belly Stoves.


The filler cap is a piece of Heavy Duty Mains wire stripped at the dead end and super glued into the Fuel Tank. A Gauge was also glued to the hole that I drilled in the wrong place! It says Lego on it but you have to look very close to see this.
Figures can be seen inside in varying places not least a Driver at each end a Control Desk consisting of a Couple of Lego Levers and another of those Lego Tubes as used on the Fuel Tank.
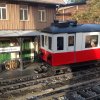
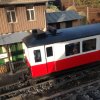
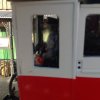
Those holes in the Cab Door grate a little! A piece of Brass Rod hammered at one end.

Short piece of Brass Tube cut off in my handy jig.

Rod bent and cut to length with a little file up tidying, finally the bit of Tube pressed on to the unhammered end gives a Door Handle.

Loosly put in place as you can see the little bit of Brass Tube bribpbgs the Handle out a little.

Super Guled in place 1 Door Handle. I only nedded to make 4.

Is that bloke seated giving us a rude sign? Signs of Oil Leakage added with Gloss Black, fuel Filler Pipe given the same treatment. Think I will also need to fabricate some Step Ups and Handrails for the long suffering public that will use this nice new shiny Dismal Unit.

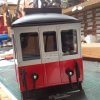
Finally on the Bench awaiting lettering with the next projec, yes it is Terry Sohams old Funkey that will next be getting a makeover, better look away now Terry!
Fuel Tank can just be made out underneath and the filler pipe is not now so red.


