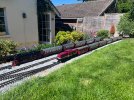
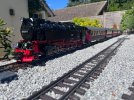
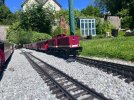
Building a G Scale LGB layout in a Berkshire garden

Welcome James, I see you have settled in well to the forum, and it is great to see you documenting your progress with photos. Just a thought, but to keep your progress together, how about your own layout thread, most people have theirs here - Large Scale Pictures.
 
Welcome to the madness
Great start, I would install a weed block or some type of fabric to keep the soil and ballast separate! Great beginning!
 
Welcome to the forum! It's a great group of people. During my time on here I've learned so much.

I'll second (or third?) the comment about settling. I built my railway fairly quickly in new raised beds and didn't compact the ground so in places my track work is interesting. However, with an annual top-up of ballast, things run smoothly and well!

Looking forward to more pictures and updates (they're always appreciated!)
 
I'll second (or third?) the comment about settling. I built my railway fairly quickly in new raised beds and didn't compact the ground so in places my track work is interesting. However, with an annual top-up of ballast, things run smoothly and well!
Curtis, did you do a separate build-thread for your line, or just post in the Coffee Lounge?

A link to a build thread, would show the amount of ground-work involved in your line..

Settlement, is always a problem, where ground is built-up.

PhilP
 
Welcome James, I see you have settled in well to the forum, and it is great to see you documenting your progress with photos. Just a thought, but to keep your progress together, how about your own layout thread, most people have theirs here - Large Scale Pictures.
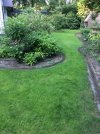
Thanks JimmyB. The weed fabric, ballast and sharp sand all arrive early next week so I'm hoping with some sunny weather (and an empty garden waste bin Monday) I can get some trains running over the bank holiday weekend. I'll start a separate thread then.
 
Welcome to the madness
Great start, I would install a weed block or some type of fabric to keep the soil and ballast separate! Great beginning!
Weed control fabric arrives hopefully today or Monday so that'll be down before the ballast.
 
Curtis, did you do a separate build-thread for your line, or just post in the Coffee Lounge?

A link to a build thread, would show the amount of ground-work involved in your line..

Settlement, is always a problem, where ground is built-up.

PhilP
I have a thread (which I've been terrible at updating), and this post is probably the best overview of the groundwork. There is also different thread I posted some before of the garden during discussions of the track plan. I have a few older photos and videos on my Instagram too.

That was a fun trip down memory lane!

Hopefully, these are helpful, but as I mentioned above, feel free to ask questions for advice or simply curiosity. It's a helpful bunch here! More than happy to support :)
 
Last edited:
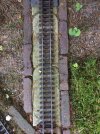
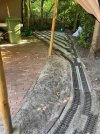
Hi! I'm a newly joined member who's been gifted a sizeable amount of LGB track from a friend. I've bitten the bullet this weekend and started construction on a continuous loop LGB layout with a station based around the Harzer Schmalspurbahnen. I'd welcome any advice on where to buy the best ballast for LGB track (laid on the ground in a shallow trench ontop of weed control fabric).

James

Hi James,
Welcome to this Forum. I used concrete slabs 100x15x5 not reinforced as a base for my rail guided with a small row of bricks at each side. At curved tracks I use special shaped short concrete slabs having a rounded front and back end so they can follow the curve of the track. The slabs are laid in a 20cm layer of clean sand. I'm running on this track for more than 6 years now and never had any big problems with changing depth. The slabs and bricks are quickly covered by a nice green layer of Mos. This Mos helps to keep de rail at his centered position on the slab. Should you want to clean the slabs, just lift the rail end use a Hoe. It took me 2 hours to clean all my 170m long track after 5 years of growing Mos. Should there be any spot with subsidence thsn i correct this using a spade at 20 cm depth in the sand and shift it under the slab as much as needed and refill with new sand and push the gras into it. So far my rail base. Rest me to give you a good tip for preventing any rail connectivity problems in the future: use Copper paste in all your rail connectors and all other electric connections and open wire ends. (For example Molycote) Im'm running my rail now for more than 5 years without ANY connectivity problem.
Good luck and succes with your new track and hobby!
Attache a few photos of the track.
 

Attachments

  • track follows boarders.JPG
    track follows boarders.JPG
    104.8 KB · Views: 0
  • Concrete slabs with rounded ends.JPG
    Concrete slabs with rounded ends.JPG
    114.1 KB · Views: 0
  • Emplacement in aanbouw.jpg
    Emplacement in aanbouw.jpg
    113.6 KB · Views: 0
  • Multi slab wide rail area..jpg
    Multi slab wide rail area..jpg
    195.8 KB · Views: 0
James , i see you have the same dark green wagons as mine. Here's a nice movie with a steam loco that pulls three of them.

Nice video!

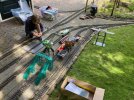
They were gifted to me along with the track, I'm looking forward to running them next weekend when I hopefully have some track laid.
 
Hi James,
Welcome to this Forum. I used concrete slabs 100x15x5 not reinforced as a base for my rail guided with a small row of bricks at each side. At curved tracks I use special shaped short concrete slabs having a rounded front and back end so they can follow the curve of the track. The slabs are laid in a 20cm layer of clean sand. I'm running on this track for more than 6 years now and never had any big problems with changing depth. The slabs and bricks are quickly covered by a nice green layer of Mos. This Mos helps to keep de rail at his centered position on the slab. Should you want to clean the slabs, just lift the rail end use a Hoe. It took me 2 hours to clean all my 170m long track after 5 years of growing Mos. Should there be any spot with subsidence thsn i correct this using a spade at 20 cm depth in the sand and shift it under the slab as much as needed and refill with new sand and push the gras into it. So far my rail base. Rest me to give you a good tip for preventing any rail connectivity problems in the future: use Copper paste in all your rail connectors and all other electric connections and open wire ends. (For example Molycote) Im'm running my rail now for more than 5 years without ANY connectivity problem.
Good luck and succes with your new track and hobby!
Attache a few photos of the track.

Thank you Gerard, your layout looks great.

I've taken your advice and ordered some Molycote.
 
After what felt like an age I finally received the parcel that makes my garden look more like the Harz!
 

Attachments

  • WhatsApp Image 2024-06-20 at 16.40.03.jpeg
    WhatsApp Image 2024-06-20 at 16.40.03.jpeg
    990.7 KB · Views: 0
  • WhatsApp Image 2024-06-20 at 16.40.04 (1).jpeg
    WhatsApp Image 2024-06-20 at 16.40.04 (1).jpeg
    968.1 KB · Views: 0
  • WhatsApp Image 2024-06-20 at 16.40.04.jpeg
    WhatsApp Image 2024-06-20 at 16.40.04.jpeg
    501.5 KB · Views: 0
  • WhatsApp Image 2024-06-20 at 16.40.05.jpeg
    WhatsApp Image 2024-06-20 at 16.40.05.jpeg
    631.2 KB · Views: 0
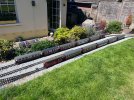
So after weeks of rain and a busy work schedule, I finally found time to finish the loop and run some trains. It's still a work in progress but I am having fun!

 
jayiscupid jayiscupid could you carry on your railway build under a new thread in another section please. This section is for a 'meet & greet' and is not meant for anything ongoing. Thanks.
 
Back
Top