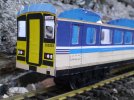
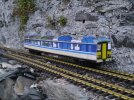
Class 153 scratch build

In other news the pieces of the full length body are now all glued to backing cardboard. I've gone with a thicker doubled walled type this time, approx 2-3mm thick. Previous was somewhere between 0.5 and 1mm thick single thickness.

I've also oriented the ribs so that they lie vertically on the body sides, so this should give less bow than before. I'll also be using about 18 internal braces, compared to 12 on the previous version (had it been full length).

I'd hope that it is dry and ready to begin cutting tomorrow, and with some luck I might have one or two of the 5 modules done.

Given that this is moving forwards from mock-up to initial prototype I expect I will take things slower and try and get a better finish. I'll look to get some pictures up of the modules as they take shape. I thought a shot of some flat paper wouldn't be much fun!

Does anyone have any ideas on a gloss varnish that I could use on paper, which is not going to destroy the paper and toner, and secondly is not going to start yellowing immediately?
What sort of paper will you be using? I would suggest Matt Photo paper or even Matt Viynl Self Adhesive Paper, I get mine from PPD. You can get Inkjet Fix Matt which stops UV loss of colour, it says on the tin fast drying varnish for fixing and protecting inkjet prints. Ghìant is the manufacturer. Also got it from somewhere on the net in UK so you should be able to source it.
 
please remember this is not intended to be Gauge 1 or fine scale,

I'm surprised that no-one has mentioned it already but I think you'll find some inspiration here. Others have mentioned the Playmobil railcar, and the Newquida coach body, and both are featured in it!

The same guy (not me!) has posted five further videos of his subsequent creations.

All the best

David
 
I couldn't find it.. Else would have put a link..
Shows what can be done, to 'Anglicise' what is out there..
 
What sort of paper will you be using? I would suggest Matt Photo paper or even Matt Viynl Self Adhesive Paper, I get mine from PPD. You can get Inkjet Fix Matt which stops UV loss of colour, it says on the tin fast drying varnish for fixing and protecting inkjet prints. Ghìant is the manufacturer. Also got it from somewhere on the net in UK so you should be able to source it.
For now it's run of the mill photocopier paper, over multiwall cardboard. Have been cutting it this evening and the good news is the rigidity is just right from the looks of it. But cutting it is a nightmare, really wears your hands out holding the knife so carefully but at the same time firmly.

I remember using self adhesive paper in the past, the issue I had was that once it stuck there was no going back, and inevitabily you'd get a crease just where it was most obvious. I'm mounting the printed paper with building trade PVA which gives a little time to reposition/slide out any creases before it all goes soft.

Thanks for the suggestion on the Ghiant product, looks like it might be an option, alls well at least until I'm out in the rain!

Today I've cut out all the new body sections for a full length model (3 central segments) although a 2 segment version also looked good, and possibly better if using smaller bogies.

The plan is to glue all the body side sections together, then mount the internal supports to one body side, leave to dry, and then attach the opposite body panel and leave to dry.

Once this is done I'll look to add the floor panels, although I'll likely only be able to install some to ensure there remains room for any potential motors.

With the floor panels installed I might look to mock up some form of interior, and I'll try and attached a removal roof this time, rather than the fixed one on the original mock up.

Hope to have some pictures tomorrow evening.

Thanks for the advice and interest, Alasdair
 
I'm surprised that no-one has mentioned it already but I think you'll find some inspiration here. Others have mentioned the Playmobil railcar, and the Newquida coach body, and both are featured in it!

The same guy (not me!) has posted five further videos of his subsequent creations.

All the best

David

Thanks David, just seen this, really impressed with these efforts! I've been thinking about a Glasgow subway model as another option, it's 4ft gauge so very close to the 'right' scale :)
 
Glasgow Subway is perfect for English TT Scale (3mm to the foot) with 12mm track. Also just the thing for those that like running trains in circles.
 
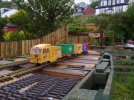
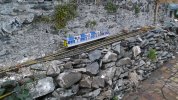
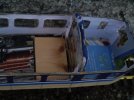
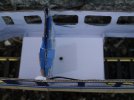
So some progress over the last few days, there's now a completed full length body shell. No floor or roof yet. Still trying to decide on power units etc.

Pictures attached.P1030879.JPGP1030865.JPG
 
Looks superb.
So apologies for the quiet spell, I've been building the line, and had other mess going on. The good news is that this evening I had a bit more energy and some motivation :)

I ordered some exterior varnish by decopatch a few days ago and that arrived, I plan to coat the body in to make it slightly more resilient. I hope to be able to get the body done this week or next.

The other development is getting some perpex and I have now cut sufficient to put in 2/3rds of the windows on one side of the body, a bit difficult to take any photos as yet. But certainly looks better than bare holes. Although sanding all the corners so they are rounded is shall we say just a little tedious.

Finally I've got a couple of LGB cargo sprinters for the railway, and having a look at these I think the bogies might be almost ideal. So one might become a temporary donor at some point in the month. I'm a little concerned as to how large the overhang will be on curves (I've got 10ft diameter minimum). One thought is to split the body in two, at which point it would fit almost perfectly onto the cargo sprinter underframes...
 

Attachments

  • P1030958.JPG
    P1030958.JPG
    503.9 KB · Views: 0
It is very long isn't it? But looks just the part
Yep just a little, but then it's based on a mk3 which is probably the longest coach on UK network.

In other news I believe I now have a motor and unpowered bogie. I got two LGB cargo sprinters this month, and while they do work fairly well both being powered, they did have a tendency to bunch and uncouple/derail as one of the units had traction tyres while the other didnt.

So with a few pieces of spare IKEA parts I managed to convert a powered cargo sprinter into an unpowered trailer.

The good news is that freed up a powered bogie, and by taking a unpowered bogie off one of the trucks I now have a matching pair, which should work well on the 153.

So I now need to build the structures to support the bogies, and assuming that all goes well it will be onto track tests!

Much faster progress than I was expecting :)
 
Not like Thameslink then.
It's been a while since I was on Thameslink! Used to stay near Harpenden.

This evening's task have been fixing the cargo sprinter power bogie which had a shredded gear, and designing motor and bogie mounts for the 153 and then gluing these to card.

Hopefully I'll get to build the mounts tomorrow evening, and then I can trial fit a set of bogies on Sunday.

No more progress on the windows, as it's pretty tedious, but predictable. I'd really like to get to the point of a rolling body.

I'll need to wait on the spare parts arriving from Sandy (Scottish Garden Railways) to fix the power bogie, and then work out if I want to put both of the power bogies back into the cargo sprinters or continue with one powered and one unpowered as at present.

Thanks to Sandy for the quick and helpful service.
 
So good progress today, I've finished the motor and bogie mounts and inserted these into the body.

Then screwed the bogies into these, which went okay. The power bogie is currently the defective one, so it can only run in one direction, and not up hills.

But it works, and perhaps more surprisingly from my point of view the degree of clearance needed isn't actually much greater than my other stock, despite it being much longer. I guess with the bogies being so close to each end this compensates.

Tonight I'll try and get a roof put on. As this will help the overall impression I think.

Next steps will be to design some underbody boxes/pipes etc as it does look a little bare, and as a result strange at the moment.

Then wait for the spare parts to arrive so I can fix the power bogie.

Beyond that windows, perhaps some lights, or a rebuild in plastikard.

I did take a video, but apparently this didn't come out as the camera ran out of battery at the last minute :( And the low light seems to have messed with the focus a little. Hopefully I'll get better pictures tomorrow.
P1030965.JPGP1030963.JPGP1030962.JPGP1030961.JPGP1030960.JPGP1030959.JPG

Comments or suggestions for improvements would be really appreciated.
 
Yep just a little, but then it's based on a mk3 which is probably the longest coach on UK network.

In other news I believe I now have a motor and unpowered bogie. I got two LGB cargo sprinters this month, and while they do work fairly well both being powered, they did have a tendency to bunch and uncouple/derail as one of the units had traction tyres while the other didnt.

So with a few pieces of spare IKEA parts I managed to convert a powered cargo sprinter into an unpowered trailer.

The good news is that freed up a powered bogie, and by taking a unpowered bogie off one of the trucks I now have a matching pair, which should work well on the 153.

So I now need to build the structures to support the bogies, and assuming that all goes well it will be onto track tests!

Much faster progress than I was expecting :)
Looking good, although not in anyway based on the mk3 coach. The 153 and 155 are bus panels on a subframe, and as such closely related to the Pacer type vehicles.
 
Looking good, although not in anyway based on the mk3 coach. The 153 and 155 are bus panels on a subframe, and as such closely related to the Pacer type vehicles.
Agreed they are based on bus panels etc, although far less so than earlier pacers and the like. They are however the same approximate length, with the same body profile though as the mk3.
 
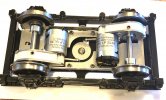
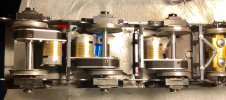
These bogies are about as close as I can find for classes 150 to 156, still far too short a wheelbase but not bad from a distance.
 
Funny that, I was on that website today! (Is it your website?) :) It's a definite possibility, although from the post I saw it's coming with a commonwealth style bogie, which isn't ideal.

Some corrections are needed here.

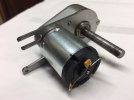
Tim Gleed-Owen runs Apple Tree Railways. Tim, an avid Gauge 3 builder introduced the HP and LP traction motors for use in Gauge 3 Diesel and Electric outline locomotives and other powered rolling stock models running on 64mm track. The HP and LP series motor gearbox designs have now been adapted for use in Gauge One/G Scale applications using a 45mm track gauge thus extending the range of gearboxes beyond the original HP and LP versions. These are individual traction motor gearboxes that attach to a single axle and are not supplied as implied in the OPs posting.

image2_2.jpeg
Gauge 3 axle mounted motor/gearbox assembly


The Gauge 3 British Railways Class 45 'Peak' which Tim is building and for which you will have seen photos of the single bogied, half bodyshell demonstrator, named 'Hillock'. Is not a sales item, but Tim's personal demonstrator for testing the haulage capacity of the HP series traction motor whilst it was under development. An LP version is also now available for low speed, low torque applications. The Gauge 3 'half-Peak' will handle at least eight Gauge 3 MKI coaches powered by three HP motor/gearboxes whilst running at a scale speed of 90mph. So when the full compliment of six motors is installed as per the protoypes configuration of ICo-CoI bogies there will be bags of power for hauling heavy frieght trains.

image5.jpeg
'Hillock' Tim's ICo 'half-Peak' a British Railways Class 45 derived motor/gearbox demonstrator


The revised and 'fully built' Peak will use a pair of 'Hillocks' ICo power bogies NOT a commonwealth bogie! Although Tim does have a complete kit of parts for Gauge 3 1st generation British Railways DMU powered and unpowered bogies, a complete kit of parts for a MKI coach bogie (both kits having bogie compensation, wheels and cast bogie sideframes) and could easily supply Peak bogie frames to order. Tim also has Gauge 3 USATC bogies for early US outline freight rolling stock and USATC Steam locomotive tenders.

005-D0-BC2-80-AB-4-FA8-9460-CB1346-D55-D2-C.jpg
Gauge 3 British Railways 1st Generation powered DMU bogie


Tims 45mm gauge HP traction unit is under my consideration for likely use in commercial garden railway capable G scale models of JRF EH200 freight locomotives and lined up for installation in several new pairs of Dr Spocks G Scale Baldwin Sharks. Cheap their not! Powerful, functional, well engineered and user adaptable - always!

Tim Gleed-Owen: M: 07946 653172

Thats All For Now

Robert - 'Doddy'


Gauge 3 Peak bogie

52387547_2318553005131589_6985620575863439360_o.jpg
 
Last edited:
Back
Top