You are using an out of date browser. It may not display this or other websites correctly.
You should upgrade or use an alternative browser.
You should upgrade or use an alternative browser.
Conversion: Toby the Tram
- Thread starter BakerJohn
- Start date
-
- Tags
- leeds hill railroad
BakerJohn
Baker, Modeler, future husband
Sure, why not?Am I allowed in the current climate to say it is Black?
idlemarvel
Neither idle nor a marvel
Train of colour, surely? 
idlemarvel
Neither idle nor a marvel
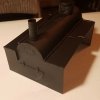
Very nicely detailed boiler, looks the part.I managed to paint the boiler today too! Thoughts?View attachment 249696View attachment 249697
BakerJohn
Baker, Modeler, future husband
Thank you, Dave. I think building the boiler was the most fun and the most stressful at the same time. It taught me a lot about scratch building inside an existing shell. I made a few silly mistakes and had to cut it up twice to get it to fit properly. (This is why there's a visible cut on the right side of the boiler. Luckily it isn't noticeable looking through the windows.) But, I really enjoyed getting to detail it and I hope to add a few more things (hand wheels and gauges) once I've been able to purchase a few. Oh! A brake should be added to the cab someday too... They might need that...Very nicely detailed boiler, looks the part.
Sometimes wheels for gauges can be a pain to get hold of. I like to fabricate them, quite easy if you can solder. Wrap cleaned up for Soldering thin bendy wire round a suitable sized tube, cut off where a circle. Place on a heat resistance surface, cut two more bits of thinner wire for the spokes, solder up. Cut off excess and clean up wolla job done. If you want to be really fancy you can cut the spoke cross pieces in 3 before Soldering to give a nice flat job.Thank you, Dave. I think building the boiler was the most fun and the most stressful at the same time. It taught me a lot about scratch building inside an existing shell. I made a few silly mistakes and had to cut it up twice to get it to fit properly. (This is why there's a visible cut on the right side of the boiler. Luckily it isn't noticeable looking through the windows.) But, I really enjoyed getting to detail it and I hope to add a few more things (hand wheels and gauges) once I've been able to purchase a few. Oh! A brake should be added to the cab someday too... They might need that...
BakerJohn
Baker, Modeler, future husband
Thanks, Jon. I might try that today! Even though I finished the loco yesterday...Sometimes wheels for gauges can be a pain to get hold of. I like to fabricate them, quite easy if you can solder. Wrap cleaned up for Soldering thin bendy wire round a suitable sized tube, cut off where a circle. Place on a heat resistance surface, cut two more bits of thinner wire for the spokes, solder up. Cut off excess and clean up wolla job done. If you want to be really fancy you can cut the spoke cross pieces in 3 before Soldering to give a nice flat job.
BakerJohn
Baker, Modeler, future husband
Here's a bunch of photos of the work I did yesterday. I painted all the door trim and window frames, glazed the windows, installed the lights, lanterns, handrails, cab floors, and boiler. You cannot see it in any of the photos here, but I also took the plastic bell an repainted it a more metallic gold color. It looks more realistic now and matches the brass hand rails better.
The second photo is taken from outside one of the front windows to show how the interior looks front-to-back. The figured used in these shots is an LGB driver from my Forney. [Posting photos as thumbnails is so much nicer, you can click on them for a full-screen view.]


The second photo is taken from outside one of the front windows to show how the interior looks front-to-back. The figured used in these shots is an LGB driver from my Forney. [Posting photos as thumbnails is so much nicer, you can click on them for a full-screen view.]


Rhinochugger
Retired Oik
The real thing in actionHere's a bunch of photos of the work I did yesterday. I painted all the door trim and window frames, glazed the windows, installed the lights, lanterns, handrails, cab floors, and boiler. You cannot see it in any of the photos here, but I also took the plastic bell an repainted it a more metallic gold color. It looks more realistic now and matches the brass hand rails better.
The second photo is taken from outside one of the front windows to show how the interior looks front-to-back. The figured used in these shots is an LGB driver from my Forney. [Posting photos as thumbnails is so much nicer, you can click on them for a full-screen view.]
View attachment 249753View attachment 249754View attachment 249755View attachment 249756View attachment 249757View attachment 249758

BakerJohn
Baker, Modeler, future husband
Someday, maybe, I'll build a scratch model of a J70 using proper proportions. It's interesting to see how the artists for Rev. Awdry's stories slowly changed the look of Toby from a real loco to what I hold in my hands. I was talking to the owner of my hobby store yesterday and he was telling me he built one from scratch for his 5" gauge railroad years ago.
Rhinochugger
Retired Oik
It's interesting to see how the artists for Rev. Awdry's stories slowly changed the look of Toby from a real loco to what I hold in my hands.
They were, essentially, caricatures of actual locos - but the original Rev. Awdry stories were based on UK railway practice. There have been many additional stories since then, mainly for TV, where railway operating procedures have been ignored largely through ignorance of the story writers. Once something becomes a commercial product, then the spirit is soon squeezed out.
But hey, it's kept a generation or three interested in trains
BakerJohn
Baker, Modeler, future husband
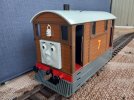
Hey guys! It has been a super long time since I've done anything to this engine, but here we go. I've finally gotten the circuit board soldered into place. As of today #7 runs and seems to work well.
Since I don't have a garden railroad at our new place (... yet ...), I took these on our front balcony.

If anyone is curious how I modified this engine, most of the information is on my railroading website, or read through some of this thread.
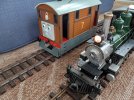
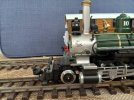
And a photo of my two locos; both running on R/C and battery power (with components from PhilP
).


UPDATE 3/2025
Going forward, this thread will be continued as a part of my main thread: LHRR Equipment. I cannot handle the number of threads I have active for different projects.
Since I don't have a garden railroad at our new place (... yet ...), I took these on our front balcony.

If anyone is curious how I modified this engine, most of the information is on my railroading website, or read through some of this thread.
And a photo of my two locos; both running on R/C and battery power (with components from


UPDATE 3/2025
Going forward, this thread will be continued as a part of my main thread: LHRR Equipment. I cannot handle the number of threads I have active for different projects.
Last edited:


