Tanker man
G scale and 5 inch ride on
I hope to start printing tomorrow, give me a couple of weeks and I will get back to you!Use a 3-6V motor, and the volume of a matchbox, and I will give you a RC, battery, and sound solution..
PhilP.
Dave
I hope to start printing tomorrow, give me a couple of weeks and I will get back to you!Use a 3-6V motor, and the volume of a matchbox, and I will give you a RC, battery, and sound solution..
PhilP.
Thanks for the recommendation. I'd spoken to Tim about one of his G45 gearboxes for another project. Given this is an outside frame, it may well be a decent contender.I've been using the Apple Tree railways gearboxes for my trams.. Although most of his products are for Gauge 3 - 63.5mm, the smallest units do fit G45 very nicely.
Nice and easy to hide and quite powerful for the size. I am running the 9V version from 7.4V Li-Ion packs and my trams trundle along at a good pace. It will need outside frames at G45, but I think this could be accommodated with this model!
View attachment 278045
Apple Tree Railway
Apple Tree Railway. 297 likes. Supplier of enclosed gearboxes, power bogies and coach/wagon bogies for garden railwayswww.facebook.com
Me Phil?Have you been talking to Eddie at Kippo Models?
PhilP
I've been using the Apple Tree railways gearboxes for my trams.. Although most of his products are for Gauge 3 - 63.5mm, the smallest units do fit G45 very nicely.
Nice and easy to hide and quite powerful for the size. I am running the 9V version from 7.4V Li-Ion packs and my trams trundle along at a good pace. It will need outside frames at G45, but I think this could be accommodated with this model!
View attachment 278045
Apple Tree Railway
Apple Tree Railway. 297 likes. Supplier of enclosed gearboxes, power bogies and coach/wagon bogies for garden railwayswww.facebook.com
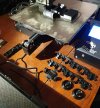
Looking good Dave!Ok so after nearly 7 hours, this is where I start! .............ok, it’s a Ford but it’s not black! ......rule 8
have to say, I used supports, which came out easily and clean.
DaveView attachment 278076
Looking good Dave!
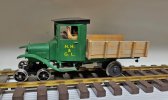
I've had to reprint the body and tank as I ran out of filament about 75% of the way through!
What has printed though looks okay. I too am using supports.
View attachment 278078
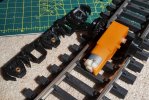
I think a bit of rule 8 applies, plus of course, there's a prototype for everythingThose frames look like they would fit a big Co-Co diesel?!? Totally inappropriate for a railcar - all the ones I ever saw just had rail wheels bolted on the axles. Or maybe a tiny truck in front.
View attachment 278290
I'd like to see the prototype of a 3-axle truck used under a railcar.I think a bit of rule 8 applies, plus of course, there's a prototype for everything
Come on someone, that sounds like a challenge!I'd like to see the prototype of a 3-axle truck used under a railcar.
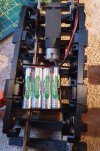
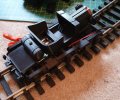
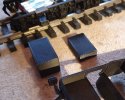
Oh no!Hmmmmmm! Looks like I’ve made a boob! Am half way through printing the motor section that goes between the frames! , was wondering how you got the motor in there! ............real men don’t read instructions!!! .....oh well, it will probably make a good wagon load, so no waste just time and filament.
had to re level the bed yesterday as nothing would stick, strange, it’s been printing fine for weeks then all of a sudden started playing up.............you live and learn !
Dave
Oy family forum and all that!!!!!Looks like I’ve made a boob!
Ok, ok! “ I have made a small error!”..............but you would be surprised what you can make on a 3D printer!!Oy family forum and all that!!!!!
Does your SW know what you are getting up to?Ok, ok! “ I have made a small error!”..............but you would be surprised what you can make on a 3D printer!!
Dave
Told you.....prototype for everything
