idlemarvel
Neither idle nor a marvel
The coupling rod kits arrived yesterday and I had some time today to fit one to my LGB 41841 RhB baggage car, which was the "worst offender" when it came to running on R1 due to its very long wheelbase (252mm).

The wheels easily misalign if there is nothing behind the baggage car to straighten the coupling/axle to it tends to be dragged kicking and screaming around tight bends.
The kits came nicely packaged with each of the three sets I ordered in their own packets. Instructions are provided in German only.

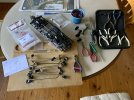
There is a YouTube video on the website but it only shows the simple case where no holes need to be drilled. It took a bit of puzzling and pondering to decide a plan, nevertheless it only took about 15 minutes with the following tools, hand drill with 2mm bit, cross head screwdriver and some pliars.

This is the set I installed today:

You get a threaded brass rod, two locking nuts, two brackets that fasten to the axles, two clamps to attach the brass rod to the brackets, and four screws to hold the brackets in place on the axles.
First job is to mark the position of the holes for the screws to hold the brackets in place. Use the brackets as a template and drill a 2mm hole. I used a finger twist drill rather than a power tool to avoid accidental damage.

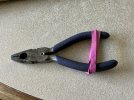
Now fit the clamps to the brackets. Use pliars or similar to open the jaws of the clamp, and to close them again.

Screw the first bracket in place. You'll find it easier to fit the other end of you remove the wheels first:

Finished. You can adjust the distance by twisting the rod between your fingers. Once you are happy the axles are aligned you can tighten the locking nuts.

Finally the test. You can perhaps see even though the baggage car is at the end of the train the wheels are alighned to the curve.

The end result is excellent. The baggage car no longer drags, it runs much more quietly and with less effort from the loco, and the couplings align better for shunting purposes. Hopefully the other kits will similarly improve the other problem wagons, but on the basis of this exercise I can thoroughly recommend these coupling kits.
The wheels easily misalign if there is nothing behind the baggage car to straighten the coupling/axle to it tends to be dragged kicking and screaming around tight bends.
The kits came nicely packaged with each of the three sets I ordered in their own packets. Instructions are provided in German only.

There is a YouTube video on the website but it only shows the simple case where no holes need to be drilled. It took a bit of puzzling and pondering to decide a plan, nevertheless it only took about 15 minutes with the following tools, hand drill with 2mm bit, cross head screwdriver and some pliars.

This is the set I installed today:

You get a threaded brass rod, two locking nuts, two brackets that fasten to the axles, two clamps to attach the brass rod to the brackets, and four screws to hold the brackets in place on the axles.
First job is to mark the position of the holes for the screws to hold the brackets in place. Use the brackets as a template and drill a 2mm hole. I used a finger twist drill rather than a power tool to avoid accidental damage.

Now fit the clamps to the brackets. Use pliars or similar to open the jaws of the clamp, and to close them again.

Screw the first bracket in place. You'll find it easier to fit the other end of you remove the wheels first:

Finished. You can adjust the distance by twisting the rod between your fingers. Once you are happy the axles are aligned you can tighten the locking nuts.

Finally the test. You can perhaps see even though the baggage car is at the end of the train the wheels are alighned to the curve.

The end result is excellent. The baggage car no longer drags, it runs much more quietly and with less effort from the loco, and the couplings align better for shunting purposes. Hopefully the other kits will similarly improve the other problem wagons, but on the basis of this exercise I can thoroughly recommend these coupling kits.


