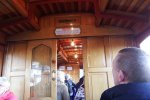
MER Vehicles

DafyddElvy

1:22.5 & 15mm Scale Trams, , NG Steam Railways
Country flag
I am now in the planning stages for some Manx Electric Railway trams, one question I'm not sure of the answer though is what thickness and type of wood to use for the body panels, because I am looking to have working drop windows I'll obviously need at least 4 layers of wood to allow the windows to drop inside the body and create the body relief, but what thickness of timber would folk suggest.

For the windows I am thinking of a little cheating and using laboratory slide glass with a sticky back PVC border to represent the drop window frame.

MER Car No. 1 is the first car I'd like to build after some non-passenger items of rolling stock.

David
I guess it depends on the tumblehome as to the thickness of the rocker panel. Look forward to your build!
 
I am now in the planning stages for some Manx Electric Railway trams, one question I'm not sure of the answer though is what thickness and type of wood to use for the body panels, because I am looking to have working drop windows I'll obviously need at least 4 layers of wood to allow the windows to drop inside the body and create the body relief, but what thickness of timber would folk suggest.

For the windows I am thinking of a little cheating and using laboratory slide glass with a sticky back PVC border to represent the drop window frame.

MER Car No. 1 is the first car I'd like to build after some non-passenger items of rolling stock.

David
For his WnU coach Matt has used (I am pretty certain having just measured it) 1.5mm ply. Much thinner than this would require a lot of internal bracing that is not present in the MER Saloons. I would have thought that you may get away with thiner material for external detailing with say 1.5 on the inner two and something between them to allow for tye glazing that would depend on the glazing thickness.
 
If there are to be layers, then laminating up from thinner pieces of ply is always viable.
 
Thanks for all the suggestions for the body panels, 1/64 ply now on order.

Now I am doing the final sketch's to build a 15mm scale model of MER number 23 and fabricating the wagon body strapping, one of the things I would like to do is properly represent the side strapping rivets, my first thought was to use 10mm scale valve gear rivets, the type with one end drilled out which can be crushed / bent over to form a rivet head, can anyone suggest any other methods to make rivets for wagon body strapping, thanks?

David
Are you sure 1//64“, if my conversation is correct the 1.5mm as suggested by Jon is just under 1/16”, so 1/64” is about 0.4mm.
 
Are you sure 1//64“, if my conversation is correct the 1.5mm as suggested by Jon is just under 1/16”, so 1/64” is about 0.4mm.
1/64" for the lower tumblehome which has a concave body shape below the waist panel, I'll see how it looks and if required put a second layer, waist panels will be 1/16".

I'm venturing in to a new world so its all a bit of an experiment unless I can glean knowledge from here.

David
 
Thanks for all the suggestions for the body panels, 1/64 ply now on order.

Now I am doing the final sketch's to build a 15mm scale model of MER number 23 and fabricating the wagon body strapping, one of the things I would like to do is properly represent the side strapping rivets, my first thought was to use 10mm scale valve gear rivets, the type with one end drilled out which can be crushed / bent over to form a rivet head, can anyone suggest any other methods to make rivets for wagon body strapping, thanks?

David
What about Cambrian, they also do bolt heads and many other useful stick on bits of detail.
 
I make my IMR carriage sides from a ply/MDF/ply sandwich using 2mm MDF and 0.8mm ply. The lower edge of the MDF is sanded to create the convex tumblehome, using a linisher -I am fortunate to have access to one at work- and the ply skin then glued on using a vacuum bag (expensive, but I have one at work) or using the little pound shop 'clip clamps'

6ff3a53b-592c-4f1f-ae4d-e5a873cab4e7.jpg


and/or bulldog clips. I make the roofs by gluing a piece of 0.8mm ply onto the roof ribs, and then add a second sheet when that has dried -this is all done using 'clip clamps'.
Its possibly wrong to say the trams have a tumblehome, the panel below the waist is concave unlike what is generally known as the tumblehome.

I plan to build up a skeleton frame for the body which will be varnished before any side panels are fitted.

The roof will be made in a similar way, with a skeleton being assembled first, varnished, followed by fitting the outer sheets.

As a modelling project its unfortunate the interiors were varnished wood, I suspect each and every piece of the body will need to be varnished before it is glued and pinned in place.

I just hope I can do the MER cars justice.

David
 
I'll be interested to see your progress.

How are you planning to cut the pieces? I would suggest an LED laser cutter might be the answer in terms of small repetitive parts, as this will be much faster and you can leave it to it while finishing other parts - or hand cutting where it's not worth setting up the file. Ply cuts very well, with a minimum or burning and the software is easy to learn.
One of the modellers problems with the MER trams is that the interior is varnished wood, most of the repetitive pieces would unfortunately need sanding back to the unburnt surface, although for the outer skin windows I might get away with laser cutting as the outer window frames are painted.

Is their one brand of LED laser cutter you would recommend and what should I avoid, as usual any advice and guidance appreciated.

Brass channel arrived thismorning which will allow me to make a start on No. 23's underframe.
I also need to think about how I am going to make 16 wagon side hinges for No. 23.

Plenty to ponder.

David
 
Regarding laser cutting, I can only give you my experiences of 9 months of using an Atomstack A5, with an updated M50 dual diode laser head. I think this is available as the X7 or X9 as a package, with either an open frame or free arm version. The package includes a standalone controller instead of requiring a PC or MAC to be linked to the cutter as I do.


One thing to point out is that LED manufacturers do not correctly state the cutting power, so a 20W or 30W machine is more like 3-6W cutting power and only a dual diode module can exceed this, perhaps doubling to 10-12W. CO" lasers are usually rated in cutting power, so even a basic 50W CO2 is significantly more powerful - if a lot trickier to set up and use.

The 11W cutting power of the dual LED module means faster cutting with less surface burning. Common upgrades are to fit air assist - basically a small nozzle linked to an air compressor to feed a stream of air into the cut to remove burnt product, enabling cleaner and faster cutting.

Mine will cut 2mm ply in 1 pass at about 300mm/minute and will go up to 6-9mm, but quite honestly, the cut takes so long it's normally quicker just to engrave the outline and then whip out the jigsaw!

Software wise, Lightburn is the best available currently, and has some quite powerful 2D drawing tools built in as well. My Wisbech and Upwell coach was designed almost fully within Lightburn, with just a couple of pieces that needed the more advanced tools of a full CAD package to create.

More than happy to provide you with some cut samples to evaluate prior to splashing the cash.

I am also a Moderator on this Faceboook site if you want some more details on laser cutting. - Atomstack Official Laser Engraving User Group
 
I can see how that panelling could really come to life with some nice layering!

It might be worth considering just engraving the shapes to be cut onto the thin ply using a laser, then cutting by hand. This will reduce the amount of tracing, but will avoid any clean up of burnt edges.
 
Back
Top