3 minutes of fame
3d printing, electronics and trams
Hi All.
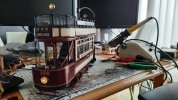
I've posted a few images on various posts of my Occre trams and how I motorise them, so I thought I would document my latest build which hopefully will be of interest to others.
The Occre Trams come with white metal wheels with quite small flanges and wooden axles and inside frames. Built correctly these are fine for positioning on a diorama and even pushing along a bit of track, but not much more. They won't really run through pointwork and will derail very easily.
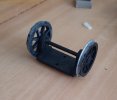
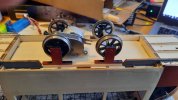
I looked around for some better solutions, but the unit supplied by Occre themselves- and no longer in production is quite poor and to my eyes would not last long. After a bit of searching, I came up with the Apple Tree Models axle hung gearbox and motor setups. Although designed for G3, the smallest variant will squeeze into G45 if you use outside frames. I ordered a couple of sets and was very impressed with them. My trams have 1 powered axle each, which is enough for a single tram, but if you are likely to pull trailers, you might want to consider motorising both axles.
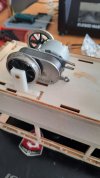
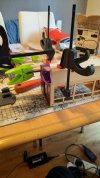
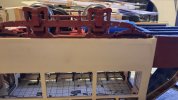
The 3D printed frames. These were done with my filament printer, while the ones above were printed in resin. Both seem to work equally well!
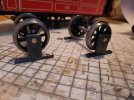
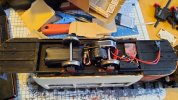
The rest of the kit is pretty simple. The frames are just simple 3D prints - I've shared these on the 3D print page and if anyone wants any, just let me know and they are yours for the price of a pint. I've used a basic speed controller and 7.4V Li-Ion battery back and a radio controlled car R/C, total cost £35 from Amazon. I would prefer the dedicated units, but they seem to be out of stock everywhere and my solution works very well, even if you need to be gentle on the trigger to get smooth starts and stops. I might well modify the controllers at some point to give some inertia control. The spare R/C channels can be linked to relay and trigger boards for audio and lighting. My Istanbul tram has some gong effects and permanent lighting as per the prototype, while my London tram will probably get something similar. All electronics are fitted under the sole bar and pretty much disappear once the trams are completed.
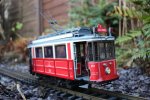
I'll update the thread as the London tram progresses. I am painting up the main body at the moment and once this is complete, I will fit the running gear and electronics before I build the top deck and apply the finer detail. This makes it easier to run in the wiring for the lighting and to hide the battery pack.
I've posted a few images on various posts of my Occre trams and how I motorise them, so I thought I would document my latest build which hopefully will be of interest to others.
The Occre Trams come with white metal wheels with quite small flanges and wooden axles and inside frames. Built correctly these are fine for positioning on a diorama and even pushing along a bit of track, but not much more. They won't really run through pointwork and will derail very easily.

I looked around for some better solutions, but the unit supplied by Occre themselves- and no longer in production is quite poor and to my eyes would not last long. After a bit of searching, I came up with the Apple Tree Models axle hung gearbox and motor setups. Although designed for G3, the smallest variant will squeeze into G45 if you use outside frames. I ordered a couple of sets and was very impressed with them. My trams have 1 powered axle each, which is enough for a single tram, but if you are likely to pull trailers, you might want to consider motorising both axles.

The 3D printed frames. These were done with my filament printer, while the ones above were printed in resin. Both seem to work equally well!

The rest of the kit is pretty simple. The frames are just simple 3D prints - I've shared these on the 3D print page and if anyone wants any, just let me know and they are yours for the price of a pint. I've used a basic speed controller and 7.4V Li-Ion battery back and a radio controlled car R/C, total cost £35 from Amazon. I would prefer the dedicated units, but they seem to be out of stock everywhere and my solution works very well, even if you need to be gentle on the trigger to get smooth starts and stops. I might well modify the controllers at some point to give some inertia control. The spare R/C channels can be linked to relay and trigger boards for audio and lighting. My Istanbul tram has some gong effects and permanent lighting as per the prototype, while my London tram will probably get something similar. All electronics are fitted under the sole bar and pretty much disappear once the trams are completed.

I'll update the thread as the London tram progresses. I am painting up the main body at the moment and once this is complete, I will fit the running gear and electronics before I build the top deck and apply the finer detail. This makes it easier to run in the wiring for the lighting and to hide the battery pack.

