You are using an out of date browser. It may not display this or other websites correctly.
You should upgrade or use an alternative browser.
You should upgrade or use an alternative browser.
Phil S' RR
- Thread starter phils2um
- Start date
Southwestforests
Registered
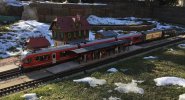
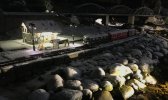
Though I don't personally like cold and snow, trains look great in snow.
Haven't ever figured out why they look good in the snow, but they sure do.
Haven't ever figured out why they look good in the snow, but they sure do.
Live steam looks fantastic with the cold air exaggerating the steamThough I don't personally like cold and snow, trains look great in snow.
Haven't ever figured out why they look good in the snow, but they sure do.
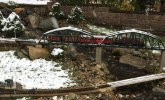
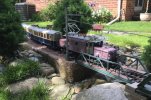
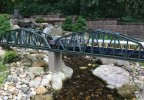
Someone starting a new RR asked about passing sidings. I suggested that they make any they put in longer than they think they need. I was speaking from experience! Here is my Guarda Station as it originally existed a few days ago.
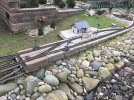
The mainline is nearest us in this view and I thought the run-around nearest the station would be fine. I was disappointed with the length almost from the get-go. There wasn't a whole lot of room to expand but I had about 3/4 of a meter of straight on the trestle after the turnout on the lower left right.
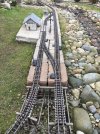
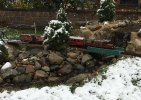
I didn't really want to put the turnout on the trestle but had no option if I wanted to extend the run-around. So I put in a couple of new stringers between the first two bents on the right,
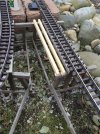
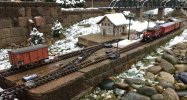
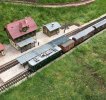
and moved moved both turnouts on the south end almost half meter. The result turned out OK. The run-around length is still not what I'd like but it's a lot better than it was!
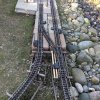
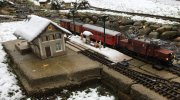
I was worried it might look strange. It worked out fine however. Appearance wise that short bit of straight leading into the turnout really makes all the difference. The extra track I've now got in the station is a huge improvement.
As an aside, I now know why most major construction takes place in the warmer months!

The mainline is nearest us in this view and I thought the run-around nearest the station would be fine. I was disappointed with the length almost from the get-go. There wasn't a whole lot of room to expand but I had about 3/4 of a meter of straight on the trestle after the turnout on the lower

I didn't really want to put the turnout on the trestle but had no option if I wanted to extend the run-around. So I put in a couple of new stringers between the first two bents on the right,

and moved moved both turnouts on the south end almost half meter. The result turned out OK. The run-around length is still not what I'd like but it's a lot better than it was!

I was worried it might look strange. It worked out fine however. Appearance wise that short bit of straight leading into the turnout really makes all the difference. The extra track I've now got in the station is a huge improvement.
As an aside, I now know why most major construction takes place in the warmer months!
Last edited:
Southwestforests
Registered
Hey, it fits within the range of railway normality, for instance,I was worried it might look strange.
Switch on a Bridge
A Bethlehem Steel-bound Conrail ore train crosses the Lehigh River in Bethlehem, PA. The train is coming from the former Jersey Central main line, and is entering the former Reading North Penn Branch. The diverging track is a connection to the former Lehigh Valley main line. The LV connection is still in service, while the switch and the North Penn Branch are long gone.
The problem with loops is that no matter how long they are there will always end up being a meet where one train is longer. The answer here is pretty straightforwards as you can use the second track to stage the longer train while the shorter one passes through. Zig zags for passing trains can also add fun where one is longer.Someone starting a new RR asked about passing sidings. I suggested that they make any they put in longer than they think they need. I was speaking from experience! Here is my Guarda Station as it originally existed a few days ago.
View attachment 293567
The mainline is nearest us in this view and I thought the run-around nearest the station would be fine. I was disappointed with the length almost from the get-go. There wasn't a whole lot of room to expand but I had about 3/4 of a meter of straight on the trestle after the turnout on the lower left.
View attachment 293568
I didn't really want to put the turnout on the trestle but had no option if I wanted to extend the run-around. So I put in a couple of new stringers between the first two bents on the right,
View attachment 293569
and moved moved both turnouts on the south end almost half meter. The result turned out OK. The run-around length is still not what I'd like but it's a lot better than it was!
View attachment 293570
I was worried it might look strange. It worked out fine however. Appearance wise that short bit of straight leading into the turnout really makes all the difference. The extra track I've now got in the station is a huge improvement.
As an aside, I now know why most major construction takes place in the warmer months!
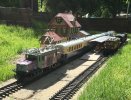
I finally decided to try ballasting a portion of my rail that is laid on block. I used "Cherrystone #2 Grit", Cherry Stone® – TCC Materials, which was purchased at a Family Farm & Home store near where I live. The grit is sharp crushed quartzite. It is available in different sizes. It cost me $8 US for a 50 pound bag. The #2 has an average size of 3/16" (approx. 5mm). I feel it is the best size of the Cherrystone Grits to represent actual ballast. I've tried some #1, 1/16" average size but it is too fine in my opinion, likewise, #3 at 5/16" is too big. The color is OK. I would have preferred something more the color of crushed limestone but for the price and convenience I'll put up with the somewhat rose tinge.
The first step was to cover the rails. I used Painters Tape. I had a 1" wide roll on hand that I split down the middle by running a sharp knife around the roll.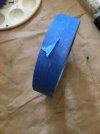
The roughly 1/2" width was perfect for the job. Next I spread some grit between the rails using a garden trowel. The grit was spread out and "shaped" using a 2" paint brush. The 2" size was big enough to not take all day, yet the bristles were fine enough for good control of the spread.
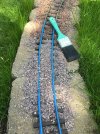
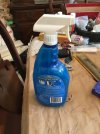
Finally, the ballast was set with a spray of "Titebond III Ultimate Wood Glue". The glue was diluted about 2:1 water to glue to make it easily sprayable. About 6 drops dishwashing liquid was added to help the wetting action. I used an old repurposed spray bottle to apply the glue mix. The tape was removed from the rails before the glue had a chance to set. This made sure the tape came off cleanly. It was then left overnight to cure. In the pic above the already glued and set ballast can be discerned by the darker color.
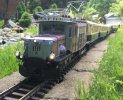
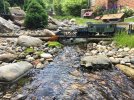
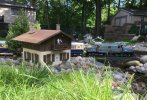
Here are a few more pics of the finished ballast.
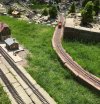
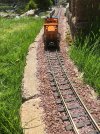
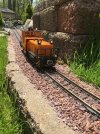
I think it looks pretty good. I am concerned a bit about how solidly the glue has set the track. The ballasted section has lost the complete freedom to expand or contract the track previously had. I did need to glue the ballast. I use a string trimmer to cut the grass by the track and use a battery operated shop blower to clear the trimmings from the rails just to keep maintenance simple. I didn't want to be blowing ballast everywhere.
I don't think I'll be doing any more until I can assess how this section holds up. If all is well next Spring I'll finish the job. Otherwise, I will need to re-think my approach.
Edited to explain when the painters tape was removed from the rails - before the glue could set!
The first step was to cover the rails. I used Painters Tape. I had a 1" wide roll on hand that I split down the middle by running a sharp knife around the roll.

The roughly 1/2" width was perfect for the job. Next I spread some grit between the rails using a garden trowel. The grit was spread out and "shaped" using a 2" paint brush. The 2" size was big enough to not take all day, yet the bristles were fine enough for good control of the spread.

Finally, the ballast was set with a spray of "Titebond III Ultimate Wood Glue". The glue was diluted about 2:1 water to glue to make it easily sprayable. About 6 drops dishwashing liquid was added to help the wetting action. I used an old repurposed spray bottle to apply the glue mix. The tape was removed from the rails before the glue had a chance to set. This made sure the tape came off cleanly. It was then left overnight to cure. In the pic above the already glued and set ballast can be discerned by the darker color.

Here are a few more pics of the finished ballast.


I think it looks pretty good. I am concerned a bit about how solidly the glue has set the track. The ballasted section has lost the complete freedom to expand or contract the track previously had. I did need to glue the ballast. I use a string trimmer to cut the grass by the track and use a battery operated shop blower to clear the trimmings from the rails just to keep maintenance simple. I didn't want to be blowing ballast everywhere.
I don't think I'll be doing any more until I can assess how this section holds up. If all is well next Spring I'll finish the job. Otherwise, I will need to re-think my approach.
Edited to explain when the painters tape was removed from the rails - before the glue could set!
Last edited:
duncan1_9_8_4
Jack of all trades on the Railway
The ballast has made it look brilliant.
viaEstrecha
Spanish metre gauge in G scale (on the cheap)
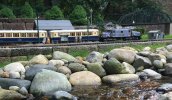
Some cracking pics there - looks so good against the water features.
I spent the last few days putting remedy to one major deficiency I noted in my very first post to this thread. I've added a new 1 1/4" PCV conduit from the house out to the RR. I'd been procrastinating on this for a couple of years now. This is why:
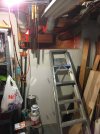
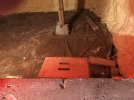
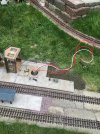
These shots are of the only access I have to the crawl space where the conduit needs to run in the house. Like many of us on this forum, I'm hardly young, spry and svelte! Doing a belly crawl frontwards and backwards over the ledge to get in and out is not quite one of the joys of the hobby! The step stool on the inside is to ease the two foot drop on the other side of the ledge. The step ladder is needed to get through the hole from the basement side. The primary reason I finally tackled this job was to get a S-88 data line out to the RR. I intend to put in some automation so trains are not just chasing each other around the loop. S-88 based sensors are supported by my Märklin CS3 Central Station.
I used a 2" diamond grit hole saw chucked in a 1/2" drill to cut a hole in the exterior brick facing of the wall. The hole was centered between the two 1/2" conduits originally installed. After I got through the brick I put a pilot drill in the hole saw in order to drill a centered hole in the 2x10 ledger board behind the brick facade. Then it was into the crawl space to complete the hole for the conduit through the ledger board with another 2" hole saw. I used the pilot hole as a guide to be sure the two holes were aligned. The hole through the wall was caulked with cement sealer after the interior part of the conduit run was finished. After four trips in and out of the crawl space to fit and glue the conduit sections together this is the result, a pull box on the exterior wall.
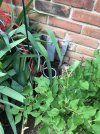
When this pic was taken I'd already run the wires to the interior of the house. I pulled two Cat 6 ethernet cables for S-88 busses. I chose Cat 6 cable over Cat 5e because of the length of run, about 35 feet, and its larger gauge wire, 23 awg vice 24 awg. One the twisted pairs are used for 12V power in the S-88 bus. The larger wire lessens the voltage drop due to wire resistance. I also put in another 12 awg 4-conductor line that will give me an additional two track power connections for the future. I had the wire left over from my initial installation years ago. Plus, I put pull cords in place should I want to run something else later. There is plenty of room for more wires in the conduit! Here is a pic of the wall plate where my CS3 Central Station inside the house connects the the RR. The wall plate attaches to a low-voltage box installed in the drywall.
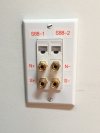 Power for my two existing track zones is via the binding posts. Short jumpers with banana plugs make the power connections between the CS3 and the binding posts. The RJ-45 jacks are for S-88. Around 2 feet of the new 4-conductor power cable is coiled behind the box in the wall cavity. I'll put in another low-voltage box next to this one if or when I make use of the new power conductors.
The next few pics are of the exterior run.
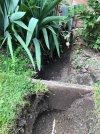
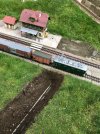
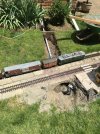
 The first couple show the trench dug down to the two existing 1/2" conduits. The new 1-1/4" conduit will emerge in waiting room for the station. The third pic above is of the new conduit in place after burrowing under the cement blocks beneath the rails. I added a 1/2" "U" shaped conduit under the rails while I was at it. This will make it easier to get sensor wires from the waiting room to the far track. The fourth pic is of the waiting room base plate and covered platform back in place after backfilling and wire pulling.
One more pic of the wall plate:
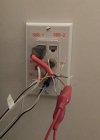 This one with the track power connections made. It also shows one of two Cat 6 pigtails I made to verify the Cat 6 RJ-45 jack and plug connections. I put a jumper cable on a wire pair at one end the checked for continuity with a VOM between the same pair at the other end. This was done for all 4 wire pairs of each cable. The out and back resistance for each pair was just under 2 ohms for those that might be curious.
And the final result, little evidence anything was accomplished:


These shots are of the only access I have to the crawl space where the conduit needs to run in the house. Like many of us on this forum, I'm hardly young, spry and svelte! Doing a belly crawl frontwards and backwards over the ledge to get in and out is not quite one of the joys of the hobby!
I used a 2" diamond grit hole saw chucked in a 1/2" drill to cut a hole in the exterior brick facing of the wall. The hole was centered between the two 1/2" conduits originally installed. After I got through the brick I put a pilot drill in the hole saw in order to drill a centered hole in the 2x10 ledger board behind the brick facade. Then it was into the crawl space to complete the hole for the conduit through the ledger board with another 2" hole saw. I used the pilot hole as a guide to be sure the two holes were aligned. The hole through the wall was caulked with cement sealer after the interior part of the conduit run was finished. After four trips in and out of the crawl space to fit and glue the conduit sections together this is the result, a pull box on the exterior wall.

When this pic was taken I'd already run the wires to the interior of the house. I pulled two Cat 6 ethernet cables for S-88 busses. I chose Cat 6 cable over Cat 5e because of the length of run, about 35 feet, and its larger gauge wire, 23 awg vice 24 awg. One the twisted pairs are used for 12V power in the S-88 bus. The larger wire lessens the voltage drop due to wire resistance. I also put in another 12 awg 4-conductor line that will give me an additional two track power connections for the future. I had the wire left over from my initial installation years ago. Plus, I put pull cords in place should I want to run something else later. There is plenty of room for more wires in the conduit! Here is a pic of the wall plate where my CS3 Central Station inside the house connects the the RR. The wall plate attaches to a low-voltage box installed in the drywall.
 Power for my two existing track zones is via the binding posts. Short jumpers with banana plugs make the power connections between the CS3 and the binding posts. The RJ-45 jacks are for S-88. Around 2 feet of the new 4-conductor power cable is coiled behind the box in the wall cavity. I'll put in another low-voltage box next to this one if or when I make use of the new power conductors.
The next few pics are of the exterior run.


 The first couple show the trench dug down to the two existing 1/2" conduits. The new 1-1/4" conduit will emerge in waiting room for the station. The third pic above is of the new conduit in place after burrowing under the cement blocks beneath the rails. I added a 1/2" "U" shaped conduit under the rails while I was at it. This will make it easier to get sensor wires from the waiting room to the far track. The fourth pic is of the waiting room base plate and covered platform back in place after backfilling and wire pulling.
One more pic of the wall plate:
 This one with the track power connections made. It also shows one of two Cat 6 pigtails I made to verify the Cat 6 RJ-45 jack and plug connections. I put a jumper cable on a wire pair at one end the checked for continuity with a VOM between the same pair at the other end. This was done for all 4 wire pairs of each cable. The out and back resistance for each pair was just under 2 ohms for those that might be curious.
And the final result, little evidence anything was accomplished:

Last edited:
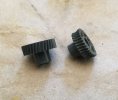
The Allegra came out of the shop (the dining room table) yesterday and was put through her paces. She was struggling on my RR's grades pulling even one two axle wagon. Amazing what the loss of one drive axle can do. Gear replaced, old on the right, and she can once again easily handle a typical Bernina rake of coaches/wagons. RhB Livestream
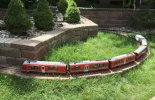
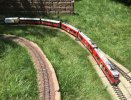
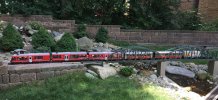
Interesting how the RhB is now using the three unit Allegra ABe 8/12s as true locomotives in push-pull service. I've seen them trailing or leading up to six additional coaches and a control car on some of the routes in addition to the the Bernina. True wolves in sheep's clothing! There are some older ABe 4/16 four unit sets (not the new Capricorns) that are close cousins of the Allegra that I've also seen in push-pull service on the flatter routes. The ABe 4/16s heading two or three additional coaches and a control car. From watching the livestream, it appears the RhB has almost completely switched over to push-pull passenger operation on all the routes except Chur-Disentis and on the Bernina.


Interesting how the RhB is now using the three unit Allegra ABe 8/12s as true locomotives in push-pull service. I've seen them trailing or leading up to six additional coaches and a control car on some of the routes in addition to the the Bernina. True wolves in sheep's clothing! There are some older ABe 4/16 four unit sets (not the new Capricorns) that are close cousins of the Allegra that I've also seen in push-pull service on the flatter routes. The ABe 4/16s heading two or three additional coaches and a control car. From watching the livestream, it appears the RhB has almost completely switched over to push-pull passenger operation on all the routes except Chur-Disentis and on the Bernina.


