Short Track Pieces

Yes, there are many such compounds, most are called "Anti-sieze" here, and have copper, nickel, or sometimes aluminum in them.

I actually prefer the nickel to copper, but that is just splitting hairs. I have been using anti-sieze on things like this since 1969.

Goes great on the end of a Mini Cooper crankshaft, for any of those who have replaced a clutch on the same.

Greg
 
Hard for people to believe but as it is actually grease, it is used on brake systems to prevent squealing.
 
Hello,

I promised to inform you all about more copper grease info from my friend.
He told me that he dissolves the grease using turpentine.
The turpentine will be evaporated in short time leaving the original grease.
He also told me that the main reason for the excellent performence against corrosion of the brass connections is the extreme temperature of about 350 degr celcius or even more the grease can cope with. The rail can be extremely hot in the summer so most types of grease will vanish, but this one stays betwee the connections.
He uses the grease for 10 years now and he still has not any problem. When he detaches the connections they all look like brand new brass.

Greatings
Gerard
 
Ok, that solvent makes much more sense!

I don't agree that the 350 degree temp rating really makes a difference, that temp is more the breakdown temperature of lubricating, but all the anti-siezes I use come with a high rating, often up to 2500 degrees F.

It's more of a quality of how thick it stays, I think there is a rating of "drip point"...

So all I am saying is these compounds are usually thick and stay in place, and often "plate" metal, i.e. not real plating, but have an extreme affinity for metal.

The entire key is keeping air, dirt, and moisture away from the metal, as you are stating.

Greg
 
Removing fishplates can be a bit of a task, there are a few You Tube Vids to show you how. This link is one of the better ones that I have found over the years.


My favoured method is to razer saw off the lip that goes down into the sleeper the. Bang off with a hammer and old screwdriver. For refitting if you re use LGB Fishplates a gentle press in to make the fit tighter at the top of the fishplate helps. But for the future I will be using the vid above one, less danger involved!
Does anybody know what has happened to this video, first time in a long while that I need to remove some fishplates, remembered the post post, and found it :) and the vid is gone o_Oo_O
 
Does anybody know what has happened to this video, first time in a long while that I need to remove some fishplates, remembered the post post, and found it :) and the vid is gone o_Oo_O
Oh typical you find the perfect way to remove fishplates on YT and the vid goes!

So
step 1, a small piece of LGB rail in the part of the track that does not have any rail with a short gap for a big screwdriver.
step 2, grip little piece of rail and fishplate in a vice with the dull length of rail dangling from the vice.
step 3, insert screwdriver and push full length of rail away till clip comes out of sleepers.
step 4, give a big grin as you pull the rail away from the secured bit in the vice.

This method even works with long sections and intermediate fishplates as the complete rail moves out of the fishplate bending out the tab.
 
Last edited:
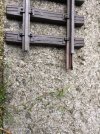
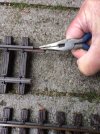
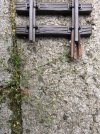
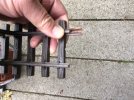
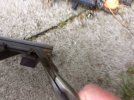
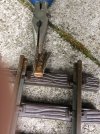
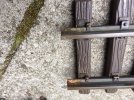
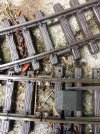
Here is a series of photo's that explains a very easy way to remove fishplate joiners using a small pliers while the the plastic spike plate remains unharmed.
Step 1: Grab the fishplate and rail between left hand thumb and fore finger and press the rail firmly on the sleeper in order to prevent damage to the plastic spike plate.
Step 2: Bend open both sides of the fishplate-joiner using a rotatation movement so it can freely rotate downwards.
Step 3: Set the pliers to the base of the fish-plate and rotate the base downwards. This will cause the angled end of the fishplate to come out without harming the spike plates.
 

Attachments

  • 1 Start removing rail connector.JPG
    1 Start removing rail connector.JPG
    549.8 KB · Views: 0
  • 2 Opening side 1 of 2.JPG
    2 Opening side 1 of 2.JPG
    370.1 KB · Views: 0
  • 3 Result opened side 1.JPG
    3 Result opened side 1.JPG
    614.7 KB · Views: 0
  • 4 Press firmly.JPG
    4 Press firmly.JPG
    1 MB · Views: 0
  • 5  turn the whole downwards  while pressing firmly as shown in pic 4.JPG
    5 turn the whole downwards while pressing firmly as shown in pic 4.JPG
    337.3 KB · Views: 0
  • 6 Result of removed part.JPG
    6 Result of removed part.JPG
    417.8 KB · Views: 0
  • 7 No damege to plastic guides.JPG
    7 No damege to plastic guides.JPG
    526.8 KB · Views: 0
That is exactly the way I did it, I did it without reading anything once I discovered that tab that goes through the tie. I think that is absolutely the easiest and fastest.

Gerard, might I use your pictures and text for my web site in my LGB track section? I would of course credit you. (if you check my home page at the bottom right (elmassian.com), you will notice the site is up to 12 million hits.

Regards, Greg
 
Bending them off with pliers is exactly how I do it too. Only takes a few seconds.
 
A point on reusing LGB joiners when you have taken out the original last sleeper..... the hole for the tail of the joiner is not the same as the other sleepers.
If you don't adjust the hole, then you risk not having the rail far enough into the joiner, and the joiner hits the first fastenings on the next set of rails, and the gap won't close up.
You could always just remove sleepers from the middle of the sleeper base set, and keep the original end ones in place.
 
Greg,
Be my guest and use the pictures.
Korm,
I never reuse the fishplates, the reason i remove them all is to exhange them with the 2 bold connectors made bij Massoth.
Those allways fit perfect and moreover they enable easy removal of just 1 piece of track without disturbing the rest of the track.
See picture attached.
 

Attachments

  • Massoth rail connectors.JPG
    Massoth rail connectors.JPG
    540.2 KB · Views: 1
Greg,
Be my guest and use the pictures.
Korm,
I never reuse the fishplates, the reason i remove them all is to exhange them with the 2 bold connectors made bij Massoth.
Those allways fit perfect and moreover they enable easy removal of just 1 piece of track without disturbing the rest of the track.
See picture attached.
Yes Massoth are the way to go, but you do need to remove the LGB, Piko, TL et all ones first.
 
Having scoured the internet, I came up with a couple of ideas, and believe this one is quicker for straight and curved rail, and the fishplate remains in tact, photos to explain:

First the track length with the fishplate and a short length of spare rail:


Inset to spare rail in the fishplate to be removed until it but upto the rail with the offending fishplate, then grip the fishplate in a bench vice, tight enough to hold, but not squeezed.


A sharp blow with a hammer on the end of the spare rail, and both rails will slide in the fishplate.


A second (or more depending on how hard you hit the rail, and the fishplate is all but off the track.


Track, rail and fishplate, with minimal damage to the track or fish plate.


This is a variation on a method I saw on the internet and was dubious if it would work, but it does, only removed 10 fishplates so far, but works every time. However for points (switches) Greg's method is the only one that will work.
 
I'm surprised the tie is not damaged from that. I can see that the tie is displaced/bent a bit downward, but no apparent damage to the "tie spikes" that fix the rail to the tie.

Interesting alternative method. I don't worry about destroying the joiner, the reason I am removing them is that they are inferior to rail clamps, and I have no wish to reuse them.

Greg
 
Back
Top