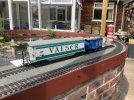
Some work on Mountains and a Concrete Viaduct plus other projects but not Boston Lodge

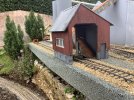
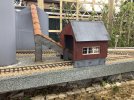
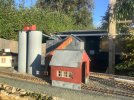
The post previous showing last Septembers work we saw the status of the Cement Works unloading plant. This has been completed. Plastic coated foamboard was cut and scribed for planking finish, sprayed brown with some light weathering. The roof is similar construction but had been completed but not finally fitted on my previous visit. Roof scribing dome to represent large sheets of some sort of roofing material. Both have also had small pins drilled in and gently knocked home for the last couple of mm or so to give a mechanical addition to joints. All bonding using my outside glue of choice, UHU Power. Windows from a Piko or Pola source. Small steel ALDI sourced brackets have been inserted to help retain the building in place.
IMG_7221.jpegIMG_7220.jpeg
 
The post previous showing last Septembers work we saw the status of the Cement Works unloading plant. This has been completed. Plastic coated foamboard was cut and scribed for planking finish, sprayed brown with some light weathering. The roof is similar construction but had been completed but not finally fitted on my previous visit. Roof scribing dome to represent large sheets of some sort of roofing material. Both have also had small pins drilled in and gently knocked home for the last couple of mm or so to give a mechanical addition to joints. All bonding using my outside glue of choice, UHU Power. Windows from a Piko or Pola source. Small steel ALDI sourced brackets have been inserted to help retain the building in place.
View attachment 313617View attachment 313618
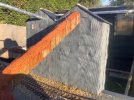
That corrugated iron looks suitably battered and rusty. Great bit of modelling, Jon

Rik
 
That corrugated iron looks suitably battered and rusty. Great bit of modelling, Jon

Rik
That corrugated iron looks suitably battered and rusty. Great bit of modelling, Jon

Rik
Yup that is what 6 months outside will do to straightened and left partly curved baked bean cans.
 
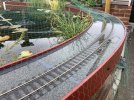
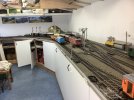
Back in May I posted the work carried out on the line, more work was carried out by me this September on my visit. But between Mike has been busy and his pond is now watered plus the loop this end connected to the main line thus doing away with the temporary loop in the Garage. Next loop to go will be the one in the smaller shed, time will tell if he gets round to that before my visit next year.

This time my main efforts were on the Hotel, some finishing up work on the Cement Works and a lot of faffing with Markway Points in the main shed, these things are a bit of a nightmare being predominantly made for G1 finescale thus giving back to back issues with LGB stock. All were happily sorted with judicious use of files and some cutting with a broken hack saw blade.

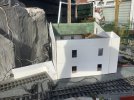
But first the Hotel. Last time it was just a wooden shell with the sides cut but no detail. In truth nothing more could be done till some more window frames were procured. These arrived between my visits and there are plenty left for some more buildings. First job was to cut out the window frame holes. A platform was also cut to fit to the rear of the Hotel where a siding is present for just 1 wagon at a time to deliver supplies. 5mm Plastic coated Foamboard has been used for all this as the building will be in full sun for much of the day. Note the cutouts for the sundry pond utilities tgat are hidden in part by the Hotel.
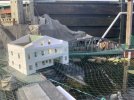
IMG_7571.jpegIMG_7572.jpeg
Here a start has been made on the rear goods facilities. There was also the issue of passenger access to the Hotel from the Station and the Door to the left was the early thinking of this thorny problem. Cant have punters walking the tracks, even in Switzerland.
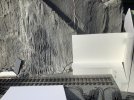
IMG_7573.jpeg
The roof was another issue, easily resolved with 4 roof tiles. Nit the most prototypical looking solution, but the lady of the house was happy so who is to disagree with that authority? By now window frames have been fitted, note the blanked out windows. Interior detail was not part of the specification, thankfully.
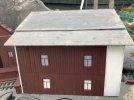
IMG_7575.jpeg
The rear good facility now in place, the construction on top is a supposed staircase from the Hotel to rech the stairs the ascend to the ruined Castle atop the hill. Doors added to the site for goods entry.
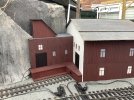
IMG_7576.jpeg
Here a Coop wagon delivering supplies to the completed Hotel with some detail on the platform.

IMG_7580.jpeg
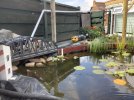
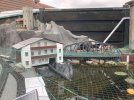
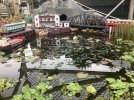
Some views of the completed Hotel and Pond area.
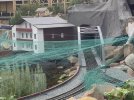
IMG_7577.jpegIMG_7579.jpegIMG_7574.jpeg
 
IMG_7591.jpegIMG_7590.jpegIMG_7589.jpegIMG_7588.jpegIMG_7587.jpegIMG_7586.jpegIMG_7585.jpegIMG_7581.jpegInevitable a few bits to tidy up, a beech to the front for instance and a way to hide that pipe. Inevitable we had a mini open day with local friends and members of the Watchet Station Volunteers present. The first picture of this group shows the effect of the heavy rainfall that affected the area including clising down the WSR for a day or so, now all forgotten with the events weather wise for those up North this weekend.

 
I have altered the title of this thread as it now includes other things I have done on this line over the years, but the Boston Lodge well not quite has its own thread.

So what has been occurring during my latest visit for two weeks up to last Friday?

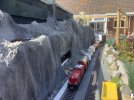
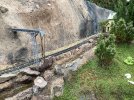
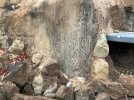
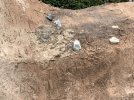
Well some of the mountains had suffered over Winter storms, in fact one part pretty well lost the equivalent of a shirt backs worth of concrete leaving a gaping great hole. Mike managed to get some cover on it in place ready for my repairs. Other parts had some smaller tears and small holes, in part created by birds pecking the concrete to sharpen their beaks and not helped by high winds on the coastline location. I never took pics of the damage so all you see here are the repaired item, the lady of the house complained on first application of the colour being too grey. In fact mountains come in all sorts of colours not just the pink that is preferred by the lady. But mix of cement with pink sand and sloppy later mixes with limited amounts of black concrete dye and heavy cement mix allow things to be blended in. The mountains closer to the rear of Boston Lodge are by preference more grey (as seen to the rear in the first pic) to reflect the Festioniogish look. The water bridge aqueduct had been completely pulled out, no doubt by cats and high winds. It is now well concreted in at both ends.
IMG_7970.jpeg
IMG_7971.jpeg
In the pic below (middle left) a trashed Garden ‘Stone Effect’ Light has been incorporated into the mountain as a planter after the electrics taken out and put into the recycling bag. More have been used elsewhere, I hate waste of materials!
IMG_7969.jpeg
Next up will be the Oil Depot constructed during my ‘holiday’.
 
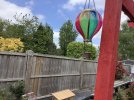
Before I get further I must share this. A mini (solar) Hot Air Balloon bought in Williton. My pal has 3 and the effect of the fake flame is superb at night. A little small for our scale, but a 1:32 or 1:48 figure would look good in the basket. At 9.99 I thought one well worth a punt. They do postal service as well. J Gliddon in Bank Street just by where you bear left in Williton for Minehead.
Mike’s 3 at night.
IMG_7575.jpeg
My one in place.
IMG_7987.jpeg

 
Before I get further I must share this. A mini (solar) Hot Air Balloon bought in Williton. My pal has 3 and the effect of the fake flame is superb at night. A little small for our scale, but a 1:32 or 1:48 figure would look good in the basket. At 9.99 I thought one well worth a punt. They do postal service as well. J Gliddon in Bank Street just by where you bear left in Williton for Minehead.
Mike’s 3 at night.
View attachment 327522
My one in place.
View attachment 327521

Not a problem with the size, you just have to imagine it being high up!
 
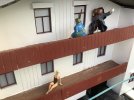
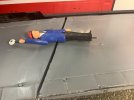
Been in Somerset these last 3 weeks doing odd jobs and enjoying another open day. A quick look at one that bugged me. I hate plastic figure stood on concrete like or other plastic blocks. Thus before the open day I attacked a few figures. The plastic is cut off with a saw blade, then leg drilled in with a drill slightly smaller than a small nail. Veneer pins are ideal. The head is cut off the pin and is then gently pressed into place with glue of choice, I tend to use UHU Power. A few holes are drilled in platforms or baseboards where you want the figures. Outside I tend to leave the nails longer so that figures can be planted in rockery plants, also works with sheep/cows etc. Figures can then be moved about to ring the changes.
IMG_8178.jpegIMG_8177.jpeg
 
Love the concrete mountains, I'm doing something similar using acrylic house render and cement construction grout for cuttings.
The nail idea is a good one I might pinch it for my sheep flock that keep get blown over by the wind.
 
Love the concrete mountains, I'm doing something similar using acrylic house render and cement construction grout for cuttings.
The nail idea is a good one I might pinch it for my sheep flock that keep get blown over by the wind.
Yes we had some sheep suffering the same and I did them plus a farmer with his dog. Sadly no direct picture but one may appear later of them in situ rather than their falling over state that was the norm till I did them ( with longer nails as they are in planting) when I talk about other jobs and the open day we had.
 
That is a great looking railway you have been building with your mate, sounds like a nice working holiday you get to have. I will be taking a different approach to mountains, using rocks but it is great to see the techniques you have used with the colouring of cement. I will be trying that on any cement joins between rocks. the planting is very effective , have just gotten some babies tears to use. Does it die back in direct sun?
 
That is a great looking railway you have been building with your mate, sounds like a nice working holiday you get to have. I will be taking a different approach to mountains, using rocks but it is great to see the techniques you have used with the colouring of cement. I will be trying that on any cement joins between rocks. the planting is very effective , have just gotten some babies tears to use. Does it die back in direct sun?
It can die back a little if in poor soil, but worst thing is winter frost that can cause big die back ….. but it always returns for both of our gardens and did in my other gardens. I tend to get it established and spreading in a shaded area then replant to where needed.
 
It can die back a little if in poor soil, but worst thing is winter frost that can cause big die back ….. but it always returns for both of our gardens and did in my other gardens. I tend to get it established and spreading in a shaded area then replant to where needed.
thankyou i will keep it in mind we do get frosts down here
 
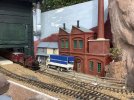
Last year I did some work on the Cement Works, I was asked to clad the rear building with corrugated tin but ran out of time or enthusiasm. So this year it was one of my first jobs, much chopping (using tin snips and protective garden gloves) of baked bean tins to get right sized ‘sheet’ looking pieces. Also some windows to be added that made things interesting whilst adding the tin sheets. Windows were either Piko or Pola ones bought as accessory packs. I usually spray inside where they will be black and glaze them so that nothing much is visible, much better then cutting out the rear to have daylight or greenery showing through. Fortunately the initial construction of wood and plastic from plastic sofit board was removable so that I could do the job out of the rain that appeared quite frequently this visit. Sheets nailed in place sing small headed steel nails around 20mm long. Once completed I masked the windows, sprayed matt grey then put back in place. As the tin was already rusty by my next visit it should look much like the overhead conveyor that joins it by my next visit. That pretty well completes the cement works though the shiny pipe offends somewhat. Perhaps some serious attack with emery may remove the shininess and allow rust to form. Or perhaps the casey jones snr casey jones snr rust treatment may be used. Oh forgot a roof added using plastic coated foamboard, I scribe this to give appearance of 8x4ft sheet roofing, sprayed matt grey with an overspray of matt black nailed in place with same nails as used for the corrugated tin sheets.
IMG_8157.jpegIMG_8156.jpeg
 
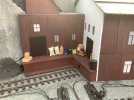
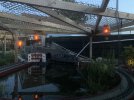
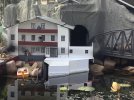
Next job was the Hotel, the front had a partial beech put in by Mike since my last visit. But there was still a lot of pipework and liner showing. Covering all that would prove to be a tricky brain pummelling job. Post 24 has pictures of where things were left last year. First up much cutting, testing and cutting again to get an even flat sitting area that sat right in the water and was level in all planes, tricky never do jobs for an engineer! We are pretty well here now with the small building to the left hiding pipes to the rear of it. I had to be quite inventive to keep this in place, a flat to the bottom slides into some glued on plastic coated foamboard at the rear with an extra piece sticking out at the height of the base. The decking was scribed in 10mm separation to represent wood.
IMG_8158.jpeg
Finished after much hassle and effort. Still it looks the piece even if slightly wonky, we had problems later with a cat. Not the resident one but an interloper that decided the area was a good resting place and possibly ideal for fishing! Solution some thin wood with nails sticking through sat on the deck between running sessions. There are lots of anti cat measures around the place to discourage visiting cats, not all succesful.
IMG_8168.jpeg
 
Finished after much hassle and effort. Still it looks the piece even if slightly wonky, we had problems later with a cat. Not the resident one but an interloper that decided the area was a good resting place and possibly ideal for fishing! Solution some thin wood with nails sticking through sat on the deck between running sessions. There are lots of anti cat measures around the place to discourage visiting cats, not all succesful.
View attachment 333684
A fisher will take care of kitty >:)
1728319538292.png
Fortunately for this kitty, fishers are North American woozles.
 
Back
Top