That is kind of what I am thinking, someone will be able to tell me I am sure. Just wondered though why it should have all gone belly up?the cv "inverce" sould be "invert" or "inverse"... (although maybe that is how you spell inverse)
In any case it is related to the polarity of the signal from the sensor to the chip... leave it set so you get the 1 chuff per revolution, that means the "trigger logic" is proper.
There will be another CV for chuffs per revolution.
Greg
You are using an out of date browser. It may not display this or other websites correctly.
You should upgrade or use an alternative browser.
You should upgrade or use an alternative browser.
Trainline Mallett an early Black one ref 2011002 not Zimo but had an onboard LGB plug in, now Batteryfied with LBG XlS
- Thread starter dunnyrail
- Start date
Greg Elmassian
Guest
Accidental reset? Cosmic rays (no really!)
I've decoders "lose" a setting before.
Greg
I've decoders "lose" a setting before.
Greg
Possibly even Witchcraft, I have been told that I have ‘Powers’, mostly related to Static it must be said! As for this beast I have managed to track down the UK Manual but only the ‘Zimo’ Decoder one but with no CV’s but that is of no consequence.Accidental reset? Cosmic rays (no really!)
I've decoders "lose" a setting before.
Greg
I need the CV register in English for the Massoth Massoth XLII PluG Decoder.
This is what I found.
This says Zimo Decoder but the very early or slightly cheaper ones were supplied with a Massoth Decoder. It is these Massoth CV’s that I am looking for.
Have been looking at the Massoth site and finding it impossible to find a Download for this stating CV Values in English. Also looks like I may need CV’s for the 8204000 Sound Module as well if there are any. Have Massoth updated their site to remove the Download Centre?That looks like a Massoth XLII PluG driving decoder and does not have any sound capability. Sounds would be handled by a sound module over the SUSI interface.
D
Deleted member 4232
Guest
Moved
Last edited by a moderator:
Sorry John that is in German and does not have the CV Values. Gone all through the Google Download you kindly linked me.Hmm...post 36... original Manual as supplied in German, converted to English, all the CV's are listed for both Massoth PluG decoders.
Edit have found the Chip CV Values in English. Now need to Print out the Pages I need to see if I can make any headway on this.
Though I think I may need the same for the 820400 as well. Changing the link on the line above did not work! Oh dear isn’t the net fun!
Last edited:
D
Deleted member 4232
Guest
Moved
Last edited by a moderator:
Thanks John that is the one, will need to look at this on my iMac as I cannot save it to the iPad. No matter will print the pages I need and hopefully get to the bottom of the problem.Oops my bad, did say at the time was in a rush, try this...uploaded the correct translated documents............
HSB – Google Drive
drive.google.com
I have got going again with this beast hence the change in Title. I decided to take the plunge as this has been a not working machine for far too long. So a New Chip has been obtained, thanks Muns. Fitted and working ok but zero Battery life. In the time the supplied batteries had thrown a wobbler, well I know I should have charged them on receipt but as this went on and on with the testing use of power things went bad and the batteries would not take charge. We had a look at them and my scientific mate suggested that we go for the nuclear option of trying to bash some charge in them with a big car charger. Whilst this did not cause an explosion it did create some fizzling which turned out to be the batteries in the 4 side which were trashed. The 8 were ok and have been wired up with 4 new ones so all is well. Thus I have been able to progress to a working loco, chuffs and all. Then comes the ikky bit stuffing it all back inside the boiler. This as ever proved to be somewhat tricky and the main problem was the front 4 batteries (yes them again) striking on the ridge inside the main boiler part. Once this was established (Well you can hardy pop inside there to have a look) it all went in quite well and still worked too.
Below you can see my patented plasticard overlay to stop the Battery being effected by the pivot screw, sadly this lifted the Battery a little too high to fit so had to be discarded. Shame as it was a good routing guide for wires. The pesky grey plug is the link to the Hall Sensor that was the need to get a new chip, in spite of all the kind suggestions I was just unsure as to how to get this working again. But with a little CV manipulation at a scale 20kph I get a satisfying amount of chuffs that works for me. Oh another point if you take one of these apart seeing that big screw. The weights that fit where the screws are have differing lengths front to back so mark them when you take them out. I noted this, before putting things back together put some white sticky paper on them to note the front before returning them in place.
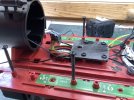
Things get quite messy up rear with the linkage to switches, charging socket and battery to contend with. Still at least with little effort I was able to get the main for and aft lights working. I have left the wheel and cab lights non working.
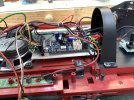
I have screwed the volume pot inside the cab as well as the fuse, these will hopefully not be too apparent once a driver and fireman are in place. The switch on the right is the battery on.off. The slider decides whether the loco is Battery (right) or being programmed (left) via the socket just below to the left. I have a plug with crock clips that connects to my Prog Track. Ok I could have used the slider to change between Track Power or Battery, but I like to remove all pickups as they are ugly and do cause a small amount of drag to effect battery life.
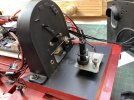
This pic shows where the joined 8 and 4 pack batteries get stuffed into the all suffering machine. The foam was left out at the final push. Left just behind the firebox front can be seen the Fosworks DCC Rx, the beating heart on a Battery DCC conversion.
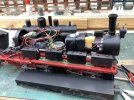
Next up now she is working will be a backdating job to 1981 condition, 99 5902 is a very different looking engine to the current 5901 that is came in with the detail that pretty well exists at the current date.
Below you can see my patented plasticard overlay to stop the Battery being effected by the pivot screw, sadly this lifted the Battery a little too high to fit so had to be discarded. Shame as it was a good routing guide for wires. The pesky grey plug is the link to the Hall Sensor that was the need to get a new chip, in spite of all the kind suggestions I was just unsure as to how to get this working again. But with a little CV manipulation at a scale 20kph I get a satisfying amount of chuffs that works for me. Oh another point if you take one of these apart seeing that big screw. The weights that fit where the screws are have differing lengths front to back so mark them when you take them out. I noted this, before putting things back together put some white sticky paper on them to note the front before returning them in place.

Things get quite messy up rear with the linkage to switches, charging socket and battery to contend with. Still at least with little effort I was able to get the main for and aft lights working. I have left the wheel and cab lights non working.

I have screwed the volume pot inside the cab as well as the fuse, these will hopefully not be too apparent once a driver and fireman are in place. The switch on the right is the battery on.off. The slider decides whether the loco is Battery (right) or being programmed (left) via the socket just below to the left. I have a plug with crock clips that connects to my Prog Track. Ok I could have used the slider to change between Track Power or Battery, but I like to remove all pickups as they are ugly and do cause a small amount of drag to effect battery life.

This pic shows where the joined 8 and 4 pack batteries get stuffed into the all suffering machine. The foam was left out at the final push. Left just behind the firebox front can be seen the Fosworks DCC Rx, the beating heart on a Battery DCC conversion.

Next up now she is working will be a backdating job to 1981 condition, 99 5902 is a very different looking engine to the current 5901 that is came in with the detail that pretty well exists at the current date.
Have been working this week on the backdating project. This has resulted in much observation of Phots of 99 5902. What is apparent from much of this is that the beast has changed much over it’s 90 odd year life. Many pictures do not give dates which makes things a little tricky when trying to replicate the 1981 condition. All the same class do reflect many detail differences as well. 5902 spent 3 months at Gorlitz works in 1975 and again in 1981 arriving not long after I saw her in February 1981 so pictures of this date are very valuable to me as who knows what changes occurred during these visits to trap the intrepid phot viewer? Still one side is pretty well covered by my own picture as below.
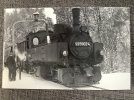
What was clear from this picture and another not too good was that the Tank and Box detail on the original in these 2 pictures was not required. The second of these shows the Bell in original position well wrong for my period.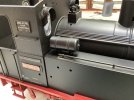
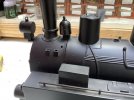
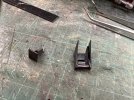
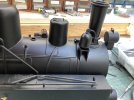 The Bell has been mounted on supports and turned, a bit of a deal breaker on this project as the pop in is used to couple up the Smokebox and Boiler. That was done with some plasticard as shown above.
Below I have started the process of replacing Pipe Runs and sundry mods to the TL bits. The 3 pipe run from the cab has been reduced to one with other lines replicating the varying runs in days gone by. I would have dearly loved to remove all of the original moulded pipe runs, but that is definitely a step too far as I found out with another of my projects.
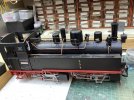
The thick pipe going over the boiler seen below was a thick piece of copper wire from some serious mains wire, this has been wrapped with very fine varnished wire the sort used in Motor Windings of which I have a reel obtained from who knows where? The Tank on top of the cab was made from some small plumbing pipe with soldered brass ends held in place by the wire that runs under the cab roof just bent over. A couple if my trusty reference pictures ftom 1981 can be seen in front of the very model of herself. I never would have thought when taking those pictures that I would model the complete line in it’s operational self in the future. Had I have had such dreams I would have been taking man many more detail pictures of the 3 locomotives that I saw that day.
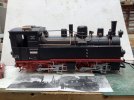
Finally a tease for the next post showing the box of bits and bobs that was rummaged through for some more metal bashing detail. I also think that I will need a reprint of the number plates.
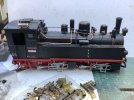

What was clear from this picture and another not too good was that the Tank and Box detail on the original in these 2 pictures was not required. The second of these shows the Bell in original position well wrong for my period.


 The Bell has been mounted on supports and turned, a bit of a deal breaker on this project as the pop in is used to couple up the Smokebox and Boiler. That was done with some plasticard as shown above.
Below I have started the process of replacing Pipe Runs and sundry mods to the TL bits. The 3 pipe run from the cab has been reduced to one with other lines replicating the varying runs in days gone by. I would have dearly loved to remove all of the original moulded pipe runs, but that is definitely a step too far as I found out with another of my projects.

The thick pipe going over the boiler seen below was a thick piece of copper wire from some serious mains wire, this has been wrapped with very fine varnished wire the sort used in Motor Windings of which I have a reel obtained from who knows where? The Tank on top of the cab was made from some small plumbing pipe with soldered brass ends held in place by the wire that runs under the cab roof just bent over. A couple if my trusty reference pictures ftom 1981 can be seen in front of the very model of herself. I never would have thought when taking those pictures that I would model the complete line in it’s operational self in the future. Had I have had such dreams I would have been taking man many more detail pictures of the 3 locomotives that I saw that day.

Finally a tease for the next post showing the box of bits and bobs that was rummaged through for some more metal bashing detail. I also think that I will need a reprint of the number plates.

This post will show what I have been up to on the ends. Not much has happened behind the Cab except for a Coupling. TL provide one but it is only held in place by weak preasure and both ends had disappeared. Peversly the Hook and Coupling on the rear were the wrong way round, should be different at front and back and as the Pics show looking at the engine or bunker Coupling should be to the right and the Hook only to the Left.
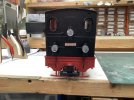
The front however is a different matter altogether workwise, there is some sort of what I can only think is a Steam Heat Ground connection for overnight Carriage Warming front left. I have pictures if it hanging on the ground at Gernrode Shed. Also the wire runs for the lights and of course the coupling. Oh and there is what I believe to be a Washout Plug under the Smokebox.
First up that warming gear, a nice complex soldering job to get all the bits together. Some small Heat Shrink nicely makes it look like a Rubber Pipe.
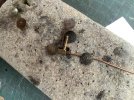
You can see what I was attempting a little better on this pic.
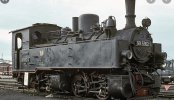
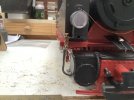
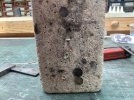
Also seen above is the Washout plug with some nice dangly chain, made up from differing sizes of KS tube, the wider bit being very short and some old Jewelry Chain. Could be Silver, it soldered well. Plus a bit of mains wire soldered across for the opening handle.
Couplings were made up from even more mains wire, some 8BA Nuts and a Screw Thread. Well not quite 8BA, some kind of non standard thread but suitably close to work for size. The nuts were filed flat and soldered between the wire bends whikst on the Plastic Hook, note I used a pair of sprung gripping Pliers to act as a heat shrink for the plastic/metal interface whilst soldering. Another spot of wire made the adjusting handle. It would have all worked had I wanted it to, but I hafixed up the thread in case movement in Traffic caused loss of the parts.
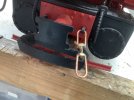
The lighting runs are some very fine Brass Wire, think it was from stripped mains multi core wire. You will see the rest ifvthis construction when I post the other side.
Below you can see the completed front end.
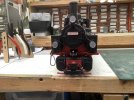
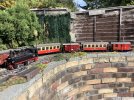
The loco in all its constructional glory was run yesterday completing the Timetable in good order so I am happy my Battery faffing has stood the test of time.

The front however is a different matter altogether workwise, there is some sort of what I can only think is a Steam Heat Ground connection for overnight Carriage Warming front left. I have pictures if it hanging on the ground at Gernrode Shed. Also the wire runs for the lights and of course the coupling. Oh and there is what I believe to be a Washout Plug under the Smokebox.
First up that warming gear, a nice complex soldering job to get all the bits together. Some small Heat Shrink nicely makes it look like a Rubber Pipe.

You can see what I was attempting a little better on this pic.


Also seen above is the Washout plug with some nice dangly chain, made up from differing sizes of KS tube, the wider bit being very short and some old Jewelry Chain. Could be Silver, it soldered well. Plus a bit of mains wire soldered across for the opening handle.
Couplings were made up from even more mains wire, some 8BA Nuts and a Screw Thread. Well not quite 8BA, some kind of non standard thread but suitably close to work for size. The nuts were filed flat and soldered between the wire bends whikst on the Plastic Hook, note I used a pair of sprung gripping Pliers to act as a heat shrink for the plastic/metal interface whilst soldering. Another spot of wire made the adjusting handle. It would have all worked had I wanted it to, but I hafixed up the thread in case movement in Traffic caused loss of the parts.

The lighting runs are some very fine Brass Wire, think it was from stripped mains multi core wire. You will see the rest ifvthis construction when I post the other side.
Below you can see the completed front end.

The loco in all its constructional glory was run yesterday completing the Timetable in good order so I am happy my Battery faffing has stood the test of time.
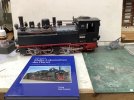
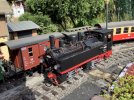
So you have seen one side, front and rear now the other side. No further work carried out as yet, though she had a good running day last Saturday clocking up 4 hours worth of Battery Use. Not much to say other than lots more mains wire for pipe runs. The Electric Generator just below the Chimney had some short tube added to join a pipe run from the cab, this would be the Steam that would be turned on and off to power the generator. Also shown with one of my book inspirations.
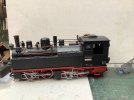
So now just waiting for the metalwork to be painted matt black and a weathering job to soften down that garish red below the footplate.


So now just waiting for the metalwork to be painted matt black and a weathering job to soften down that garish red below the footplate.
penylanpip
Registered
A great deal of work gone into that, Jon, changing a toy into a model of the real thing.
That's an awful lot of 'leccy wiring runs - for a steam powered loco!
But then (as did Mr Bulleid) they do try to make working life a little better for the crew.
That's an awful lot of 'leccy wiring runs - for a steam powered loco!
But then (as did Mr Bulleid) they do try to make working life a little better for the crew.
Thanks Philip, a lot of them are Steam Pipes as well. You can rest assured that the Kiss one will not and does not need the same treatment.A great deal of work gone into that, Jon, changing a toy into a model of the real thing.
That's an awful lot of 'leccy wiring runs - for a steam powered loco!
But then (as did Mr Bulleid) they do try to make working life a little better for the crew.
