Rhinochugger
Retired Oik
Total cost - yes, I did spend something - £1.98 for two rattle cans of primer from QD.
So the Mikado was free, then

Total cost - yes, I did spend something - £1.98 for two rattle cans of primer from QD.
Thass royte Ryno. Our got free on em.So the Mikado was free, then
")
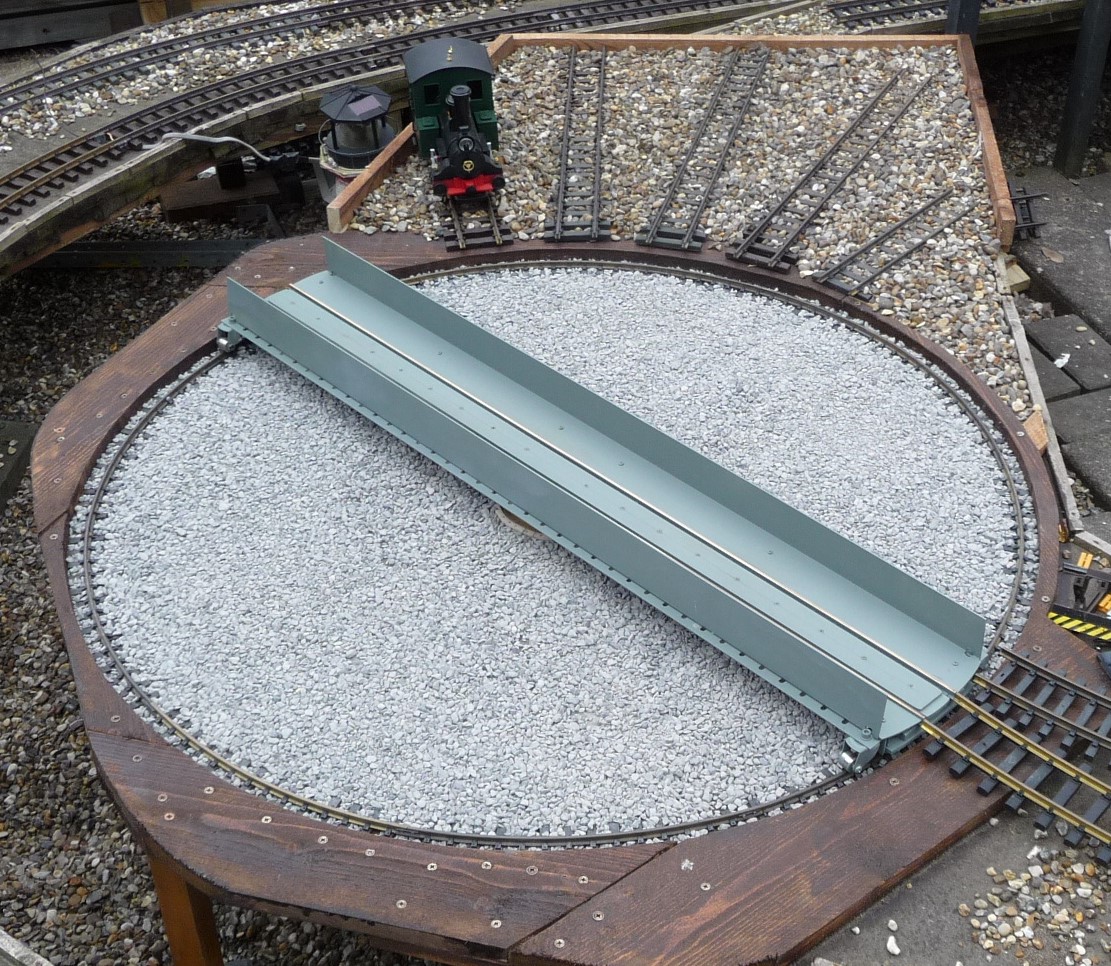
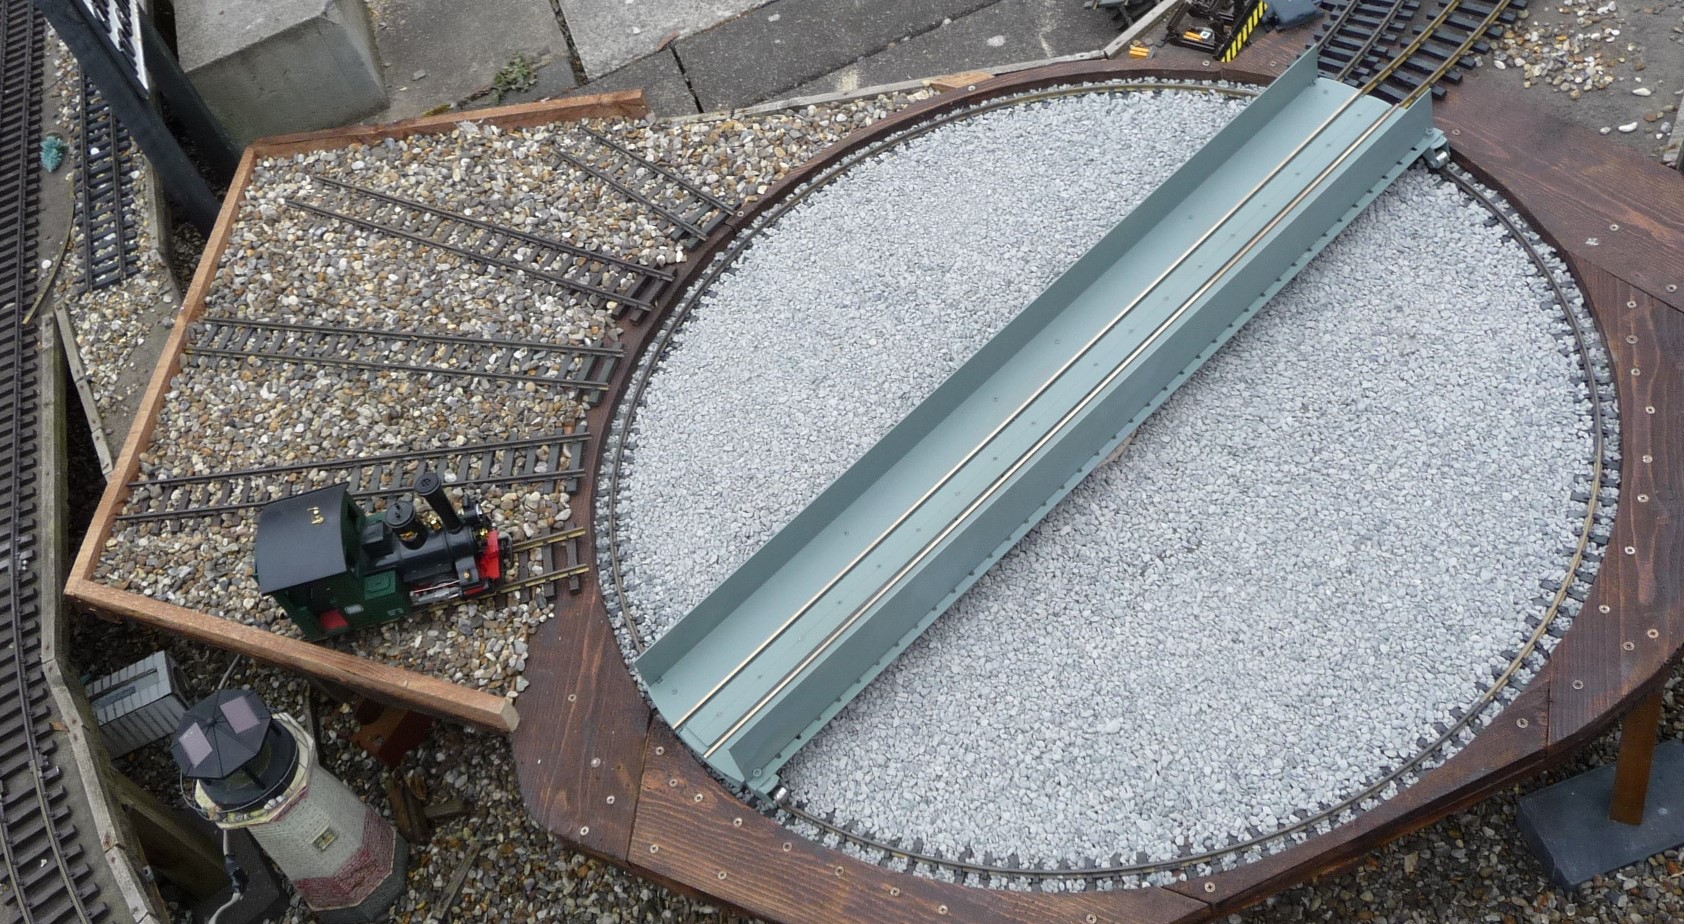
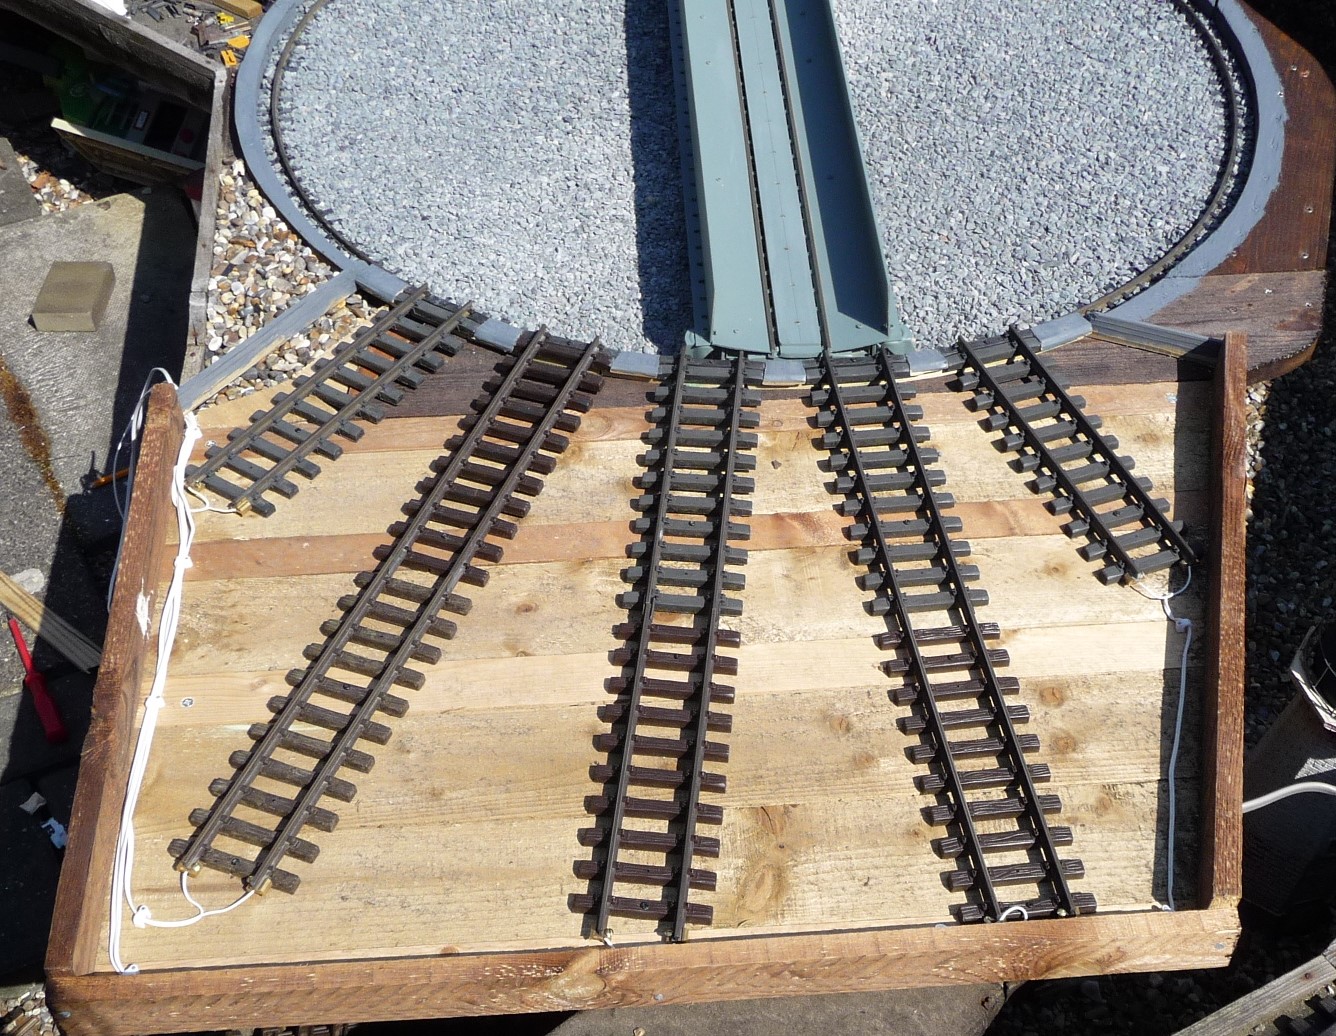
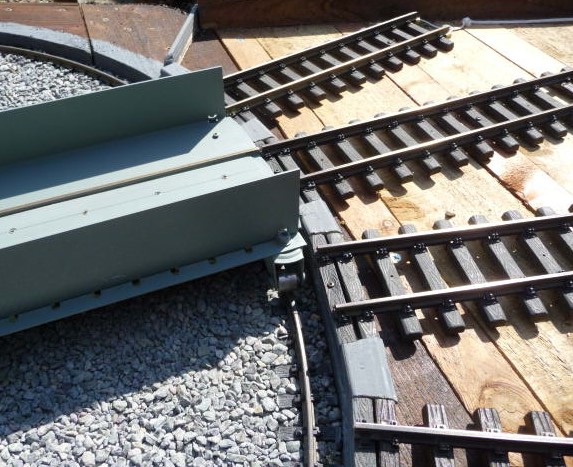
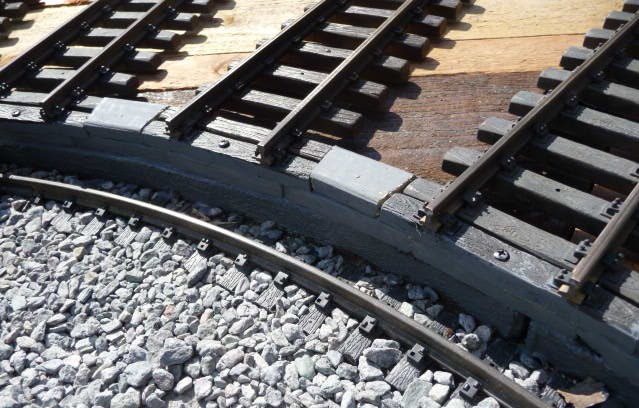
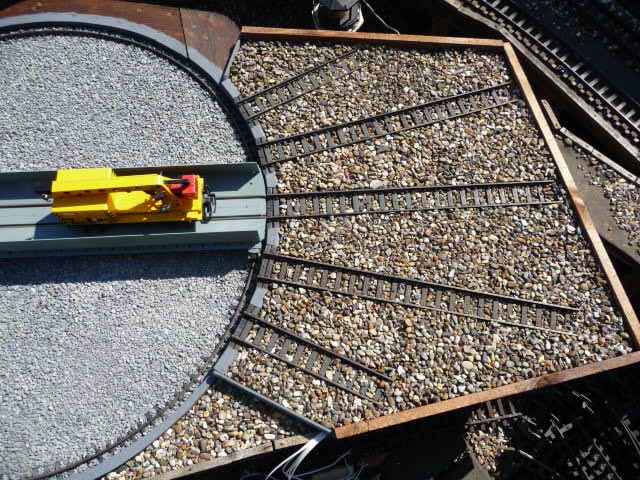
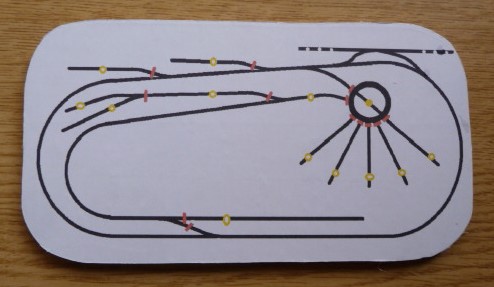
Wot showersManaged a couple of hours work in between the showers today. All feeds to stabling tracks in place and tested. My soldering skills are abysmal so to ensure a good connection every wire is clamped. I found a bag full of Massoth rail clamps which I'd forgotten about. Out came the angle grinder and I chopped a load in half. The fit nicely on the protruding rail at the end of the tracks. Cables clips hold the feed wires in place. Small slices of wood used to ensure rail height is compatible with the turntable deck. Used a Matra crane wagon to check alignment (no particular reason, it just happened to be the closest bit of rolling stock to hand). It's not perfectly flat - a small jolt is noticeable when traversing the 'gap'. The Railway Inspectorate gave it the once over. Verdict was 'passable with care and restricted speed'. As it's not on the mainline and locos will only be moving at a crawl, that's good enough for me. PW department ballasted the track area and all is good to go but I must remember to install some sort of 'stop blocks'. Next job was to tackle the entrance roads. Only one completed as it suddenly became a little moist. Rain stopped play but all things being equal I'll be back tomorrow.

Rain and sleet at the edge of nowhere. SWMBO went to Wroxham and got caught in a hailstorm.Wot showers
You have made a good job of a tricky thing to get right.Rain and sleet at the edge of nowhere. SWMBO went to Wroxham and got caught in a hailstorm.
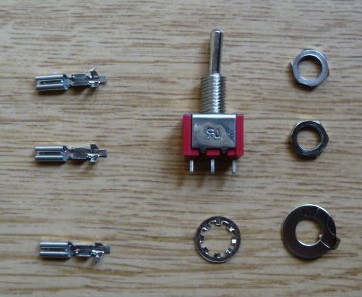
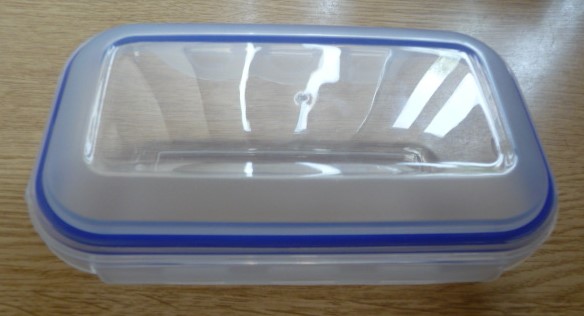
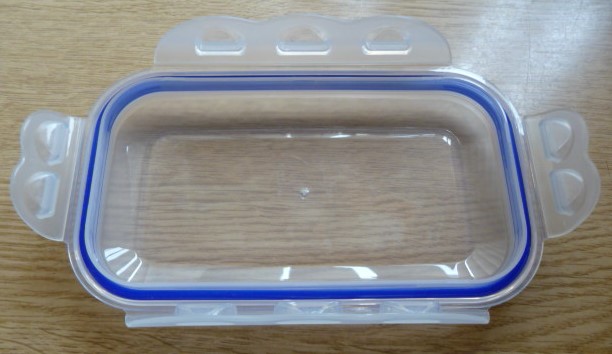
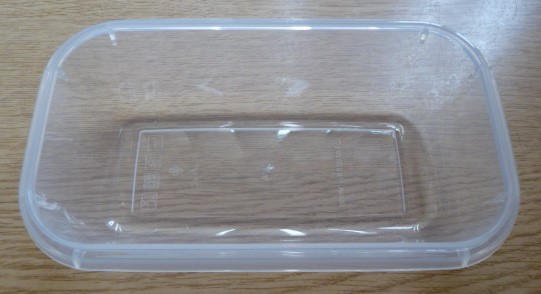
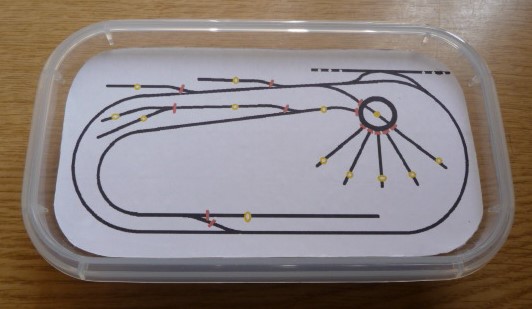
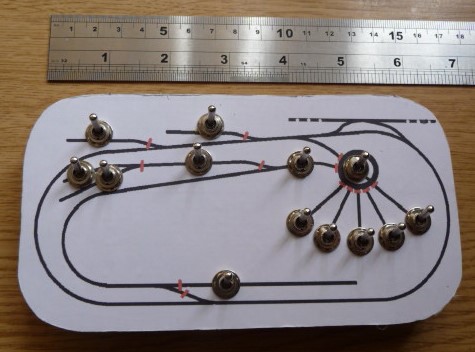

Possibly a bit late for some of it, that box will be of unknown providence for UV. Well worthwhile to spray with Matt Black to act as protection (oh dear more possible cost).Rain stopped play so activities undertaken indoors. Time to make a start on wiring up the trackwork for the loco stabling. The continuous oval will be permanently track-powered but I worked out I would need 13 independent sections so turned to eBay for some small toggle switches. Couldn't find any at what I thought was a decent price so tried Amazon instead. Sourced a 20 pack for a little under £9 and some 2.8mm female (spade type) plugs for £6. Next obstacle was how to keep all the electrics dry. Found a small resealable sandwich box in Home Bargains for £1.50 which looked like it would fit the bill. When I got home I filled it with water, put the lid back on and left it upside down in a bowl all night. No leaks, so I thought it water can't get out there's a fair chance it can't get in either - so problem solved. Cut a small piece of ply on which to mount the switches over a track diagram. Printed out the graphics and attached to the ply with double sided carpet tape. Holes drilled and the miniature SPDT toggles switches installed. In order for the board to sit at a level that would give room for all the cabling and connectors underneath and let the toggles be clear of the lid when replaced I am using Plasplugs connector blocks as spacers. I appear to have been somewhat reckless with money for this stage of the project, having parted with nearly a score, but in view of the savings made so far I though 'hang the expense'. That's it for today - wiring up tomorrow (weather permitting).
I haven't selected it's final resting place yet Jon, but the probable location will be sheltered meaning never in direct sunlight and unlikely to get wet from rain etc. I was more concerned with damp from the atmosphere corroding the switch contacts. The sea mists we get here soak everything whether it's under cover or not. I've got some of those little bags of silica gel somewhere (the sort that you get in boxed electrical goods) so I might bung a couple of those in, under the switchboard.Possibly a bit late for some of it, that box will be of unknown providence for UV. Well worthwhile to spray with Matt Black to act as protection (oh dear more possible cost).
Aha in that case a drop of Silicone round where the wires go in may help keep that Sea Mist Out.I haven't selected it's final resting place yet Jon, but the probable location will be sheltered meaning never in direct sunlight and unlikely to get wet from rain etc. I was more concerned with damp from the atmosphere corroding the switch contacts. The sea mists we get here soak everything whether it's under cover or not. I've got some of those little bags of silica gel somewhere (the sort that you get in boxed electrical goods) so I might bung a couple of those in, under the switchboard.
Who missed out what?Sea Mist Out.
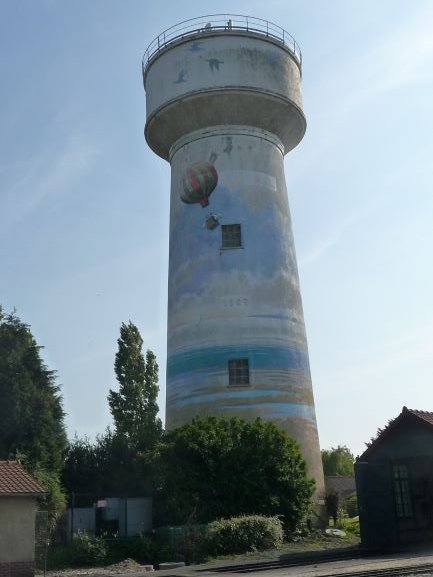

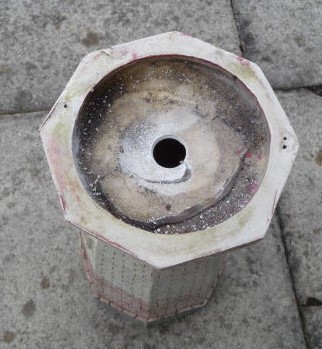

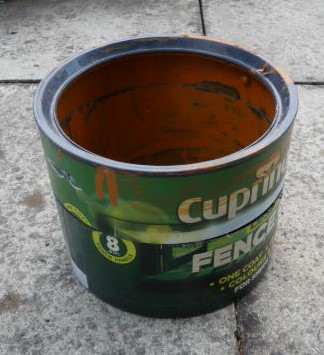
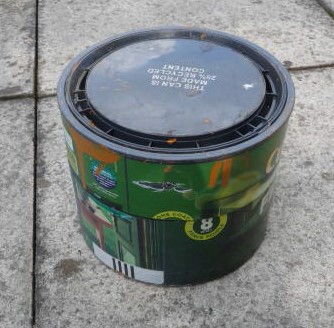
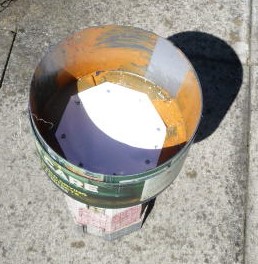

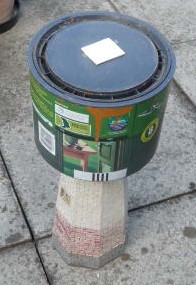
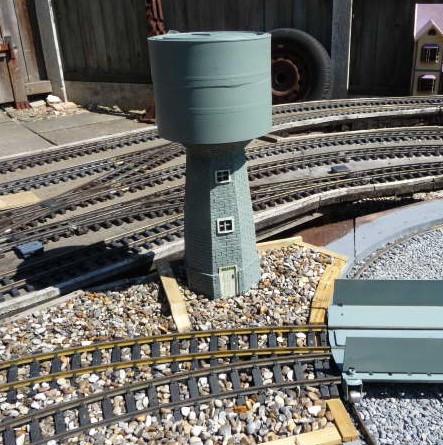
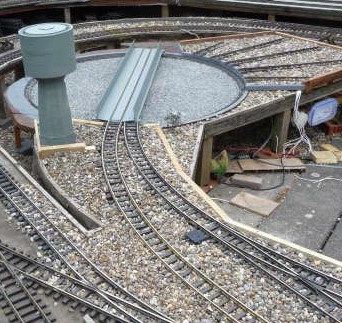
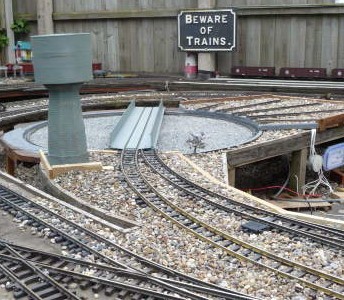
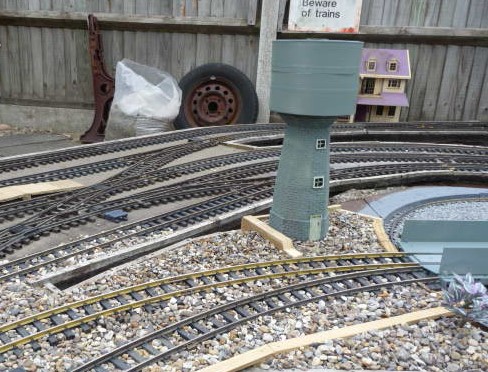
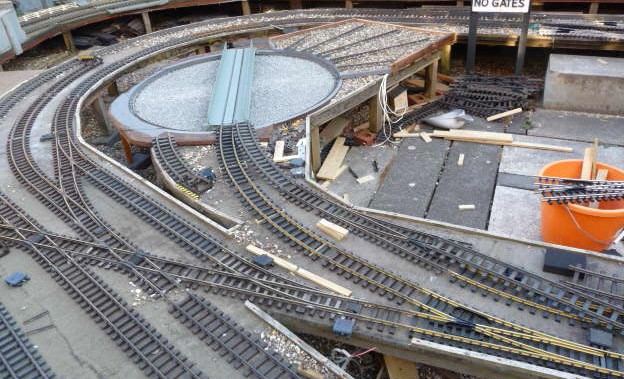
Hm looks likes you have similar idea’s to where I was going. My Lighthouse has gone belly up as well so been planning on a similar theme. That Water Tower at Le Crotoy is indeed a wonderful piece of Architecture so perhaps it had been worrying in my mind as well. Anyhow here is what I have been toying with the marriage of a BnM Light House and inevitably a Bonio Tin.Weather somewhat inclement this morning as I tried to hook up the wiring. Whilst pulling about under the baseboard had to move the (now) non-functioning lighthouse and an empty Cuprinol tub. Then it started to rain again so retreated indoors, but not before taking the the garden ornament and plastic pot with me - a seed of an idea had been sown involving another money-saving production. What does a loco servicing facility require? Water and coal must be top of the list. On my frequent visits to France I was always rather taken by the water tower at Le Crotoy on the Chemin de Fer de la Baie de Somme. Lo and behold I had the raw ingredients of such an item in front of me. Being of light resin construction the lighthouse was always blowing over in the high winds so I thought if this is going to be used it needs to be more stable. I removed the light and railings and drllled a large hole in the top. I then filled the 'tower' with pea shingle which will make it immoveable in all but hurricane force gusts. The plastic tub was much too tall so I sliced it into three pieces - using the centre segment as a stiffening ring inside the other bits. I made a template of the platform at the top of the tower and placed it inside the centre of what was going to be the bottom of the tank and carefully drilled eight holes to take small self-tapping screws to fix the two together. The top of the tub (complete with lid) was slid down to mate up with the lower portion. The side of the tank was then wrapped with Gaffer tape to provide a more acceptable finish The whole thing was sprayed with matt grey primer and the window and door details picked out in appropriate colours. The scale is considerably smaller than my standard 1/24th so to disguise the undersize door I painted the lintel with black and yellow hazard marking ensuring anyone venturing inside would remember to duck. A small square of plasticard has been glued centrally on the tank top to represent an access hatch. Once placed in a suitable location next to the turntable it seemed to blend in well. As the weather had improved a little a visit from the ballast train transformed the turntable throat into a more pleasing scene. The forecast for the next few days is cold and wet so perhaps a coaling stage is in the offing if I can locate enough junk to cobble together.

On reflection Jon I much prefer your circular lighthouse base to my octagonal QD variant. That Bonio tin would look very much at home atop a stone built plinth.Hm looks likes you have similar idea’s to where I was going. My Lighthouse has gone belly up as well so been planning on a similar theme. That Water Tower at Le Crotoy is indeed a wonderful piece of Architecture so perhaps it had been worrying in my mind as well. Anyhow here is what I have been toying with the marriage of a BnM Light House and inevitably a Bonio Tin.View attachment 251645