You are using an out of date browser. It may not display this or other websites correctly.
You should upgrade or use an alternative browser.
You should upgrade or use an alternative browser.
W&L Coach Partial Kit Build
- Thread starter jimmielx
- Start date
Thanks Paul. Agreed, painting panelling after assembly is no fun - I did it once too!Brilliant. I found out the hard way that painting panels after assembly is not the easy route!
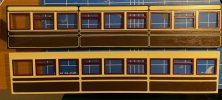
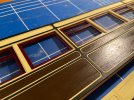
Noticeably the RTR Accucraft versions of these coaches have a very much simpler colour scheme without any of the panelling picked out - doubtless cheaper to manufacture. Maybe that was prototypical at one time, but the on the repro coaches currently running the fully picked out panelling looks really lovely, so I’m giving it a go. But nothing about panelling has proved easy - it’s taken me two evenings just to get the top layer glued on!
Last edited:
… and here’s the result of another evening’s work. Ends now fully panelled.
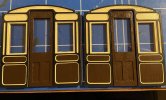
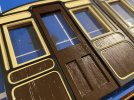
I will add some details to the ends before assembly as that is easier done now too I think. Also annoyingly I have forgotten to paint the inside of the door frame around the glazing - you can see some bare wood, so I’m going to add some sort of window around the door glazing to mask that.
Here’s a sense by of how the sides and ends will look when joined - a little fill on the panelling will be needed.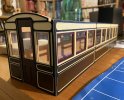

After a couple of weeks away from building the coach I've started work on it once more. I've now joined the sides, ends and body together and added the seating. The seating is entirely from the kit - as most bits will be from here on.
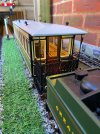
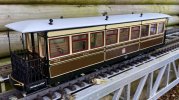
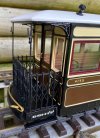
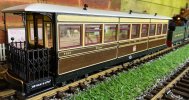
Here are some pictures of it on the track.
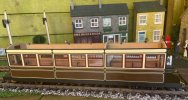
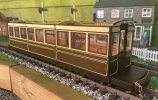
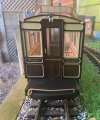
And some interior pictures where you can see the seats installed and the lights which I've just added.
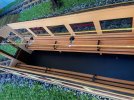
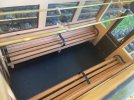
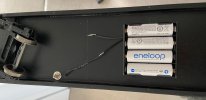
The lights are 5v LEDs, wide angle, warm white, powered by 4x rechargeable AAs (so 4.8v supply). I'm still on a quest to find my ideal battery powered coach lighting - will see how these look...
The batteries are housed under the frame along with a switch. LEDs are connected to a pair of brass conductor rails at the top of the coach. LEDs currently have a blob of liquid electrical tape on them to limit light leak from the top, but I may still have to do something to prevent the resin roof from glowing - will see how translucent it remains after painting.
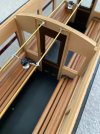
And finally a couple of pictures with the roof placed on top. It isn't painted yet and is slightly bowed so will need glueing down - which means I'll have to people the coach before it can be properly finished. So plenty left to do. I'm onto the end railings next once they are dry, then some of the under frame detail - not all as my battery box gets in the way of most of it!
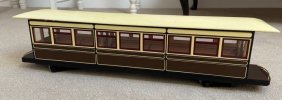
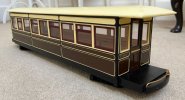
Here are some pictures of it on the track.


And some interior pictures where you can see the seats installed and the lights which I've just added.


The lights are 5v LEDs, wide angle, warm white, powered by 4x rechargeable AAs (so 4.8v supply). I'm still on a quest to find my ideal battery powered coach lighting - will see how these look...
The batteries are housed under the frame along with a switch. LEDs are connected to a pair of brass conductor rails at the top of the coach. LEDs currently have a blob of liquid electrical tape on them to limit light leak from the top, but I may still have to do something to prevent the resin roof from glowing - will see how translucent it remains after painting.


And finally a couple of pictures with the roof placed on top. It isn't painted yet and is slightly bowed so will need glueing down - which means I'll have to people the coach before it can be properly finished. So plenty left to do. I'm onto the end railings next once they are dry, then some of the under frame detail - not all as my battery box gets in the way of most of it!


I'm very pleased with how it's turned out.
I did take it today for a run at the East Sussex G Scale Society's track, but both it and the Castle refused to stay on the track. There is a certain amount of undulation on that track which other members stock (mostly LGB) seemed fine with, but not mine. Oh well, it does run faultlessly (so far) on my layout, so that'll do for me.
Anyway, my current problem is that I think it doesn't look quite right on it's own. I have an IP kit of a small luggage brake van which I'm putting together to go behind it in brown, but I kind of think I may 'need' to build another coach - maybe the brake to go with it... Not quite sure what to do about the roof though, that came from the remains of the kit that started the project. GRS do sell a W&L roof (not in stock at the moment), but it's 4 cm shorter than this one, so that wouldn't work. Anyway a thought for another day!
3 minutes of fame
3d printing, electronics and trams
That looks very nice indeed.
Worth checking the back to backs if you are getting derailments. It could be the test track is gauge widened and this is leading to derailments.
Worth checking the back to backs if you are getting derailments. It could be the test track is gauge widened and this is leading to derailments.
Thanks all, much appreciated!
My line is all LGB track, whilst I'm sure Brunel wouldn't play billiards on it, it is pretty level and certainly free of lumps and bumps. The GSS track I was on today certainly looked like a bumpier ride. I'm not sure if there was any gauge widening - it looked like all regular LGB track. Perhaps LGB wheels are more tolerant than the ones I mostly use - 3mm flanges on LGB vs 2mm on the various Brandbright/Tenmille/Binnie/IP wheels I typically use on coaches and wagons.
With the castle I'm fairly confident that the front bogie - which is entirely home brew - doesn't have enough upwards downwards play in it to cope with a bumpier ride - certainly if it was pushed too far up the wheels could foul on the underside of the frame.
Anyway, as long as I get reliable running on my line I shall count myself a very happy camper! And I'll take something that I think won't mind the ride to the next GSS meet.
Good idea! I have checked back to backs on the coach wheels 40.0mm +/- 0.3mm on all which I would imagine is ok. I've not checked the castle, but it now has a great many hours running in without incident on my line. The coach has only had a few laps, but it too is fine so far.That looks very nice indeed.
Worth checking the back to backs if you are getting derailments. It could be the test track is gauge widened and this is leading to derailments.
My line is all LGB track, whilst I'm sure Brunel wouldn't play billiards on it, it is pretty level and certainly free of lumps and bumps. The GSS track I was on today certainly looked like a bumpier ride. I'm not sure if there was any gauge widening - it looked like all regular LGB track. Perhaps LGB wheels are more tolerant than the ones I mostly use - 3mm flanges on LGB vs 2mm on the various Brandbright/Tenmille/Binnie/IP wheels I typically use on coaches and wagons.
With the castle I'm fairly confident that the front bogie - which is entirely home brew - doesn't have enough upwards downwards play in it to cope with a bumpier ride - certainly if it was pushed too far up the wheels could foul on the underside of the frame.
Anyway, as long as I get reliable running on my line I shall count myself a very happy camper! And I'll take something that I think won't mind the ride to the next GSS meet.
Amongst other projects I have embarked on making a second W&L Pickering coach - the one on it's own just isn't enough...!
The first was made from the remnants of a Brandbright kit from eBay - basically a roof and some white metal castings - this one doesn't have the benefit of any of that...
I am yet to figure out how I will make the roof, the Brandbright one is resin. GRS sell one - sadly somewhat smaller. So I imagine I'll make it out of wood somehow!
Anyway, it's been a bit stop start, I think I started last autumn some time, but in the last couple of days I've got the side end and interior panels made up as before and the chassis has been ready for some time. I've acquired some brass balcony ends from GRS (which are similar in size to the Brandbright white metal ones) and the same bogies and wheels from Tenmille that I used on the last coach.
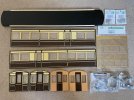
I'm currently fabricating some window frames from plasticard (vinyl cutter to the rescue) which I thing will look very similar to the white metal ones I had in the kit.
Work will force another modelling break for a month or so now, but hopefully I'll have this running by the time the weather is nice!
The first was made from the remnants of a Brandbright kit from eBay - basically a roof and some white metal castings - this one doesn't have the benefit of any of that...
I am yet to figure out how I will make the roof, the Brandbright one is resin. GRS sell one - sadly somewhat smaller. So I imagine I'll make it out of wood somehow!
Anyway, it's been a bit stop start, I think I started last autumn some time, but in the last couple of days I've got the side end and interior panels made up as before and the chassis has been ready for some time. I've acquired some brass balcony ends from GRS (which are similar in size to the Brandbright white metal ones) and the same bogies and wheels from Tenmille that I used on the last coach.

I'm currently fabricating some window frames from plasticard (vinyl cutter to the rescue) which I thing will look very similar to the white metal ones I had in the kit.
Work will force another modelling break for a month or so now, but hopefully I'll have this running by the time the weather is nice!

