What happened at your workbench today?

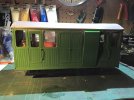
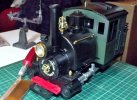
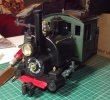
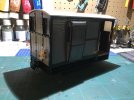
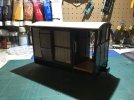
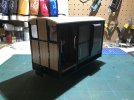
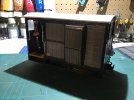
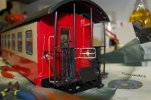
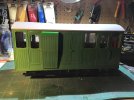
Rain stopped play today, so I spent most of the day finishing off my latest coach kit from Swift Sixteen:-676B41EB-B3C7-4F41-B6D8-A94C3AC1F1C7.jpegA00FC09B-EB20-4062-813D-DBCDA982C657.jpeg
A00FC09B-EB20-4062-813D-DBCDA982C657.jpeg
The colour used on the coach is Halfords “Country Green”. The coach is intended for use by the CFR management.C270150C-3412-478D-847E-A166AC939952.jpeg
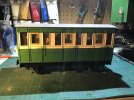
I also took the time to respray an old Accucraft coach which had been a grounded coach body for many years. It’s now back in revenue service on the branch line.
 
This could prove an interesting and testing build. There are 2 other WHR related vehicles in the pipeline. I've ridden on this one in real life - Seat #1, best veiw in the house, both ways. Max

20201002_235034.jpg
 
I fixed my ancient Train Engineer transmitter finally, everything except frequency button, I had replaced nearly all of the button switches, then had no change of direction and a couple of others all on the same (earth/ground) circuit . Found a dry joint, my fault, the Train Engineer is over 20 years old so really pleased it’s working again. Also found the accessory unit, that works although it won’t switch points/switches, either Aristocraft or LGB, not sure why.
 
I think you need a battery RC loco in there, Paul? - As a 'life-boat' to collect failed Live-Steamers.. :giggle::giggle:
 
So, just to re-assure the weak and squeamish, I only had to chop off one of the driver's legs :):)

The two old sourpusses in the back remain unmolested :oops::oops:

DSCF1817.JPG
And this is how it looks with the lid on, and the wiring ready to connect to the other half - when I've done the other half, that is :nerd::nerd:

DSCF1820.JPG
 
Still up to my eyeballs in packing up everything for the (Now much delayed.) (Thanks Flu... NOT..!) house move.
Anyhoo, I've come across all kinds of train related rammel. So I've had a bit of a play.
Those of a sensitive nature should look away now!
Ingredients:
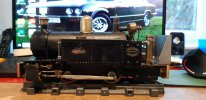
3/4 of a much abused LGB porter saddle tank.
1/8 of a early Bachmann LYN.
Wiring loom and lamps from a long dead Otto.
Add plasti-card and assorted sprinkles to taste.
Mix thoroughly.

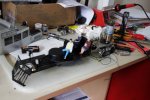
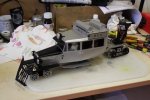
Joking aside, the Lyn cab only needed a couple of mm off the boiler opening to fit the LGB / Playtrain boiler. 9mm slice off the rear of the wrecked lYN chassis / boiler assembly provided the extra length needed and filled the original mounting holes.
Still quite a bit to do to yet, ( like a nice tall straight funnel.) But has some potential.
The only question is what name give this unholy union. As obviously LYN no longer fits the bill.
Any suggestions?

NB: No functioning locomotives were destroyed in this experiment. All parts from the junk / spares box.
View attachment 273344View attachment 273345View attachment 273346View attachment 273347
Progress report:
Thanks to a very kind member of the forum, she now has the bell she needed.
Also I've made and test fitted a stovepipe funnel and made a start on beefing up the front coupling mount. (Which will not be red for much longer.)
Cab fitment fettled and mounting blocks made up to be attached after cleaning up the inside of the cab for respraying. (Hence glazing removed.)
So what do you think? which looks better? The original smoke stack or the stove pipe? (Luckily I made them to be interchangeable.)
Still unsure whether to go for LGB or US claw couplings.
porter update 002.JPGporter update 003.JPG
 
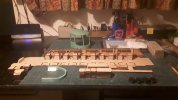
I have spent the last few rainy days doing a bit more to progress the 2 HSB coaches, toilets fitted, handrails attached and seats painted green, so that leaves gates and transfers to finish

DSC_0011.JPG
 
I’ve finished off another Swift Sixteen Guards Van:-
E137269B-24C9-4F7F-912F-D397688A6404.jpeg0015CE85-E02D-4BCD-A7BC-89821D65A653.jpegA225461C-6CD3-48A7-8444-168D0BF82B2E.jpeg8D898E42-16DD-40B7-8883-3DCA34CD6FBD.jpeg

I rather enjoy building the Swift Sixteen kits.
 
Not exactly at the workbench, but ordered in for it, are some lights for the Cleminson coach. I've tried various things in the past, but these are so small, and powered by a coin cell battery -I've been using PP3s! I'm hoping the whole installation will stick on the underside of the roof...
 
Not exactly at the workbench, but ordered in for it, are some lights for the Cleminson coach. I've tried various things in the past, but these are so small, and powered by a coin cell battery -I've been using PP3s! I'm hoping the whole installation will stick on the underside of the roof...
I’ve used these on my 00 layout and in a toy train coach, I think they are pretty good, they can be a bit bright if you use all of them in a small coach, but all my passengers have sunglasses !
 
Not exactly at the workbench, but ordered in for it, are some lights for the Cleminson coach. I've tried various things in the past, but these are so small, and powered by a coin cell battery -I've been using PP3s! I'm hoping the whole installation will stick on the underside of the roof...
Looks interesting, I presume you've gone for the O gauge kit, have you got the warm white or amber? I have been thinking about lighting for a bit, will be good to see how you get on.:)
 
Looks interesting, I presume you've gone for the O gauge kit, have you got the warm white or amber? I have been thinking about lighting for a bit, will be good to see how you get on.:)
I have bought a strip of them and a few battery holders -I've laser cut myself a few more Cleminsons and an IMR half brake for rainy days. I went for amber as they were oil-lit, and will only put three in the whole 450mm coach.
 
A bit of a round up from the week, but with a lot of help from the very patient friend at work who has been teaching me to weld I made up a temporary bunker for Lady Frankannestien. I've still got the orginal to restore and fit one I can figure out how to bolt it down. It has been a long restoration and a steep learning curve to boot but the engine runs well on blocks now. Hopefully it does as well on the rails tomorrow. All going well, she will be in bits again to clean and repaint.

201009.jpg

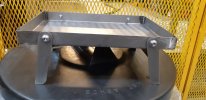
For a little more practice we also made up a steaming tray (with folding legs) to test her in.

201008.jpg
 
I Like the steaming tray..

The Irony of the labelling on whatever it is resting on, is not lost on me either! ;):giggle:

PhilP.
 
More work on the gates needed, last night soldered them up and today fitted & painted themDSC_0012.JPG
DSC_0013.JPG
DSC_0014.JPG
Some are a bit wobbly due to my dodgy soldering, mind you it did help when I cleaned and tinned the end of the iron:oops:
 
I Like the steaming tray..

The Irony of the labelling on whatever it is resting on, is not lost on me either! ;):giggle:

PhilP.
Haha! I had missed that one :giggle: No worries though, this one's meths fired ;)
 
Back
Top