A Roundhouse SR&RL joins the battery locos

Darren,
You will be very pleased with the running quality. Roundhouse make very fine locomotives. They just run and run. I have an " Old Colonial " model and is is nearly 30 years old and it runs just like a fine old clock. I also have a " Katie " that has been rebuilt to a model of Hunslet " Jack. " These 2 are among my favorite engines to run. DSC_1111.jpg
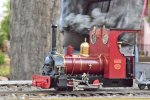
Charles M
 
Darren,
You will be very pleased with the running quality. Roundhouse make very fine locomotives. They just run and run. I have an " Old Colonial " model and is is nearly 30 years old and it runs just like a fine old clock. I also have a " Katie " that has been rebuilt to a model of Hunslet " Jack. " These 2 are among my favorite engines to run. View attachment 269882
Charles M

What a beauty! Thank you Charles, it's great to hear. I am sure she will be a keeper. My only concern is that it may be the start of a slippery slope :)
 
The Ozark and Trackside detail parts are negotiating the ParcelForce system at the moment, so should be here within the next week.

I've successfully passed some 0.28mm enamelled wire through the handrail and tested it with an led, which seems to work nicely. I'll be using the loco as the common earth, as suggested!

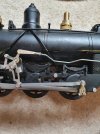
In the meantime though, I have some decisions to make concerning which spring detail to use. Here are my choices, I'd be keen to hear which folk would choose

For the main drivers, there's the one in the middle vs the one on the right...
20200726_142753.jpg

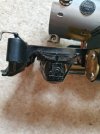
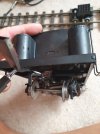
For the pilot truck there's this
20200726_142812.jpg

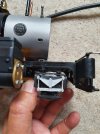
or this (which I think is a bit too small):
20200726_142906.jpg
 
I think the heavier (left-hand) for the Driver's, and the first of the offerings for the pony.. - If only for the added 'bulk' of the larger driver-spring, and the fact the pony-spring (sort-of) matches, but more importantly covers the odd-looking faux-spring-shape on the pony-truck..

But what do I know? :):wondering:
 
The Ozark and Trackside detail parts are negotiating the ParcelForce system at the moment, so should be here within the next week.

I've successfully passed some 0.28mm enamelled wire through the handrail and tested it with an led, which seems to work nicely. I'll be using the loco as the common earth, as suggested!

In the meantime though, I have some decisions to make concerning which spring detail to use. Here are my choices, I'd be keen to hear which folk would choose

For the main drivers, there's the one in the middle vs the one on the right...
View attachment 270637

For the pilot truck there's this
View attachment 270638

or this (which I think is a bit too small):
View attachment 270640
I would be looking at some close ups of the real thing after all you have invested a good deal of cash in your loco, best to get it right.
 
I think the heavier (left-hand) for the Driver's, and the first of the offerings for the pony.. - If only for the added 'bulk' of the larger driver-spring, and the fact the pony-spring (sort-of) matches, but more importantly covers the odd-looking faux-spring-shape on the pony-truck..

But what do I know? :):wondering:

:D
Thanks Phil, that was what I was leaning towards, which is reassuring
 
Regarding LEDs.. I'd been planning to use a switchable 3v button battery in the tender but my stash of warm white LEDs are all prewired with resistors, making the output at that voltage quite dim.

So I'm considering either using a 9v battery with the LEDs I have, or removing the resistor to use the 3v button.

Is there a 'best' option given the tiny feed wire I'm using, or is there not much in it?

To answer the above backwards:

1. The wire gauge will be fine.. LED's take very little current.

2. Possibly use a 9V battery? - It will last a-g-e-s.

3. You STILL need a resistor with 3V! - Just a smaller one. You do not say for what voltage your existing LED's are wired for?

PhilP.
 
To answer the above backwards:

1. The wire gauge will be fine.. LED's take very little current.

2. Possibly use a 9V battery? - It will last a-g-e-s.

3. You STILL need a resistor with 3V! - Just a smaller one. You do not say for what voltage your existing LED's are wired for?

PhilP.

Thanks again Phil,

sorry for being dense. Electronics have never been my forté.

I've just checked my prewired LEDs incorporate a resistor making them duitable for a 9-12v operating voltage. I'll go with a switched 9v battery and can fit and forget :)
 
Not much progress to report this week. The excellent RC-controlled sound unit from Mike at Model Radio Workshop arrived with a custom whistle loaded. It's tested well on an 8ohm speaker I had in the cupboard. I'm now waiting on an oval Visaton one to sit in the rear of the tender.
20200801_175157.jpg
Speaking of the tender, the receiver switch and servo leads have been relocated to underneath the tender, to clean things up a bit. I've also revised my LED power approach to remove the need for a separate leed between tender and loco. Instead I will tap into the servo power lead in the loco, for a 6v supply.

Work has started on a taller cab, in 1.2mm brass to add some rigidity to the structure, although I'm talking with a details company about handing the commission of the cab and it's detailing over to them. They're bound to make a better job of it than I am!

Detailing of the main loco should start this week, fingers crossed!
 
Last edited:
A quick cosmetics poll for anyone who has time.

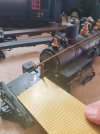
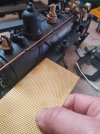
I have some brass plating to create a gangplank from the loco to the tender.

Would anybody also choose to use it for either
a) The pilot deck
b) the running boards
I'm about 50% on (b) and completely unsure on (a)

20200802_170929.jpg

20200802_170838.jpg
 
Last edited:
From what I can see, f you use it on the running boards, it might make them look a bit thick, and the boiler/ running board join may look odd.
 
Slow but steady progress now the detail parts are starting to roll in.

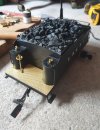
The tender has had decking floor added, some brake handle details and a kadee coupler. I need to raise the coal boards, add some stirrup steps a rear light and tank filler
20200806_112519.jpg

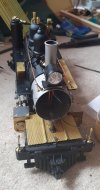
The loco has had flag posts, handrail finials, pilot detail, kadee coupler an LED headlight and a toolbox added.

I still need to add some more smokebox detail, runningboard steps and strips, cooling pipe, steam and brake pipework detail but its getting there.

20200806_113231.jpg
 
Back
Top