Aristo Mikado joins the fleet

I still haven't gotten around to steaming the Mike, but it now has a much improved smokebox door plate, courtesy of MDC Plates and has been renumbered to 19.

The quality of the plate is excellent. Dimensions are spot on and given I only provided a reference photo, I think it's spot-on!

View attachment 276171
Oooh... that turned out well! MDC plates can be ordered through me, see MDC name, number and works plates
 
Hmm, I need some wisdom from the masses on this.

I've been rebuilding the Vanderbilt tender to try and improve it a bit.

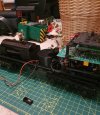
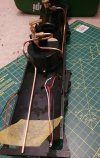
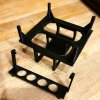
I've printed out a tower to hold the electronics properly
20201125_182236.jpg

20201125_182202.jpg


Heres the bit I could do with some advice on. Although it was quite ingenious, I'm not a great fan of the gas cannister in the tender idea, mainly because the tender needs to be disassembled every time the cylinder needs to be replaced. Given the cylinder is approximately twice the original tank size that means every two runs AND a close eye must be kept on the water as it would always run out before the fuel.

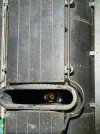
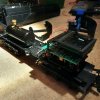
So I've opted to replace it with a neat little Bix tank. I can line up the fill port to be underneath the hatch feature on the tank body which is quite neat, but it puts the tank valve in an inaccessible position under the tender shell.

I don't want to cut extra openings in the tender so I'm wondering if I can put a hard line in from the Bix tank outlet, through a control valve in a better location and from there off to the loco.

By doing this, I'd need to keep the tank valve permanently open and control gas delivery through the new, remote valve

Heres a picture of the tank and fill port access
20201125_181910.jpg

20201125_181938.jpg


Does that seem like an okay approach?
 
Last edited:
I can't comment on model steam engines specifically but that's exactly what we do with our industrial gases at work. They're delivered, plumbed in and the valve opened up on the tank. The delivery of the gas is then all controlled from inside the building at the points it is needed. As long as you trust all the joints in between are gas tight. I'm not sure if the tender might already have them, or you might have already done it, but it might be worth adding some holes into the floor and the tender top to allow any spilled gas to vent. Apologies again if I'm teaching you to suck eggs, but some leak detector fluid might also be a good investment while you're getting it set up. This is the stuff we use at work:

Leak Detector Fluid
 
Hi Ricky,
That's fantastic; just the sort of sanity check I needed! :)

Interesting stuff. If the approach is good enough for the real world, I think it's going to be fine for this :D

Great idea regarding the vent holes and greatly appreciate the link for the fluid. I'm a firm believer in belt and braces, so I may well use some for peace of mind when I set it up. So far (I've not plumbed anything in yet, just messed about with filling and emptying the tank, I've relied on the Mk1 human sniffer, which is okay but not ideal...
 
Tidying up of the Vanderbilt tender has become something of an overhaul!

I have gone to town 3d-printing parts to get everything secured and placed :giggle:
  • A support for a Bix gas tank,
  • A bracket for the nice little gas control valve from Clevedon Steam.
  • This sits on a printed enclosure for a Visaton speaker
  • The tower and support bracket for the electronics
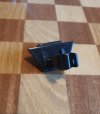
  • The tender coupler was broken so I've also printed off a little bracket to allow an Accucraft pocket coupler to be mounted at the rear
(that tiny thing in the foreground is unrelated; it's an enclosure for a pair of iPhone speakers which are supplying sound for a Lil Critter battery RC conversion )

20201129_185609.jpg

20201129_185625.jpg
 
I printed off a little pipe bender today, in order to tackle the gas lines to and from the remote fuel valve.

Given that I've never bent pipe before and it was all done with a thing I've made, I'm quite pleased with how it came out!
20201201_191946.jpg

Next up, the job I've been putting off. Silver soldering the connections on :sweating::D
 
Looks great, the pipe bender is spot on too :clap: I've made up quite a few copper brake lines for cars and bikes in the past, there's something really satisfying about going from a coil of pipe, going corner by corner and ending up with a part that slots exactly into place :)
 
Excellent!

An observation, and suggestion. - It is probably camera-angle, and the fact the output pipe is not gong anywhere yet..
But:

Can I suggest you engineer a bit of 'daylight' (a gap) between the output pipe and the gas tank? - A bit of 'wiggle-room' and to allow things to expand and contract.

PhilP.
 
Looks great, the pipe bender is spot on too :clap: I've made up quite a few copper brake lines for cars and bikes in the past, there's something really satisfying about going from a coil of pipe, going corner by corner and ending up with a part that slots exactly into place :)
Thank you for the kind words Musket :)
There certainly is. It's very creatively satisfying!
 
Excellent!

An observation, and suggestion. - It is probably camera-angle, and the fact the output pipe is not gong anywhere yet..
But:

Can I suggest you engineer a bit of 'daylight' (a gap) between the output pipe and the gas tank? - A bit of 'wiggle-room' and to allow things to expand and contract.

PhilP.
Thanks Phil :)

Yes absolutely. Thank you for the words of wisdom, and well noticed by the way! Ivd just tested thd pipework for the shot but once its fixed, I've included a little space around it :)
 
Back
Top