Let me tell you my experiences with track:
1 I use LGB trains on 45mm track. Outside in the garden everything is R3 or higher. I bought all kinds of trackmarks, LGB Chinees etc.
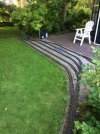
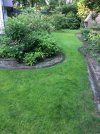
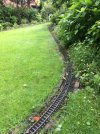
2 I planned the track by first laying all the track in the garden. I choosed to build the first track at ground level going around the lawn around my house and after that i extended the flower boarders up to the track. Those boarders are now very nice curved with the track and the track now blends in very nice with the garden.
3 Then i put a lot of little marking sticks in the ground in the axis of each track, to mark the trail of the track.
4 I marked all trackparts by number so i could lay them again after having made the track support.
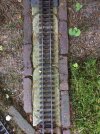
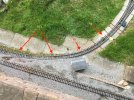
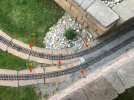
5 I removed all the trackparts and build the track support by digging out about 20x30 cm and replacing with sand. Then i hired a streetstone worker to lay all the 5cm thick 15cm wide and 1 m long concrete slabs with street stones along on both sides. In the curves i used special concrete slabs 5cm thick and 15 cm wide having a round end and front so they can be layed nice as a train in the curve. All the track is at the lawn level so i can easy run my lawnmover over it.
6 Then i installed all track parts back again using the numbering and the original connections.
SO FAR SO NOT SO GOOD!
7 Soon the old rails connections appeared to give an electric problem. I solved that by exchanging nearby all sleeve connections with the screw mounted connections of Massoth. I did this also with the track from other chinese marks. But more important: i used a grease, based on Copper called : Cu7439 Plus Paste from Molykote in tubes of 100g. Since than i had no electric connections problems any more (for me 4 years now and for a friend of my already 10 years no problems!)
8 Corrections in track length can simply be done by using a hand steel saw.
9 Correction of a too low track level can be simply done by using a hand shovel. Put it next to the track in the ground and bend over so the soil is pushed under the slab and the slub comes upwards. Remove the shovel and fill the gap with sand. A too hig level can be corrected by simply bouncing the slab and stoons deeper into the ground.
FIXING THE TRACK TO THE SLABS
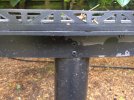
10 I started using thin copperstrips accross the slab and pushed in the ground between the slab and the two stones. On top of the strip i soldered two little bumps that fit inside the sleeper. This keeps the track nice at the center of the slab. However it appeared that my grandchildren move the tracks from this contruction. Since there was no need anymore to prevent fixed rail constructions in order to be flexible in case of electric connection problems (point 7) , i started using screws.
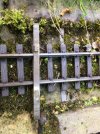
11 I use little screws and drilled holes in the slepers and the concrete slabs. A normal drill machine did not the job because the drill couldn't manage the very hard SiO2 stones in the concrete. So i bought a heavy drill hammer and the smallest drill (5mm) they got for that machine . To control the position of this drill (and not destroying the track!) i made a sturdy guiding construction from wood with steel guiding slots for the drill in order to keep the drill exactly in the middle of the sleeper. This works great!
TRACK ABOVE GROUNDLEVEL
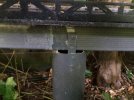
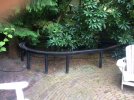
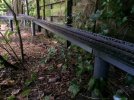
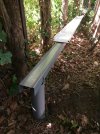
12 To build a track above ground level is used 3m long thin steel U-profiles (used in building industry for guiding wires) and put them on top of vertical plastic 80 mm tubes. Each 3 m one vertical tube in a 80 mm hole made by hand drill. The U profile is mounted on top of the tube after cutting of the top of the tube at the disired level.
13 The connection between the U-profiles and between the U-proile and the 80mm plastick pipe i made by using two or three Pop-nails. They are very easy to install (just dril one hole) and make a very sturdy connection. Be aware of the fact that the small expanding end of the pop-nail allways is at the steel plate side! The forces of this expanding nail cannot be held by the plastic pipe.
14 On top of the U-profile i mounted a15 cm wide 1.2 m long TRESPA plate , again using the fast pop-nail method.
15 Finally i mounted the track on the trespa plates (again with popnails!) and i put a small model fence at each side of the trespa plate made from the white plastic corner wall-protection you can buy at the building shop.
16 In the beginning i started with nice curved TRESPA track plates, but in the future i will use a bit wider straight sections at shorter distance that can handle 1 or 2 curved track parts.
Well, it has become a long story and i hope you can use some of the ideas.
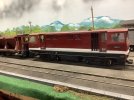
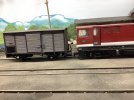
I took some pictures for better understanding.
I hope these photos do not take too much kBytes.
Bart van der Schrieck
