LGB Mikado Derailments

In reply #15 Rhino Chugger mentions the problem of not straighten out of the wheels after a bend.
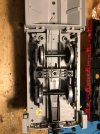
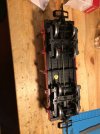
I had the same issue with 2 axe wagons and solved it by applying a horizontal thin springsteel wire acting as a straightening spring.
In long wagons the wire is mounted in two horizontally drilled holes, one in the wheels base and the other in the wagon base structure.
In short wagons both holes can be drilled in the wheels base.
The spring causes the wheels to be straightened nicely after each bend.
However, my main reason to apply this type of spring was that it is also a great help when putting a derailed wagon back on the rails!
Especially wagons with double axes on each side let alone a long row of many of such wagons!
See the two examples below.
 

Attachments

  • wagon 2 assig met richtveer.JPG
    wagon 2 assig met richtveer.JPG
    267.1 KB · Views: 0
  • wagon onderzijde met veer.JPG
    wagon onderzijde met veer.JPG
    269.4 KB · Views: 0
The issue MUST be with the point (switch) the blade SHOULD be held in place by the motor drive. (Nearly) all my point have motors attached, and if I move the blades by hand, as they past the halfway point (pun what pun) they the leap across to the other side.
 
Completely agree, let's focus on the main issue, that the points are solidly held in place, period. There will always be conditions that could try to dislodge them, that is why the real thing has a positive lock on the position when thrown.

I use air-operated switches at 40 psi, they are never dislodged.
 
The only system change I’ve made is upgrading an LGB MTS power supply and controller to the Marklin CS3+.
Great video it shows the 4 th driver moving sideways quite clearly. At the start of the clip the outside edge of the driver is on the rail head. It then moves suddenly towards the camera, taking the outside edge of the driver off the top of the rail head.It is this action that is moving the switch blades. The movement happens when the 4 th driver is 2 sleepers past the throw bar. At this position, the driver on the far side is just coming off the curved stock rail.

My tests showed that the groove for the traction tire is creating a step that is moving the 4 th driver axle sideways.
On the other side of the loco, the 4 th driver is riding on the curved stock rail and the groove for the traction tire has no effect. But as this driver travels, it falls off the curved stock rail and then the groove for the traction tire starts to be aligned between the rail head of the switch blade and the whole axle moves towards the camera taking the switch blade with it.

Why is it moving so much?

What condition are the traction tires?

What is the back to back dimension?

Is your point motor defective and not holding the blades?

On my tests, the blades only moved when the point motor was removed. They only opened 1 mm and didn't cause any problem.

Alan
Alan you provided the missing link, Traction Tires! After 30 years they dry up, crack and fall off. I did not realize that the 4th driver wheels had slots in them for the traction bands. This is what is moving the tongue rail. Now I just need to order new traction bands and the Mikado's will be back on track! Thanks to everyone for their insight, I've learned a lot about my Mikado's and it's good to know that everyone is ready and willing to help!
Phil
 
Glad that weve got to the cause of the probem. Without traction tires the grooves in the drivers have more of the switch blades to get hold of.
There was a fixation with a faulty point motor but as I have kept saying point motors and manual throws are not essential.

How about the lead trick?
Is that still jumping or do you think that it was also affected by the lack of traction tires?

Alan
 
Alan you provided the missing link, Traction Tires! After 30 years they dry up, crack and fall off. I did not realize that the 4th driver wheels had slots in them for the traction bands. This is what is moving the tongue rail. Now I just need to order new traction bands and the Mikado's will be back on track! Thanks to everyone for their insight, I've learned a lot about my Mikado's and it's good to know that everyone is ready and willing to help!
Phil
:clap::clap::clap::clap::clap::clap::clap:
 
I may try and replace it with a stronger one for more down pressure. Articulations is ok.
If, as you have observed, the front truck is not causing the point blade to move or jumping the rails when it hits the frog there is no need to increase the spring tension.

I should have mentioned much earlier in this thread that I had a similar issue with my LGB LD1 G4/3. The front truck would jump the point rails at the frog on only one of my turnouts causing the points to shift just enough to catch a driver flange and cause a major derailment. (As if the front truck derailing wasn't enough!) This naturally led me to believe there was a problem with the turnout since the loco ran through all my others seemingly without a problem. Like many of us, I have a tendency to jump to conclusions! I tried a lot of things to keep the front truck on the rails including putting a shim on the turnout's guard rail. I finally discovered the true cause after much consternation and frustration. The problem started following a major overhaul of the loco to replace the smoke generator. There was an obstruction to the free swing of the truck in one direction. It was a result of an error in re-assembling the loco and the obstruction was not immediately obvious when inspecting the loco off the rails. I have an LGB R3 curved section leading into the troublesome R3 turnout. A combination of curved entry and obstructed swing brought on the catastrophic result! Once I had finally discerned the true cause everything is back to normal including the removal of the turnout guard rail shim.

Just remembered that obstruction to the front truck was one of the tubes feeding "smoke" to the cylinders of the loco. This is how I also learned how hard smoke generator tubing can become! The tubing was replaced with new stuff.

Edit added to identify the obstruction.
 
Last edited:
Thanks. I did look at the front truck and they do have springs. I may try and replace it with a stronger one for more down pressure. Articulations is ok.
Adding extra springs is a dodgy road to go down. Most likely something else wrong.

How's the back to back?

Does the lead truck move freely as Plil S suggested? It slides over a straight length of plastic, the wheels apply leverage over this to compress the spring. Does it need lubrication? Is it damaged?

Alan
 
Great video it shows the 4 th driver moving sideways quite clearly. At the start of the clip the outside edge of the driver is on the rail head. It then moves suddenly towards the camera, taking the outside edge of the driver off the top of the rail head.It is this action that is moving the switch blades. The movement happens when the 4 th driver is 2 sleepers past the throw bar. At this position, the driver on the far side is just coming off the curved stock rail.

My tests showed that the groove for the traction tire is creating a step that is moving the 4 th driver axle sideways.
On the other side of the loco, the 4 th driver is riding on the curved stock rail and the groove for the traction tire has no effect. But as this driver travels, it falls off the curved stock rail and then the groove for the traction tire starts to be aligned between the rail head of the switch blade and the whole axle moves towards the camera taking the switch blade with it.

Why is it moving so much?

What condition are the traction tires?

What is the back to back dimension?

Is your point motor defective and not holding the blades?

On my tests, the blades only moved when the point motor was removed. They only opened 1 mm and didn't cause any problem.

Alan
Alan it was the traction tires! The old
 
tires are gone so the switch Tonge is getting caught in the 4th driver tread groove and slides open as the d4th driver passes!
 
Glad that weve got to the cause of the probem. Without traction tires the grooves in the drivers have more of the switch blades to get hold of.
There was a fixation with a faulty point motor but as I have kept saying point motors and manual throws are not essential.

How about the lead trick?
Is that still jumping or do you think that it was also affected by the lack of traction tires?

Alan
I ordered new traction tires and will test the Mikado again in a few weeks. Stay tuned!
 
I'm a new member but a long time LGB train collector and operator.
The leading and trailing wheels on my 2-8-2 LGB Mikado's are derailing on a consistent basis when navigation points. The leading truck appears to bounce at the frog and jump the rail. The larger and more consistent problem is that when the engine is passing straight through a right hand switch the drive wheels and the trailing truck (wheels) appear to push the tongue open which either causes the tender to be diverted to the right line which derails it, or the tongue is left half open which will cause the next train that passes through to derail.

Has anyone else seen this problem? I have two Mikado's and they both cause this problem. I'm thinking about adding lead tape or a spring to apply more pressure to the trucks. Any additional thoughts on how to solve this problem would be appreciated. My steam engines are on the shelf for now.

The image below show the switch after the Mikado and Tender pass through.
I have had a problem with those point motors
And replacement with the more modern one without the small loop/ hole on the ends , as this seems sometimes hit the rail before it can go across all the way into the lock position which is held by the magnet in the motor. Also adjusting the height of the motor can help by lifting it higher by tightening the two screws making sure they are seated properly. Therefore locking the point blade in firmly. Hopefully this will help
The plot thickens..... First;y let me state that I don't have any problems with traction tyres, or electric point motors. Reason, I have none (on my 22 year old layout). Being somewhat frugal, electric points were to me, an unnecessary expense which also implied additional expense of a power supply. And traction tyres earned my disapproval back in the heyday of Hornby Dubblo. I recently looked at mortgaging the house to get me one of them LGB Allegra units, all went well until I saw traction tyres in the spec. I still don't have my Allegra.

I've been Ginglenooking all day, cutting and pasting bits of LGB track, and this derailment issue was on my mind.... so, I stripped down the mechanism of one of my turnouts, admittedly manual, to see just what does go on. I concur that all bits need to be tight and level, I deliberately reassembled the mech rather loose, to see what happens.... bits will and do slip out of place/line and points change when you don't want them to. When assembled correctly, with manual at least, the points flip over with half a stroke of the drive rod, the rest of the stroke is applying extra spring pressure to hold the switched in place.

Did you actually try testing those points with a manual throw?

I tried push stuff through the turnout with hand pressure trying to force the switch to open.... I failed. Now that I hear that the electric mechanism is magnet, rather than mechanical, I suspect that, with dodgy fixing could indeed be the root of the problem.
 
The issue MUST be with the point (switch) the blade SHOULD be held in place by the motor drive. (Nearly) all my point have motors attached, and if I move the blades by hand, as they past the halfway point (pun what pun) they the leap across to the other side.
Do you have solenoid motors Jimmy? This is an EPL motor that has a rack with a gear on a motor that moves the point over. Ok so it is not a real motor but acts like one.
 
The issue MUST be with the point (switch) the blade SHOULD be held in place by the motor drive. (Nearly) all my point have motors attached, and if I move the blades by hand, as they past the halfway point (pun what pun) they the leap across to the other side.
Yes, traction tires or not, the switch position must be maintained mechanically. The missing traction tire may have made it easier for the points to move on their own, but they should not in ANY case.

I do know some switches will "give" but heck, this is on the straight route! The train is already going straight.
 
Yes the EPL motor with the rack, at this is a motor drive it is drawn by the internal magnets.
Been a couple of years since I pulled a few of these apart to get them working again. Forget completely how they work but the rack is a vital part as are the stops that limit the throw either end but also mark where they should be set to. If I remember right is a small pip on the ‘motor gear’ that does that limiting. Get it in the wrong place and the thing is not set right and does not do the job.
 
Been a couple of years since I pulled a few of these apart to get them working again. Forget completely how they work but the rack is a vital part as are the stops that limit the throw either end but also mark where they should be set to. If I remember right is a small pip on the ‘motor gear’ that does that limiting. Get it in the wrong place and the thing is not set right and does not do the job.
Jon, my first few "repairs" were not as good as they should have been mainly due to a lack of understanding, and as such were not set up correctly. As you point out the rack and pinion must be set correctly for is to work in both directions and hold the blades against the rails.
 
If I remember right is a small pip on the ‘motor gear’ that does that limiting. Get it in the wrong place and the thing is not set right and does not do the job.
One way is to hold the rotor with the "pip" straight up then put the rack on so it is centered. Then, while holding the rack against the pinion move it to one or the other end positions (rotation is limited by the pip). It will stay there till the top cover is put back on.

The other trial and error method is to keep repositioning the rack until it travels the same extent on both sides of the housing. In any case, the "pip" need to be "up".
 
Last edited:
Back
Top