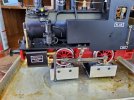
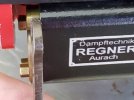
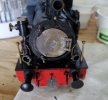
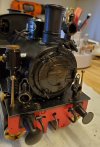
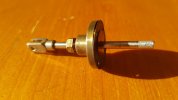
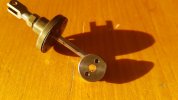
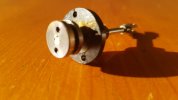
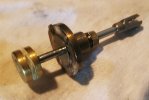
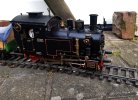
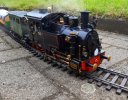
More Regner Else and no water

Even the great Gresley went over to France to look at his miracle working with Steam. Hm history appears to have passed you by Paul. Still I guess we all don’t know what we don’t know.
Speaking of Gresley. Long valve travel was considered the magic bullet for speed records. You wanted a lot of steam for power which meant wide ports. Plus expansion so as to make the most of it, therefore long lap. Made them bad starters, though. That combined with the ever faulty conjugated valve gear. Light and shade, I'd say
 
Speaking of Gresley. Our little steamers are high speed locomotives in their own right. Have you never had to chase after a runaway loco? I harbour a theory as to why. We like our trains to have realistic linear proportions, because we want them to look similar. Paul M taught us how sensitive the issue can be. So we scale down linear dimensions. This neccessarily throws off area proportions by the square (pressure, piston diameter), volume proportions even cubic (weight, cylinder size, boiler capacity).

What do we get? - Lightweight, small cylndered high-pressire engines that Gresley only could dream of.
 
What do we get? - Lightweight, small cylndered high-pressire engines that Gresley only could dream of.
There was a comment that Accucraft seems to have figured the equations out. Their latest small-cylinder locos (e.g. Peckett) are quite well-behaved compared with the Ruby.
 
So, onwards and upwards. I'm back from buying a new boat so today I grabbed Else and a towel and went to the bench.
Two issues to solve: leakage around the cylinder caps fronts and the 'hangers' being upside down.

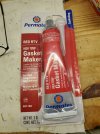
First collect the tools - in this case Permatex hi-temp gasket maker. If, as suspected, there is no gasket, then we'll need to make one. This stuff worked fine on my Aster JNR8550 kit, which came without the gasket set as I think they dropped out of the box in Savannah, Ga.

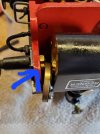
20220604_110656_resized.jpg


I started undoing the cylinder caps and immediately was stopped by the top bolt - blue arrow below. The bolts are quite long and there is no way it was coming out without removing the cylinder.

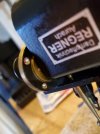
20220604_171523_resized_1.jpg

The good news is that there was a gasket in place, so I decided to make do. The bolts were not tight, so I made sure they were all a bit tighter than before when I put the cap back.

20220604_171529_resized.jpg

The hangers were easy, but it did give me chance to put some Loctite on the bolts.

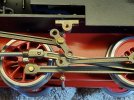
20220604_172124_resized.jpg
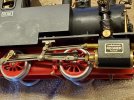
20220604_172801_resized.jpg

I then re-checked the timing (again) and tomorrow I will try another steam test. Fingers crossed. :nerd:
 
I got her fired up today but the results were not encouraging. So I dropped the valve rod and tried a bit of manual testing on the port side.

20220605_135537_resized.jpg

It seemed to want to work - the steam pushed the piston back and forth when I manually moved the valve piston.
However, looking at my timing, I remembered Ol Hogger Klaus mentioned the valve piston should only stick out the width of the spanner supplied by Regner. As this pic shows, it clearly sticks out a bit more.

20220605_134936.jpg

So I moved the hanger bracket even further back, reattached the valve rod and re-lit the fire. That did it!


I think this project is done. :party:
 
I got her fired up today but the results were not encouraging. So I dropped the valve rod and tried a bit of manual testing on the port side.

View attachment 299760

It seemed to want to work - the steam pushed the piston back and forth when I manually moved the valve piston.
However, looking at my timing, I remembered Ol Hogger Klaus mentioned the valve piston should only stick out the width of the spanner supplied by Regner. As this pic shows, it clearly sticks out a bit more.

View attachment 299761

So I moved the hanger bracket even further back, reattached the valve rod and re-lit the fire. That did it!


I think this project is done. :party:
Success at last, perseverance and a little help from your friends did the trick. But well done you for finally sorting it.
 
A final cosmetic update. Like most Regners (in my experience) this loco will light the fire in the smokebox just as easili as n the flue - you have to be diligent about making sure it pops back or you get a burned smokebox door. Like this:

20220606_114821_resized.jpg

So I got out the acrylic paint, which I have used with some success on other boilers, and gave it a coat of black.

20220606_115125_resized.jpg

We'll see how long that lasts.
Oh, and I have to buy more distilled water and butane after all this. . .
 
Did I mention that my Else was not free frim ailmemts?
Fired up, she would run on blocks. Once on the track, she would stall, hissing under a big plume of steam.
I rounded up the usual suspects:
Centering of valves,
quartering of cranks.
No dice! Finally, I felt I could trace it to the starboard cylinder. I decided to bite the bullet I had so far managed to dodge: Taking off the rear cylinder cap to have a look at the piston. The catch is the innermost bolt which is quite impossible to reach with a spanner. If you succeed, you can turn it but a tad at a time.
Eventually I could pull the plug, no, the piston out:

20220704_190944.jpg
Well, almost.
The piston stayed behind, and I had to ease it out, Sushi way.

20220704_191022.jpg

So this is what happened: Running light, the piston would stick so-so to its rod. With load, it would slip off and leave the ports connected with all the steam escaping.

20220704_191111.jpg
You can make out traces of solder.
This is not unheard of in various circumstances: a smokebox fire melting the solder, condensate breaking the joint, or excessive use as a push-along toy lacking proper lubrication.
 
Last edited:
Good news from Else.

With spares from Regner on order, I felt somewhat impatient. Why not try to work out a temporary solution. You know that I am the "proof of concept" type: Will it work this way?, even if this may not neccessarily be the best way.
Summoned courage and resoldered the connection. The bit of old solder would melt readily in the gas lighter flame, so soft-soldered it had been. I dissolved a bit of rosin in ethanol, dipped in the piston rod. Waited for evaporation, then brought the flame. Eventually, temperature was enough for fresh solder to flow, -alas, not as neatly as intended maybe.

Surprise came when I tried ot fit the pistion back: The peg was too big for the hole! I can offer three explanations:

1. The man in the mirror - perhaps I inadvertendly had caused dents and burrs.
2. Soldering: - stray solder or heat deformation
3. Design: Regner's kit instruction recommend putting in the piston from the front of the cylinder. Which cannot be done once the chassis prevents access, as on a finished locomotive. Perhaps the rear throat is tapering for some reason.

I decided to give it a once over in the lathe, polishing away excess solder in the process. I had to bridle my ambition and see to a wrapper of sheet metal fiirst, so that the chuck would not burr the piston rod. With pleasure I noted that my soldering withstood turning.

After time-honored teflon twisting I put everything together, replacing the frail seal with some oil-soaked card, and attending patiently to that inner bolt.

Steamed her up and off she went.

Now I am still waiting for the new teflon pistons and valves to arrive.
 
Last edited:
Teflon spares have arrived.

Out came the old piston. Note that my teflon packing was far from perfect, neither was the oiled paper gasket.

Else_piston_old.jpg

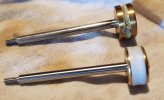
Let's look at the pistons side by side. This is the alternative type, as opposed to the double C-cup piston we have seen. (#52 abouts)

Else_piston_comparison.jpg

Gently pushing it into the cylinder. The loose bolt is meant to keep the new seal aligned.

Else_pistoncap_guide.jpg

Tightening in a tight spot.

Else_tightspace.jpg

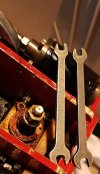
I crudely (or cruelly) adapted the spanner to the job.

Else_spanners.jpg

Still, you get but 1/6 of a turn and you have to flip the spanner each time. After tightening I found quite a noticable compression. That is to say, after the valve was back in.

Else_valve_comparison.jpg

I want to proceed step by step, for the time being, I will make to with the old valve.

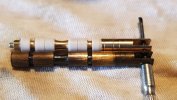
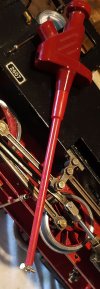
And another thing I found in my toolbox. This electrical probe came in nicely where my fingers could not reach the bolt.

Else_probe.jpg

Now I am waiting for a chance to fire her up.
 
Last edited:
One thing at a time.

Under steam today, the teflon piston admittedly was not an instant success. The limping even on blocks made me suspicious that only the opposite side was doing proper work.

With the main rod unhooked, the piston would move only reluctantly, if at all. I untightened the piston rod seal nut which helped. Still, a backstroke would not be followed by a frontstroke as would be expected from the valve position. I assumed that the piston was travelling too far not allowing for a minimum of space for steam. Screwing the crosshead out a bit should have helped, but the result was less than convincing.

You know me and my lack of patience. I did not want to keep tinkering: I wanted a run! (This is not to say that I am ready to give up on the teflon piston yet.)

Now that I somehow got the knack of it, it did not take more that 15 minutes to have the old piston - with new packing - back in and the fire going again. Once on track, I got four nicely spaced equal chuffs, what more could I ask for?

- Well, a little less heat as far as weather is concerned for more consistent gas pressure. You can't win them all.
 
Last edited:
And we're back . . .
(Or is that too american?)

Anyway, today was the first time I had a chance to test my newly-fixed Else. I should have been back in FL in October with plenty of time to run on the Calusa Creek RR (my friend Jack's garden railway.) Unfortunately Hurricane Ian had other plans, so we had to hastily find alternate lodgings for the winter if we were to avoid the cold in the north. On a visit to our FL home I packed Else and took her back to MD.

Despite a few steam leaks, and my forgetting that to make it go you have to open the throttle (duh!) all was well.

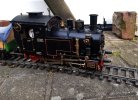
20230124_145333_Else.jpg

And to prove it, here's the video:


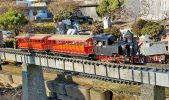
P.S. What do you think of my Amusement Park "toast-rack" coaches? They are New Bright 'Disneyland' from 20 years ago, and I fitted new metal wheels.
 
And we're back . . .
(Or is that too american?)

Anyway, today was the first time I had a chance to test my newly-fixed Else. I should have been back in FL in October with plenty of time to run on the Calusa Creek RR (my friend Jack's garden railway.) Unfortunately Hurricane Ian had other plans, so we had to hastily find alternate lodgings for the winter if we were to avoid the cold in the north. On a visit to our FL home I packed Else and took her back to MD.

Despite a few steam leaks, and my forgetting that to make it go you have to open the throttle (duh!) all was well.

View attachment 309299

And to prove it, here's the video:


P.S. What do you think of my Amusement Park "toast-rack" coaches? They are New Bright 'Disneyland' from 20 years ago, and I fitted new metal wheels.
They look very fine, sadly not available and a member of the Forum trying to create a similar beast using 2 of the LGB 4 wheel equivalents.
 
Else's new make-up.
230512Else_02s.jpg

(I took a permanent marker such as recommended for metal, glass, &c. surfaces, they call them lacquer markers here. It will not withstand heat and oil that much and can be removed by using lighter fluid.)
 

Attachments

  • 230512Else_02.jpg
    230512Else_02.jpg
    845.9 KB · Views: 0
Hi everybody, some news from Else.

The circuit gained some 5 inches in radius. Thats all I've got space for and I hope curve drag will be reduced.


(You will notice that she is short from stalling at the crest of the "hill" and how the momentum car - the second one with the tarp on it- moderates downhill speed.)

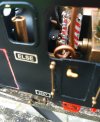
Else was embellished with a bell (märklin spare) and grab irons. The latter were original parts of the Regner kit. (A bit ridiculous in absence of footboards for the switchman to stand on, however.)

ElseGrb01.jpg

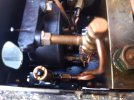
The top up valve was relocated to the port side so as to connect it to the water gauge which makes for easier observation while filling. The smaller article from Paul and other Easy Line steamers would not fit underneath the cab roof, yet the re-installation of the original valve would need to reach beyond the steam manifold and thus require a longer pipe. Therefore spares were ordered from Regner. Always impatient, as you have come to know me, I tinkered with the parts on hand and came up with this.

ElseValve02.jpg

The valve proper was tucked away inside the cab corner, the feed line was coiled (both, because it was too long for that solution and in order to provide a water pocket, since the valve in my experience will not be steam tight under all circumstances.)

ElseValve01.jpg

Happy steaming everybody!
 
Last edited:
Back
Top