OcCre San Francisco Streetcar Build

JimmyB

Now retired - trains and fishing
Country flag
So this is my journey through my "OcCre San Francisco Streetcar Build".
I will not be bringing you a blow by blow photographic journey (though there will be photos), the OcCre instructions for the Streetcar is full of photos, and there are some very useful videos.
What I will be doing is describing my thoughts, hints tips and anything of interest, and where I deviate from the instruction.

So to start, what is in the box:
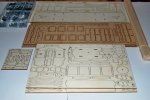
Streetcar_01.jpg

Six very nicely cut frets, with minimal laser burning, a variety of faced ply wood, also a "bundle of sticks" and a box of metal parts.
 
Making a start, you really do need to read the instructions and watch the videos, I have been building kits including wooden ones for longer than I care to remember, and IMHO this kit is not for the beginner.
My first issue was what adhesives to use, the instruction say:
Use white glue for wood,
Use fast-acting glue for part difficult to hold in position, and small parts.
Use transparent contact adhesive for window to frames.

In the end I opted for OcCre own white glue, , Rocket CA, and Deluxe "Glue and Glaze"

The frets are quite thin and need care to remove, and although this is slot and tab, they are not tight fits so on assembly some "wobbliness" could occur, leading to complications further on, and fine tunes of the parts, especially the wooded strips

Wanting to motorize this Streetcar I started looking for the appropriate motor not long after opening the box, many thanks to 3 minutes of fame 3 minutes of fame for his assistance. The Streetcar sits on two bogies, and fitting the Apple Tree hung motor as per tram conversion is not immediately viable due to the narrowness of the bogies and nowhere for the axle mounts. Planning and discussions are still on-going, but possible solutions are in sight, I will keep you informed.
 
Whilst moving through the assembly I am pursuing in parallel the motorization of the Streetcar, after dismissing Apple Tree, I have looked at Dean Goods gearbox and IP Engineering 30mm diameter wheels.

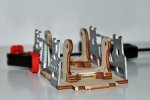
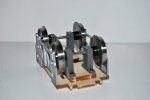
This is a dry assembly of the bogie and axle mounts, the sides are in place to show the restricted space.
Streetcar_Bogie_02.jpg

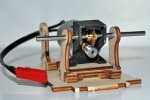
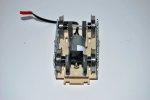
This shows the gearbox in place, it fits fine, though the axles will need trimming
Streetcar_Bogie_03.jpg

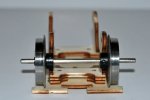
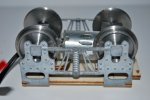
The issue is, with the wheels set at 40mm B2B the securing bushes interfere with the axle hangers
Streetcar_Bogie_04.jpg

A number of solutions are being sought, my preferred would be new axle hangers further inboard.
 
The option I would look at would be to fit axle boxes and dispense with the inside wheel arrangement, may be something as simple as a small square piece of wood with axle bears glued to the inside of the dummy frames.

David
 
Another option would be to split the axle hangers central, drill out for the bushes then glue in place. You could use some off cuts from the kit to strengthen the parts and help to make them parallel and square. Possibly even glueing some to set the distance between axles before splitting the axle hangers.
 
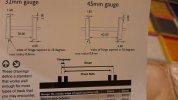
Interesting, I measured the B2B of a number of items LGB/Bachmann/Accucraft/IP/Timdon, and none were 41mm all being narrower, ranging from 39.6 to 40.5, however the majority were around 40.2 - 40.3 mm.
My mistake, the 16mm Association standard is actually 40mm back to back20220122_190313.jpg
 
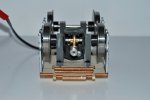
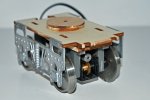
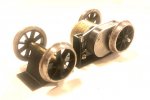
The motorized bogie, with the help of 3 minutes of fame 3 minutes of fame , who provided the axle supports as a 3D print job, I now have a motorized bogie, I will let the pictures tell the story:

These are the brackets fitted to the none motorized bogie. The axle height needed to be 26 mm above the base, so I had the brackets made with 21mm axle height, this allowed 5mm thick ply to be used far the screws to grip to.
Streetcar_Bogie_05.jpg

The brackets were glued to the side of the Dean Goods gearbox (both ABS), axles cut to size, you can see the close tolerances here.
Streetcar_Bogie_06.jpg

Streetcar_Bogie_07.jpg

Streetcar_Bogie_08.jpg

Streetcar_Bogie_09.jpg
 
More general hints and tips during the build. It is advised in the instructions to paint many of the parts before assembly, which is often the case with many kits, however being wood after assembly some cleaning up and filling is required, which then requires more "touch-up" afterwards :

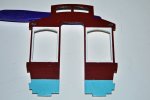
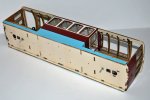
Inner end panels painted as advised
Streetcar_07.jpg

When fitted "blending in" and disguising the tabs required some sanding and filliting

Streetcar_09.jpg

The same applies to the front and rear panels

Streetcar_10.jpg

Have to admit, not loving the acrylic hand painting.
 
Whilst moving through the assembly I am pursuing in parallel the motorization of the Streetcar, after dismissing Apple Tree, I have looked at Dean Goods gearbox and IP Engineering 30mm diameter wheels.

This is a dry assembly of the bogie and axle mounts, the sides are in place to show the restricted space.
View attachment 294357

This shows the gearbox in place, it fits fine, though the axles will need trimming
View attachment 294358

The issue is, with the wheels set at 40mm B2B the securing bushes interfere with the axle hangers
View attachment 294360

A number of solutions are being sought, my preferred would be new axle hangers further inboard.
 
Jimmy as you have got so far you probably won't go back, but there is a new AppleTree solution available. Regards Davidimage3.jpeg
 
Excellent. I'm glad to see the parts fitted!

This kit is on my to do list, but I put it back because of the motorising. Your solution is really good and well worth considering.
 
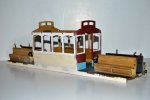
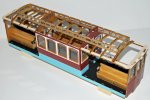
I have arrived at the stage were to roof is next, unfortunately, having a removable roof is not an option, or at least it is not for me my my skills.

Streetcar_11.jpg

Once it is all enclosed access is limited, so any final internal touching up needs to be carried out, also as a number of areas have been filled and sanded, all the "dust needs to be removed, especially from the windows.

Streetcar_12.jpg

One of the later stages is fixing the bogies to the chassis, however recommended method is a wood screw in to the underside, I felt this may be a weak point, so again before the roof is fitted two machine screws were fixed in place with CA.
 
Last edited:
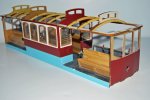
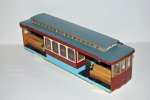
The roof is on, following the OcCre instructions, however the instructions says "apply filer", but there is no hint as to what type of filler, so being a wooded roof, I used a water based wood filler, the one that "does what it says on the tin" :) :
Streetcar_17.jpg

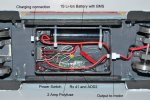
I have also completed the electronics, the components all fitted in small plastic "project box" fixed under the body:

Streetcar_18.jpg

So having fitted the bogies and powered the electronics up, this is when the problems started. It would seem that my original motor would not be driven by the Rx, As you can see it is a 3.7 volt battery and a 3 - 6 volt motor but even though every bound the Rx stopped with an error flash. change of motor (same physical size) bu 6 -12 volts, and no problem at all. Put on my test track and the wheels just slip, no traction, the whole item just weights 900 gms, and with two bogies, only one driven that is 450 gms loading. An extra 500 gms over the power bogie and away it goes, but my issue is where 500 gms of additional ballast can be added, with the open design, there are no hiding places - still considering my options.
 
Back
Top