You are using an out of date browser. It may not display this or other websites correctly.
You should upgrade or use an alternative browser.
You should upgrade or use an alternative browser.
What happened at your workbench today?
- Thread starter Henri
- Start date
DickyC
(BZB Mountain Railway)
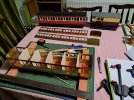
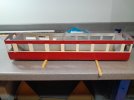
haha, how many do the IMR have ? when you have more than them start to worry.....Back when Methuselah was in short trousers, I started building an IOM saloon, using up left-over laser cuts from earlier runs. With the bomb wagon completed, I've dusted it off and resumed work:
View attachment 323708
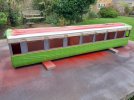
The main reason I delayed manufacturing is that I already have enough of them:
View attachment 323709
This one, when completed, will make six, which is as many as the real railway had! Mind you, they are attractive: some have called them the most elegant narrow gauge coaches in the British Isles...
Dan, are all the locos 3 rail, or do you use the 3 rail track as 2 rail?More animation for my "O" scale layout. As the description indicates, I am starting to feel well enough to engage in a bit more activity.
Madman
Registered
Dan, are all the locos 3 rail, or do you use the 3 rail track as 2 rail?
All of the locos a three rail powered. Center rail is hot, outer rails are neutral.
Northsider
Modelling the Northern half of the Isle of Man
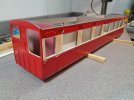
As is often the way, close inspection showed up a few minor blemishes in the paint, so they were flatted back using homemade sanding sticks (wet and dry paper glued to a piece of stripwood) and then given another blow over. So another period of paint drying/hardening, which will delay the fiddly second stage of masking. But worth sacrificing a day or so rather than 'rush and regret'.
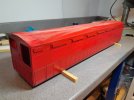
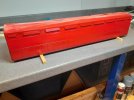


Northsider
Modelling the Northern half of the Isle of Man
JimmyB
Now retired - trains and fishing
A couple of days ago I gave my Bootlane Nancy a quick prime using some of my rattle cans, before filling in the blemishes:
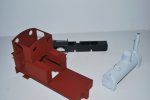
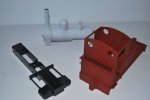
Yesterday I gave a second coat of primer with the airbrush (no photos), but today disaster struck, lightly sanding the chassis, and when it hit the floor it shattered. In touch with Bootlane to see if I can purchase new frame sides, but they seem slow to answer emails.
The instructions do mention they are fragile but more than I suspected.
This is a problem with 3D printed items..A couple of days ago I gave my Bootlane Nancy a quick prime using some of my rattle cans, before filling in the blemishes:
View attachment 323974
View attachment 323975
Yesterday I gave a second coat of primer with the airbrush (no photos), but today disaster struck, lightly sanding the chassis, and when it hit the floor it shattered. In touch with Bootlane to see if I can purchase new frame sides, but they seem slow to answer emails.
The instructions do mention they are fragile but more than I suspected.
I believe Andrew has a 'proper' job, as well as Boot Lane Works, so you may have to wait until this evening for a reply?
PhilP
DickyC
(BZB Mountain Railway)
Ouch, they look nice. Was it a 3d resin part or the Acrylic mentioned in the spec ? "fragile" not a good thing for garden railways.A couple of days ago I gave my Bootlane Nancy a quick prime using some of my rattle cans, before filling in the blemishes:
Yesterday I gave a second coat of primer with the airbrush (no photos), but today disaster struck, lightly sanding the chassis, and when it hit the floor it shattered. In touch with Bootlane to see if I can purchase new frame sides, but they seem slow to answer emails.
The instructions do mention they are fragile but more than I suspected.
Northsider
Modelling the Northern half of the Isle of Man
JimmyB
Now retired - trains and fishing
Acrylic chassis framesOuch, they look nice. Was it a 3d resin part or the Acrylic mentioned in the spec ? "fragile" not a good thing for garden railways.
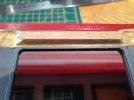
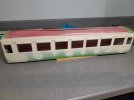
Always a bit tricky with those crevices around the doors and detailing. To get a good match I tend to spray a little if the colour required into a Rattle Can Lid then brush on. Usually a bit if a challenge finding the right cleaner so must remember to use those Micro brushes next time I have a similar issue. Still a nice job.Off-white paint on, masking off.
View attachment 323979
There are a few places where the paint crept under the masking, but these will either get T-Cut out, or touched in by brush.
View attachment 323980
The inside has 0.8mm plywood cladding (now, where did I put that?) so I'm not concerned by the overspray...
Northsider
Modelling the Northern half of the Isle of Man
Yes, the paint tends to track along those grooves due to capillary action. Mind you, I had invested in proper modeller's masking tape and used a cocktail stick to press it into the crevices, so the paint creep is, as a p*litician might say, disappointing ...Always a bit tricky with those crevices around the doors and detailing. To get a good match I tend to spray a little if the colour required into a Rattle Can Lid then brush on. Usually a bit if a challenge finding the right cleaner so must remember to use those Micro brushes next time I have a similar issue. Still a nice job.
JimmyB
Now retired - trains and fishing
I use Tamiya, very good most of the time, but user error, not pushing in to crevices does allow paint to track.Yes, the paint tends to track along those grooves due to capillary action. Mind you, I had invested in proper modeller's masking tape and used a cocktail stick to press it into the crevices, so the paint creep is, as a p*litician might say, disappointing ...
Fezwig
Just a man in the middle of a complicated plan.
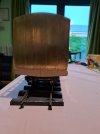
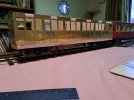
Keeping the IMR theme going, but a bit off painting yet! New buffer beams made and fitted, slight prang, seems to be catching, removing the old ones, sprung out the bottom corner of one side, will have to reglue and leave it overnight. Anyway, another job tackled was fitting the boogie mounts, needs a bit of fettling/ride height but it's up on its wheels.


Northsider
Modelling the Northern half of the Isle of Man
...and the IMR theme continues: I bought a cheap Bachmann flat wagon with plans to stretch the bogies; but it seems the design has changed, and cut-and-shut may not work.
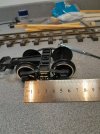
The wheelbase needs extending by 10mm, which isn't a huge amount: perhaps a suitably shaped piece of brass strip could be used?
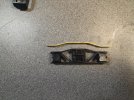
But how to make four identical pieces? A jig? Or a press tool; now that would be the thing! And I had a suitable-sized piece of brass, so I marked it out...
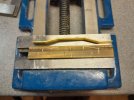
...chain drilled...
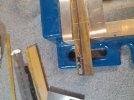
...filed...
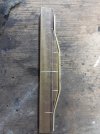
and it looks about right; the next task will be to make the other half of the tool...

The wheelbase needs extending by 10mm, which isn't a huge amount: perhaps a suitably shaped piece of brass strip could be used?

But how to make four identical pieces? A jig? Or a press tool; now that would be the thing! And I had a suitable-sized piece of brass, so I marked it out...

...chain drilled...

...filed...

and it looks about right; the next task will be to make the other half of the tool...
Did you do the paint one coat, mask then spray that colour again to seal the joints then the top coat when that had dried? This does help to seal the gaps and reduce bleed over.Yes, the paint tends to track along those grooves due to capillary action. Mind you, I had invested in proper modeller's masking tape and used a cocktail stick to press it into the crevices, so the paint creep is, as a p*litician might say, disappointing ...
Northsider
Modelling the Northern half of the Isle of Man
Primed, plus two (red) colour coats; then re-masked and applied two coats of off-white.Did you do the paint one coat, mask then spray that colour again to seal the joints then the top coat when that had dried? This does help to seal the gaps and reduce bleed over.
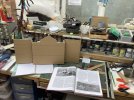
I have been considering revising my Eisfelder Talműhle station. It has always been a bit of a compromise but I have had a desire to make a representation of the real thing. Thus over the last few days I was have been busy cutting and glueing cardboard for a disposable prototype. I imagine what I have done will be some 30 or more % smaller but will fit in the limited space. More will appear in my build of the station thread at some stage if I intend to go forwards with this.

Last edited:

