What happened at your workbench today?

What happened at my workbench?

I moved it outside for more working space and my fingertips fell off with frostbite :mask::mask:
 
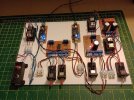
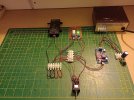
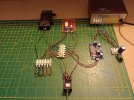
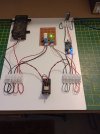
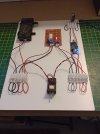
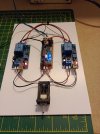
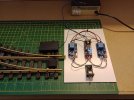
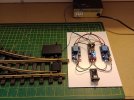
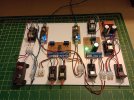
Next Month's project for discussion and evaluation of the various ideas for Point Motor Control, as per the pictures below:

Work in progress projects in the pipeline are,
a) Rudimentary colour light signals,
b) Activators and Detectors for Automation,
c) Servo Motor Control,
d) Animation, including smoke, movement, lights and sound,
e) by which time it will be Christmas! :)

Point Motor Control Green.jpg

Point Motor Control Red.jpg
 
Mine isn't a workbench per se more of a work in progress, but I will get there some day - I'm a lifelong optimist, one day I should get something finished / right.

Rlwy.JPG
 
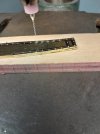
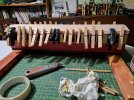
Obsessives Corner, Episode 247. Out with the 0.8mm drills bits, bearing in mind that they are basically a dressmaking pin with two helical grooves cut into them. Oh, and made from a hard (and therefore brittle) material. Despite putting the pillar drill on top speed and going carefully, I snapped two...
20240303_165633.jpg
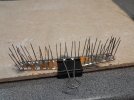
Then the two bufferbeams (which had been 'sweated' together to halve the amount of drilling) we're separated, cleaned up and pins were soldered into the holes.
20240303_172324.jpg
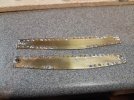
Then the pins were snipped off with side cutters and the reverse side dressed on the linisher, before cleaning up with a brass brush and wire wool. I've still got safety chain eyes to fit, and a couple of 10BA truss rod ends.
20240303_175641.jpg
And of course all this will be visible from the other side of the garden...:shake::oops:
 
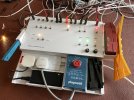
At long last, I have finished the control panel for my grandson's birthday railway. It will not be a permanent installation, so the panel allows for the plugging in of many long cables, so it can all be removed and stored indoors, and has provision to store track wire holders, a plastic uncoupling knife, railer ramp and cleaning block. An old Playmobil controller and laptop power adapter are set on to the MDF base, the box etc being foamboard. There are four momentary switches for points, mimic lamps for the signals and to also to show whether power/points are set for the main or loop at the station, so he will be able to operate 2 trains alternately around the dogbone line, isolating either one at the station by setting the turnout. There are also switches for the station lighting, an isolated siding and a level crossing.

DGR_Controls.jpg
 
Laid out the paraphernalia associated with the Mimic Panel Control, schematic and notes completed.

EPL Mimic Panel Green.jpg
EPL Mimic Panel Red.jpg

Revised and simpler control for Manual or Automatic operation of the Massoth EVO-S.

EVO-S Control Board.jpg

EVO-S Control Board Diverge Route.jpg
EVO-S Control Board Normal Route.jpg
 
At long last, I have finished the control panel for my grandson's birthday railway. It will not be a permanent installation, so the panel allows for the plugging in of many long cables, so it can all be removed and stored indoors, and has provision to store track wire holders, a plastic uncoupling knife, railer ramp and cleaning block. An old Playmobil controller and laptop power adapter are set on to the MDF base, the box etc being foamboard. There are four momentary switches for points, mimic lamps for the signals and to also to show whether power/points are set for the main or loop at the station, so he will be able to operate 2 trains alternately around the dogbone line, isolating either one at the station by setting the turnout. There are also switches for the station lighting, an isolated siding and a level crossing.

View attachment 324462
Nice work.
 
Right, a bit more progress,
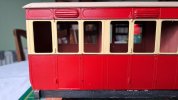
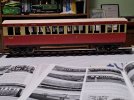
Roof fitted and in a new method, rather than use pin tape, a water based marker was used, what a revelation! a hour of stress done and dusted in 15 minutes with just a steel rule:)
This evening saw the decals put, so now ready for a coat of matt varnish.
20240302_191721.jpg
IMG-20240304-WA0001.jpeg
20240304_211305.jpg
 
Last edited:
At long last, I have finished the control panel for my grandson's birthday railway. It will not be a permanent installation, so the panel allows for the plugging in of many long cables, so it can all be removed and stored indoors, and has provision to store track wire holders, a plastic uncoupling knife, railer ramp and cleaning block. An old Playmobil controller and laptop power adapter are set on to the MDF base, the box etc being foamboard. There are four momentary switches for points, mimic lamps for the signals and to also to show whether power/points are set for the main or loop at the station, so he will be able to operate 2 trains alternately around the dogbone line, isolating either one at the station by setting the turnout. There are also switches for the station lighting, an isolated siding and a level crossing.

View attachment 324462
You must have put a lot of thought into that! Looks like an enjoyable project
 
Obsessives Corner, Episode 247. Out with the 0.8mm drills bits, bearing in mind that they are basically a dressmaking pin with two helical grooves cut into them. Oh, and made from a hard (and therefore brittle) material. Despite putting the pillar drill on top speed and going carefully, I snapped two...
Maybe cutting fluid might have helped. It helps a lot when drilling through stainless steel.
 
Maybe cutting fluid might have helped. It helps a lot when drilling through stainless steel.
Brass tends to be self-lubricating, though a splash of turpentine (or saliva!) can help. There's not much binding of swarf, and precious little heat. In all honesty I was probably just a bit heavy-handed.
 
With every metal incl lead and tin based, when you need to drill use oil.
only synthetic oils, from car engine oil to dedicated cutting oil.

oil has to my knowledge two functions: cooling and reduce friction.
 
Back
Top