You are using an out of date browser. It may not display this or other websites correctly.
You should upgrade or use an alternative browser.
You should upgrade or use an alternative browser.
What happened at your workbench today?
- Thread starter Henri
- Start date
I found all of my battery packs in my RH locs had given up the ghost due to lack of use and charging regime. Converted them all to run on 9v cheepo batteries from my local poundstrecher, doubt you will have one of them nearby!Started servicing steam engines
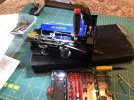
Sent for and received Strikalite battery packs for 2 as they’d given up, waiting in the shed for meView attachment 325397
owlpool
Welsh NG in the mountains. live steam
That was the problem with mine. Some run on replaceables but I like the convenience and it cost only £42 for 2 Strikalite packs and charging adaptersI found all of my battery packs in my RH locs had given up the ghost due to lack of use and charging regime. Converted them all to run on 9v cheepo batteries from my local poundstrecher, doubt you will have one of them nearby!
Chris Vernell
45.29 N, 75.75 W
Cue musicThis is my latest creation. I still have to add sound and some greenery to the trees.
Monty
Registered
JimmyB
Now retired - trains and fishing
Not quite the workbench, but the railway itself. As mentioned in the coffee lounge, I have had a couple of derailments on mu curved gradient. A little (and I mean little) superelevation, hardly noticeable and the two main culprits tested and all is well. Just need some warm weather for the rest of the re-blasting
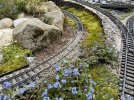
Test crew going open air for a full-on feel of the track
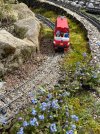
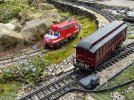

Test crew going open air for a full-on feel of the track


Jasper
Hey, I'm only being creative here!
Runaway coach!
Rhinochugger
Retired Oik
Oh, we like superelevationNot quite the workbench, but the railway itself. As mentioned in the coffee lounge, I have had a couple of derailments on mu curved gradient. A little (and I mean little) superelevation, hardly noticeable and the two main culprits tested and all is well. Just need some warm weather for the rest of the re-blasting
View attachment 325549
Test crew going open air for a full-on feel of the track
View attachment 325550
View attachment 325551
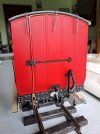
Lovely piece of modelling. It's making me want to attempt to do the same to my motley collection of coahesLast external details done, lighting switch and associated cables and rivets.
View attachment 325561
Followed by splashing of black paint.
owlpool
Welsh NG in the mountains. live steam
Rhinochugger
Retired Oik
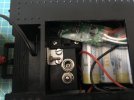
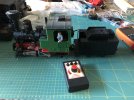
Yep, if you leave the batteries charged, it's surprising how long they'll lastGot my battery powered Stainz running again. Must be about 10+ years ago had 12 AAs pack from Strikalite and RC from Ge_rik in the tender. Needed some new connectors and one bit of soldering, a new bracket for the switch panel and general fettling. Now runs fine after about 5 years non operationalView attachment 325567View attachment 325568
owlpool
Welsh NG in the mountains. live steam
I did charge them periodically - unlike the ones in the steamers which had diedYep, if you leave the batteries charged, it's surprising how long they'll last
Rhinochugger
Retired Oik
I had a 12v pack of sub-Cs in a loco which went away fully charged, but did not get used again for four or five years. It still ran, and I replaced the batteries a couple of years ago, so they ran for another four or five years after I resurrected itI did charge them periodically - unlike the ones in the steamers which had died
The Shed
Citizen of the Republic of the North East.
Completed several of the questions and requests from the recent indoor meet.
One of the assembled individuals purchased a number of Relay Modules, and was somewhat flummoxed on how to operate them, two options provided, both designed around 'Old Skool' IC's.
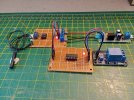
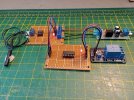
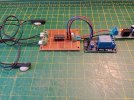
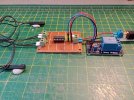
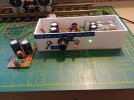
Another request, put together another two PWM to Linear converters, temporary assembled one to send down, to enable the recipient to copy for their own use.
One of the assembled individuals purchased a number of Relay Modules, and was somewhat flummoxed on how to operate them, two options provided, both designed around 'Old Skool' IC's.


Another request, put together another two PWM to Linear converters, temporary assembled one to send down, to enable the recipient to copy for their own use.

I thought they where up to date and modern!'Old Skool' IC's
Only if they are tiny, surface-mount, and won't do anything unless you spend three-weeks trying to program them!I thought they where up to date and modern!
PhilP
David1226
Registered
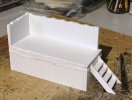
Work proceeding on the first of a pair of loco coaling stages, fabricated out of 3.0mm plasticard. The rear and left hand walls are double thickness glued together, the front and right hand walls are single thickness, but doubled up where the corners meet. The decking and steps are single thickness. The steel strip reinforcement are 2.0mm wide strips of 0.5mm plasticard. The bolt heads are the usual 1.0mm self adhesive pearl jewels. As with most of my scratch builds, I start with an idea and design it as I go along. This time, I got it wrong, the rear/side walls were too high, it didn't look right, I had to saw 15.0mm off the height and remodel the tops of the walls, at least I should have the dimensions right for when I start the second model.
David

David

