You are using an out of date browser. It may not display this or other websites correctly.
You should upgrade or use an alternative browser.
You should upgrade or use an alternative browser.
What happened at your workbench today?
- Thread starter Henri
- Start date
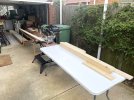
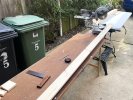
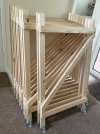
Those boards will be nice and heavy to carry into shows, even with ply tops. My Gauge3 4x2ft boards will be all ply with ply legs as well almost single finger lift for each board with legs separate, not that I am planning to do many shows with it more to do with storage and occasional getting them out for a play in the house.Not my regular workbench, you understand, a temporary set up, but you get my drift. A start made, but still a long way to go.
View attachment 326352
View attachment 326353
David
Madman
Registered
A bit more experimenting with my Lionel rocket launcher, yesterday. I obtained a larger rocket so that lights could be placed at the bottom. Not quite perfect yet, so more tinkering to be done. I also ran the Lionel "Tie-Jector". This is an item I picked up a few years ago at a meet in Philly. This one dates to the mid fifties.
This puts my rocket launcher to shame;

475K views · 49K reactions | It took 99,000 hours to build the USA theme world at miniatur wunderland. The space shuttle is a great detail to the scenery. #spaceshuttle #usa #modeltrain #miniaturewonderland | Model Trains Enthusiast
It took 99,000 hours to build the USA theme world at miniatur wunderland. The space shuttle is a great detail to the scenery. #spaceshuttle #usa #modeltrain #miniaturewonderland
 www.facebook.com
Jasper
Hey, I'm only being creative here!
But there is something to the quiet, matter-of-fact ascend of that Space Shuttle. It just departs, without any fuss, like a train or a bus would. And don't forget: that's how Space Shuttles were conceived, they would depart and arrive all the time, like any regular transport. So to me, that looked simply right.This puts my rocket launcher to shame;

475K views · 49K reactions | It took 99,000 hours to build the USA theme world at miniatur wunderland. The space shuttle is a great detail to the scenery. #spaceshuttle #usa #modeltrain #miniaturewonderland | Model Trains Enthusiast
It took 99,000 hours to build the USA theme world at miniatur wunderland. The space shuttle is a great detail to the scenery. #spaceshuttle #usa #modeltrain #miniaturewonderlandwww.facebook.com
brokenwing
Registered
A very smart set up. I envy your skills as I can only saw angled cuts even when they should be straight. Thought it was a bit mean that the “Bins” only gave you marks of 5 for your joinery!Not my regular workbench, you understand, a temporary set up, but you get my drift. A start made, but still a long way to go.
View attachment 326352
View attachment 326353
David
The Shed
Citizen of the Republic of the North East.
Another couple of paid jobs completed, assembling Stay Alive Capacitors and modifying the LGB 55028 Decoder for their use.
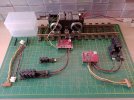
Additional circuitry for Signal Control, SR Latch and a Fade In/Out, operating from the Massoth Train Detection Module.
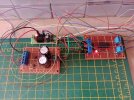
Testing with a purchased Signal, and a 3D printed dwarf signal, all good.
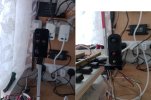
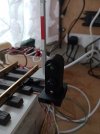
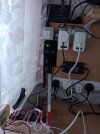
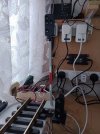

Additional circuitry for Signal Control, SR Latch and a Fade In/Out, operating from the Massoth Train Detection Module.

Testing with a purchased Signal, and a 3D printed dwarf signal, all good.


The Shed
Citizen of the Republic of the North East.
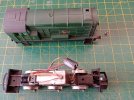
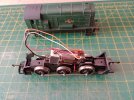
Back onto the smaller scale, short instruction course for some of the Club Members, converting a Hornby Class 08 from DC to DCC.
As part of the Heritage Museum Display on the Hopetown Layout, require a Class 104 DMU, one method is the conversion of a Hornby 110, the Cab Ends are available on eBay for £25.00 a pair, not a chance!, home printed for a few pennies!
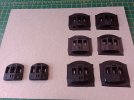


As part of the Heritage Museum Display on the Hopetown Layout, require a Class 104 DMU, one method is the conversion of a Hornby 110, the Cab Ends are available on eBay for £25.00 a pair, not a chance!, home printed for a few pennies!

On my trip to North Elmham a house a few doors past where I was staying had a load of toys n stuff outside just help yourself. Sadly no Playmobil but on the third passing a light bulb moment hit at this. 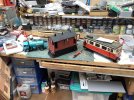
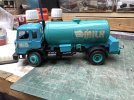
Pulled apart the Tank will be repainted and go in my factory. Other bits like fuel tank, exhaust, engine and wheeks will find use on conversions and in junk piles when rusted on my line. Not much will go to waste. The figure is I reckon 0 gauge so he will get a repaint and go into one of my 0 gauge coaches or Stephen’s Railcar.
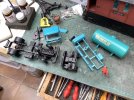


Pulled apart the Tank will be repainted and go in my factory. Other bits like fuel tank, exhaust, engine and wheeks will find use on conversions and in junk piles when rusted on my line. Not much will go to waste. The figure is I reckon 0 gauge so he will get a repaint and go into one of my 0 gauge coaches or Stephen’s Railcar.

Rhinochugger
Retired Oik
Blimey, the Milk Marketing Board - how old is that? OK. I thought it was a Bedford TK, but it says Leyland on the front, and the MMB was still going when I were a lad, just down the road at Thames Ditton - my mother had worked there before they got marriedOn my trip to North Elmham a house a few doors past where I was staying had a load of toys n stuff outside just help yourself. Sadly no Playmobil but on the third passing a light bulb moment hit at this. View attachment 326739View attachment 326737
Pulled apart the Tank will be repainted and go in my factory. Other bits like fuel tank, exhaust, engine and wheeks will find use on conversions and in junk piles when rusted on my line. Not much will go to waste. The figure is I reckon 0 gauge so he will get a repaint and go into one of my 0 gauge coaches or Stephen’s Railcar.
View attachment 326738
But then again, how many left hand drive trucks did the MMB have
Oh dear instead of trashing it should have ebayed it! Too late now.Blimey, the Milk Marketing Board - how old is that? OK. I thought it was a Bedford TK, but it says Leyland on the front, and the MMB was still going when I were a lad, just down the road at Thames Ditton - my mother had worked there before they got married
But then again, how many left hand drive trucks did the MMB have
Rhinochugger
Retired Oik
Ha ha - I don't think it would have been valuable - interesting, but uselessOh dear instead of trashing it should have ebayed it! Too late now.
I don't think the model can be of any age - plastic chassis and steerable front wheels can't be any earlier than the 70s
Rhinochugger
Retired Oik
The Milk Marketing Board wasn't just about advertising, in fact I don't think they did advertise much (unlike the Egg Marketing Board) - think Railway Clearing House for dairy farmers
viaEstrecha
Spanish metre gauge in G scale (on the cheap)
'The Repair Shop' is one of my favourite TV programmes yet I hate repairing stuff myself - much more fun creating something new. But birds/animals/footballs/clumsy pensioners etc present a constant challenge to vulnerable signals and so I've been repairing some. Despite being North Pilton Works ply, they've done remarkably well outside, modified and with oodles of primer and paint. The original LEDs are set in chunky coloured plastic domes, which looks good but I only have conventional 5mm bright LED replacements, so I've set these in clear acrylic disks of the same diameter - I keep a stock of these in various sizes and they are sold as bases for adventure games figures. I am also taking the opportunity to redesign the bases and track attachment, using a LGB 5071 cable holder as a pattern, as I found my original design failed to keep the signals pertly perpendicular after a year or two. It's an age thing, I suppose. Constantly learning. 
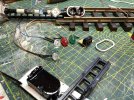

Northsider
Modelling the Northern half of the Isle of Man
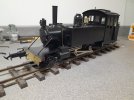
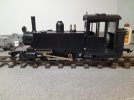
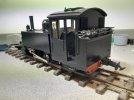
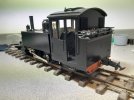
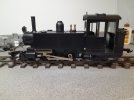
Well, I've mentioned it in the daily posts, so here's a first look at where I'm up to with the L&B Baldwin. I have a whole history worked up for how & why this might have made it to the IOM...
New bufferbeam, sand domes gone, new stays and lubricator pipes, and plenty of paint, which is still a work in progress. Next up, safety valves, a blower pipe and couplings...
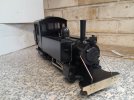
New bufferbeam, sand domes gone, new stays and lubricator pipes, and plenty of paint, which is still a work in progress. Next up, safety valves, a blower pipe and couplings...

Fezwig
Just a man in the middle of a complicated plan.
It was found in a jungle in Brazil and was mistaken for a diesel.........I have a whole history worked up for how & why this might have made it to the IOM...
Northsider
Modelling the Northern half of the Isle of Man
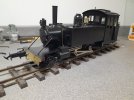
Rather like Brough Superior motorcycles, which were assembled and tested before being dismantled for final painting, my re-worked Lyn is complete apart from a couple of tasks so I put everything together for one last check. Final painting will follow, and RC installed when I get the time, but for now, time to take stock...
