You are using an out of date browser. It may not display this or other websites correctly.
You should upgrade or use an alternative browser.
You should upgrade or use an alternative browser.
What happened at your workbench today?
- Thread starter Henri
- Start date
Are they all successful Mary Kay sales associates? We had a neighbor who always drove a pink Cadillac she "won".I read somewhere that my country has 3400 pink automobiles. I like to try picturing them together in one place.
Jasper
Hey, I'm only being creative here!
Thanks for providing me with a new scenery idea.Are they all successful Mary Kay sales associates? We had a neighbor who always drove a pink Cadillac she "won".
David1226
Registered
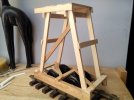
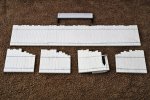
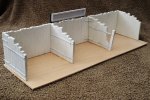
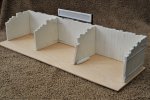
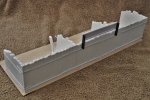
Work progresses with the coal staithes, shaping completed, assembly completed, sign board completed, although will have to have taller support posts. Also name printed up for the sigh board. Since the below photos were taken, whole thing has been sprayed up in grey primer. Now the marathon task of painting awaits.
David


David
The Shed
Citizen of the Republic of the North East.
Blowing a hooey here, tidying up exercise ready for tomorrow, new boiler being fitted.
One of those days to mull over a 'round tuit', Hall Sensors and a method to trigger one, being a devout tightwad looked for a cheap DIY method.
Yellow insert, from one of these kits, Metal Construction Vehicle Kit | Construction Toys at The Works, pick one up whenever I come across one on my travels.
Insert drilled out for an interference fit over a wagon/coach axle, couple of small magnets super glued on to it.
Hall Sensor module, cheap and cheerful for experimentation purposes, fairly tolerant in the Horizontal & Vertical plane for the magnets to activate it, anything between half and quarter inch away from the magnet, as for side play from the axle anything between on eighth or a quarter of an inch, precise not a requirement!
Signal (VOUT) and POS hooked up to a Green LED, as magnet gets close/ and near far away, Hall Sensor activates/deactivates LED turns on or off.
Once the magnet passes the activation zone, Hall Sensor off and LED off.
Basis for further tinkering, and as one thing leads to another, another 'round tuit' may even get started!
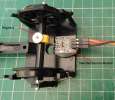
Hall Sensor activated, LED ON
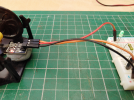
Hall Sensor deactivated, LED OFF.
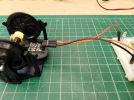
One of those days to mull over a 'round tuit', Hall Sensors and a method to trigger one, being a devout tightwad looked for a cheap DIY method.
Yellow insert, from one of these kits, Metal Construction Vehicle Kit | Construction Toys at The Works, pick one up whenever I come across one on my travels.
Insert drilled out for an interference fit over a wagon/coach axle, couple of small magnets super glued on to it.
Hall Sensor module, cheap and cheerful for experimentation purposes, fairly tolerant in the Horizontal & Vertical plane for the magnets to activate it, anything between half and quarter inch away from the magnet, as for side play from the axle anything between on eighth or a quarter of an inch, precise not a requirement!
Signal (VOUT) and POS hooked up to a Green LED, as magnet gets close/ and near far away, Hall Sensor activates/deactivates LED turns on or off.
Once the magnet passes the activation zone, Hall Sensor off and LED off.
Basis for further tinkering, and as one thing leads to another, another 'round tuit' may even get started!

Hall Sensor activated, LED ON

Hall Sensor deactivated, LED OFF.

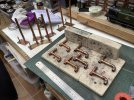
Managed to get most of the Van completed, put it out on the Railway for tomorrows running day and then remembered things still to do. That means it will need to be Green Carded and returned to Gernrode Shops to be completed, that process likely to take another weeks wait for the next Operating Session. But I have made a good start on the 7 water cranes that I am building.

justme igor
Registered
Not much happen...spendid a six/eight hours cutting some sleepers/ties for my storage shed....(1 of 6!!!total).
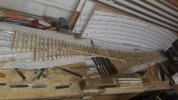
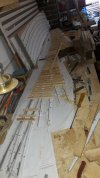
I can not wait to finish and turn it around!!!
Yes i made use of a jig and my jigsaw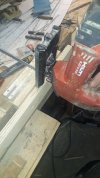
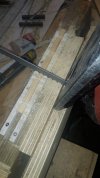
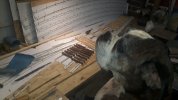
My big help or he was looking for food, reminds me of updating a other thread/tutorial!
With best regards, Igor kurgan
Ps pictures are again not in there following order...sorry for this mess


I can not wait to finish and turn it around!!!
Yes i made use of a jig and my jigsaw


My big help or he was looking for food, reminds me of updating a other thread/tutorial!
With best regards, Igor kurgan
Ps pictures are again not in there following order...sorry for this mess
JimmyB
Now retired - trains and fishing
So having looked at the "camera wagon" thread, and not liked my own videos of going around the track, i thought i would dabble.
Having "bench tested" the wagon, one issue I found, and have notice in general, when you push a wagon around a circuit the lead bogie want to go straight, so NOT driving the camera mount. I had suspected this may occur, and in anticipation I have ordered a "bogie steering" kit as described in "Installing LGB Container Wagon Wheel Set Control Kit" from Germany, this should cure that issue.
So where is the video? well the camera I have is a clone (so I found out) and the video is terrible, and the sound is completely out of sync hence my thread "which camera" though still not made my mind up.
Camera wagon mock-up.jpg
A wagon for camera mount with bogie driven pivot
Having "bench tested" the wagon, one issue I found, and have notice in general, when you push a wagon around a circuit the lead bogie want to go straight, so NOT driving the camera mount. I had suspected this may occur, and in anticipation I have ordered a "bogie steering" kit as described in "Installing LGB Container Wagon Wheel Set Control Kit" from Germany, this should cure that issue.
So where is the video? well the camera I have is a clone (so I found out) and the video is terrible, and the sound is completely out of sync hence my thread "which camera" though still not made my mind up.
Jasper
Hey, I'm only being creative here!
That's one of the reasons four wheel bogies exist.Oh! and a two-axle (four-wheel) bogie, would probably cure the 'no-steering' problem?
JimmyB
Now retired - trains and fishing
Oh! and a two-axle (four-wheel) bogie, would probably cure the 'no-steering' problem?
Good call, so what to use as a downer
PhilP
G Scale, 7/8th's, Electronics
Good call, so what to use as a downer
Well, not the "up good's"!
Either an ECR bogie vehicle, perhaps..
OR
"Paging Mr eBayMike.."
justme igor
Registered
Put the camera(lens!) in the middle/center of the wagon?So having looked at the "camera wagon" thread, and not liked my own videos of going around the track, i thought i would dabble.
Camera wagon mock-up.jpg
A wagon for camera mount with bogie driven pivot
Having "bench tested" the wagon, one issue I found, and have notice in general, when you push a wagon around a circuit the lead bogie want to go straight, so NOT driving the camera mount. I had suspected this may occur, and in anticipation I have ordered a "bogie steering" kit as described in "Installing LGB Container Wagon Wheel Set Control Kit" from Germany, this should cure that issue.
So where is the video? well the camera I have is a clone (so I found out) and the video is terrible, and the sound is completely out of sync hence my thread "which camera" though still not made my mind up.
Great thought btw, followed this with intressed to build my own.
Thanks for sharing.
justme igor
Registered
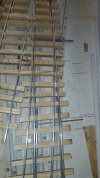
A grown up man playing with tracks and trains....pathetic!
Gentle man are you ready????....got any tissues in reach?
Yes i am pretty proud....
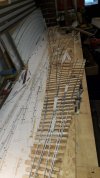
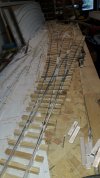
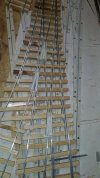
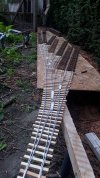
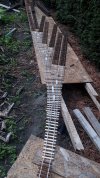
It needs a little bit of further tweaking, BUT the test wagon and loco did not derail or serious flange butting.
Things to improve:
Smaller spout to my putty tool
Have to reinforce the guard rails from the bottom, to make a more solid u
Pay a bit more attention to the safety rails into the frog, to file the edges off.
Make the gap in the points from the closure rail longer, 4 inch is just to short
Adjust some ties/sleepers for sliding plates under the points.
Spacing in between sleepers and where to place them propperly
Total: 22 hours of work(incl cutting and slotting the sleepers) and 20 meters of alu strip.
Total costs 9.50 euro incl putty, i am really impressed
Wood was free fire wood.
Those 3 way's are for in the shed not outside.
Gentle man are you ready????....got any tissues in reach?
Yes i am pretty proud....


It needs a little bit of further tweaking, BUT the test wagon and loco did not derail or serious flange butting.
Things to improve:
Smaller spout to my putty tool
Have to reinforce the guard rails from the bottom, to make a more solid u
Pay a bit more attention to the safety rails into the frog, to file the edges off.
Make the gap in the points from the closure rail longer, 4 inch is just to short
Adjust some ties/sleepers for sliding plates under the points.
Spacing in between sleepers and where to place them propperly
Total: 22 hours of work(incl cutting and slotting the sleepers) and 20 meters of alu strip.
Total costs 9.50 euro incl putty, i am really impressed
Wood was free fire wood.
Those 3 way's are for in the shed not outside.
Attachments
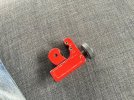
So the uprights were all cut using a Plumbers Cheeto Pipe Cutter like below, these give a good square cut that supports itself when soldering to the base plate. What I do is a little flux on the end, drop in a little bit of solder then put a pair of pliers in the top to stop my pinkies getting burnt then heat up with a Cooks Blow Torch till solder emerges round the edges. Remove blow torch and wait till solder dulls then it should be set. All has been heated up on heat protection Matt and blocks. These things will take a full blown silver solder torch full heat and just glow a little red where the flame is. Hope that is what you were asking.To Dunnyrail,
Do you have a trick to get all sub-assemblies in the same plan, flat.
I am very interested by your water supply tower construction .


