What happened at your workbench today?

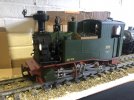
I appreciate this is a basic question, but what did you do for ‘servicing’? I’ve got a similar railbus that has been sitting in a box for ages and soon will be coming out to play.
Good question!
all of the following steps are done from underneath the bus

WORD OF WARNING, these rail buses are fitted with a spring and ball bearing at the end of each gearbox, and they will ping off if you open the gearbox to re-grease, I usually take these apart in a sealed box.


basically i clean up the wheels and contacts,
take off the middle motor cover and remove the motor to check contacts and driveshafts

the wheels need to be removed to open the gearbox, this is where the springs could escape, add a little grease to the gears if needed and clean up the carbon brushed if needed

re assemble , make sure any wires do not get pinched in casings, and should be good to go!

hope this helps
 
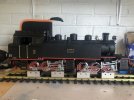
Lgb mallet has been fitted with Massoth pulsed smoke unit, sound and firebox light View attachment 269171
Nasty pile of what looks like "iron filings" under the third axle from the left, I assume these are just coincidently there.
 
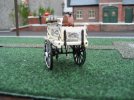
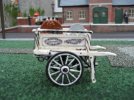
Rain here most of today so time in shed to finnish of knive grinders barrow
 

Attachments

  • IMG_0587.JPG
    IMG_0587.JPG
    450.4 KB · Views: 0
  • IMG_0585.JPG
    IMG_0585.JPG
    425.5 KB · Views: 1
Got a couple of doors boot headed up and spray painted Van body brown.
 
I have tried to build it to 1:24 scale as the doors and windows are easily sourced due to use in doll houses (half scale).
Thanks for reminding me that 1:24 is indeed one of the most common dollhouse scales, which can come in handy for G scalers. (The other one is 1:12)
 
Last edited:
Not much,:).....installed the mechanics.
20200627_180304.jpg20200628_121909.jpg20200628_120443.jpg20200628_122322.jpg20200628_120433.jpg20200628_121648.jpg20200627_180304.jpg20200628_121909.jpg
for this one.....
It is not electrified yet but that ill come in time.

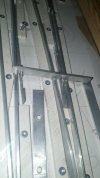
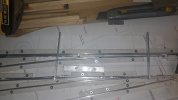
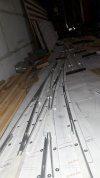
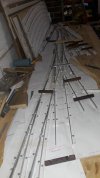
20200630_213100.jpg20200630_213013.jpg20200630_213044.jpg
 
Last edited:
Now there is talent, 3 way points. I remember my 1st one in 0 gauge, fiendishly tricky to wire up with live frogs. But you do not have that issue.
 
Now there is talent, 3 way points. I remember my 1st one in 0 gauge, fiendishly tricky to wire up with live frogs. But you do not have that issue.

Thanks for your compliment, i am really busy with it.
Sorry i misstated wrong: i would like to electrify the mechanics based on a solenoid, and control them frequency based with one power cable.
 
Thanks for your compliment, i am really busy with it.
Sorry i misstated wrong: i would like to electrify the mechanics based on a solenoid, and control them frequency based with one power cable.
No I meant track power, mechanics not too difficult except that a level of interlocking desirable to ensure that routes are set and returned to normal or alternative routes correctly.
 
Masked up my Van for next coat of brown prior to spraying bkack. Did not think I would get the second coat done but after our walk it was sunny and warm enough to do it.
 
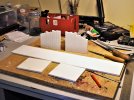
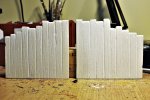
I have a sizeable backlog of modelling projects that I am waiting to get stuck into once my eye operation is, hopefully successfully, out of the way. You cannot put life on hold forever, so I have been tinkering, that is to say I have an idea but the execution is made up as I go along, in this case some coal staithes for the Claptowte Railway. Having considered various options I decided to stick with the medium that I am happiest working with, polystyrene sheet. I had a largish sheet of 2mm thickness so I had to start by cutting strips of the relevant size and gluing three together to make walls 6mm thick. Now starts the really messy, but strangely therapeutic, bit, the scribing, sawing and filing. Two side walls completed, two more and the back wall to go.

dig 200701001.JPG

dig 200701002.JPG

David
 
Back
Top