What happened at your workbench today?

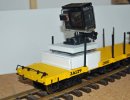
Well eventually have my "camera wagon" working:

View attachment 270276

So this is the set up for the initial trial, the rock a temporary fix to provide some stability. So what does the feed look like:


A quick run around the circuit, not bad, well i like it :)

Further to this camera wagon, some refinements, the major change is to turn the turntable around and it is operated "through the wagon":

This shows the hole cut and fixing for the mount
Camera Wagon Floor.jpg


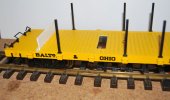
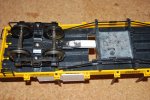
The under side with the camera turntable drive, metal wheels and additional weight
Camera Wagon Chassis.jpg


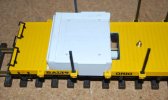
The camera mount "dais" in position, this is not fixed, but located for easy removal, the raised sides are to locate the turntable bearing.
Camera Wagon Dias.jpg


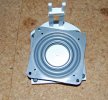
The camera turntable, note a "4 inch Lazy Susan" bearing from evilbay is used for the swivel, and the drive pegs at the top of the photo.
Camera Wagon Turntable.jpg


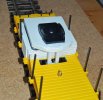
Turntable and camera mount in position, again the turntable is just located in position, with the only bearing bolted to the turntable.
Camera Wagon Camera Mount.jpg


The complete assemble.

Camera Wagon Complete.jpg

The height and distance back allows a better panorama, (without too much sky), and though only "hand push" tested provides a good amount of stable movement. The next stage a is a full external test, and then a coat of paint just to finish it off.
 
Further to this camera wagon, some refinements, the major change is to turn the turntable around and it is operated "through the wagon":

This shows the hole cut and fixing for the mount

View attachment 271771


The under side with the camera turntable drive, metal wheels and additional weight

View attachment 271772


The camera mount "dais" in position, this is not fixed, but located for easy removal, the raised sides are to locate the turntable bearing.

View attachment 271773


The camera turntable, note a "4 inch Lazy Susan" bearing from evilbay is used for the swivel, and the drive pegs at the top of the photo.

View attachment 271774


Turntable and camera mount in position, again the turntable is just located in position, with the only bearing bolted to the turntable.

View attachment 271775


The complete assemble.

View attachment 271776

The height and distance back allows a better panorama, (without too much sky), and though only "hand push" tested provides a good amount of stable movement. The next stage a is a full external test, and then a coat of paint just to finish it off.
.......... and then, presumably, it will be available for hire ;);)
 
.......... and then, presumably, it will be available for hire ;);)
Now there is a thought :)
Or actually like the G mad van that did the rounds though this time in UK ONLY and with stipulation that it should be moved on after no more than a week and not being kept by a select few. This way we could get a lot of vid of many lines all done in a similar way?

I did try hard to get on the G Mad van thing but was ignored.
Yeah, I got grumpy about that as well - Ian Powell took pity and delivered it to me at work in Hammersmith :clap::clap:
 
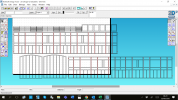
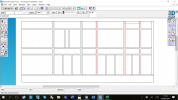
It's a sign of the times that a workbench is now digital/virtual, as well as the actual place where work takes place. I've just started the drawings for a Manx Northern Cleminson six-wheeler:
1597942028925.png

The Train Department produced a beautiful kit of them a few years back, but at the time the budget didn't run to one, let alone a rake. But with the return to work (and a laser cutter) imminent, I thought I'd start planning. The tricky bit is going to be the underframes, but once I've cracked it there were 11 identical coaches, so I might need a few...
 
It's a sign of the times that a workbench is now digital/virtual, as well as the actual place where work takes place. I've just started the drawings for a Manx Northern Cleminson six-wheeler:
View attachment 271857

The Train Department produced a beautiful kit of them a few years back, but at the time the budget didn't run to one, let alone a rake. But with the return to work (and a laser cutter) imminent, I thought I'd start planning. The tricky bit is going to be the underframes, but once I've cracked it there were 11 identical coaches, so I might need a few...
There's quite a good online drawing of the Cleminson 6w flexible chassis - but you may not have to go the whole hog - a pair of LGB / Playmobil swivelling axles and a central floater that just goes from side to side could do it. The issue is clearances with the running boards.
 
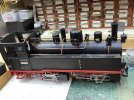
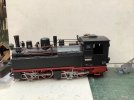
Last few days have been working on this troublesome loco.


Got it all all up and running so now working on backdating it to roughly 1981 condition. New bits of Copper Mains wire doing new and revised runs. So e of the originals being used where practicable.
614299EC-641C-4D75-AAE1-D471C3EFF6A1.jpeg
 
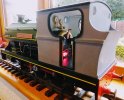
As most things haven't worked out as planed this weekend, I thought I would do some thing useful, Add some pipework and finally work out the assembly order for Grumpy Bear's cab so now I can start and add the detail to it, then off to paint shop. I have added the firebox module so now the Driver and Fireman can keep warm on these cold summer evenings :)

bear6.jpg
 
Last few days have been working on this troublesome loco.


Got it all all up and running so now working on backdating it to roughly 1981 condition. New bits of Copper Mains wire doing new and revised runs. So e of the originals being used where practicable.
View attachment 271952
What is the second chimney for?
 
What is the second chimney for?
Now that is a very good question, sadly one that I do not have a reliable answer for. Perhaps some one could comment, certainly as such it is not a Chimney as on some pictures of other Mallets it has a flat top. Perhaps something to do with boiler water feed? All I know that on this model it twiddles to change the sound level on the speaker. Of interest the Mallets did not have this in their early days but similar devices can be seen on some of the pictures of RHB Mallets and even some of the 2-8-0’s that LGB now produce. Below you can see a similar device just in front of the cab.
2DC2B38F-5F81-4262-AF70-655F76380580.jpeg
 
Hope to get within social distance of a laser cutter today for some test cuts of the Cleminson body:

1598426454766.png
 
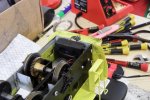
This shows the little speaker and its box installed in the Yeti. The speaker opening is about 3 - 5 mm from the face of the speaker

The speaker is one of those small, flat, rectangular ones which are a bit tinny until you contain them ;);)

DSCF1800.JPG
 
I think I can answer the double chimney query, steam regulator exhaster lets the excess steam on the regulator out many locos in europe had smaller Chimney blast pipes, An english A4 has the same arrangement on the double front. Dr Giesel (sorry about spelling) produced a flat double which was trialled on Corris no4 on the Talyllyn railway in the 1950's and is in Thomas books.
 
I discovered most of the contents of my solvent (for welding plastics) had 'disappeared' from the bottle. :(

So it being past closing-time, I am trying hot-melt. - To construct an angular mounting.. It is not going well! :eek:
I fear the unit concerned will fall apart in the future.. Supposed to be 2-off of these, but am only going to build one for now..
 
I think I can answer the double chimney query, steam regulator exhaster lets the excess steam on the regulator out many locos in europe had smaller Chimney blast pipes, An english A4 has the same arrangement on the double front. Dr Giesel (sorry about spelling) produced a flat double which was trialled on Corris no4 on the Talyllyn railway in the 1950's and is in Thomas books.
Not quite it is “a silencer for the vacuum brake ejector“. Many thanks to Andreas for that knowledge.
 
A while ago I bought a Bachmann "Atchison Topeka & Santa Fe" battery operated train set (mainly for the track) with a not working loco. The plan was to convert the RC battery powered loco to 2.4 RC battery powered loco. So having bough an genuine "Annie" chassis I made a start today, and Bachmann advice, true to their word the body does fit the chassis with very little work, main work carried out arounf the sockets and switch. Tested with one of my "other" power cars and it works, having already purchased the Rx and MLS, just needed a decent speaker and battery, and with the tender stripped down these are now on order.
What I need is some weight for the loco, and a two pin plug, my original only had 1 and I need one for the "chuff".

Now to think about paint scheme mmmmmmmmmmmmmmm.
Are you considering putting the Batteries in the loco? You should get some decent weight with 8-10 batteries inside where the original 7.2 pack used to sit. As for connecting plugs, the links will not be heavy use so likely one of those 4 pin or two pin 00 DCC linking loco and tender plugs will be fine. I have used them for power on my 3 car DCC fitted LGB 4 wheel railcars with great success.
 
Back
Top