You are using an out of date browser. It may not display this or other websites correctly.
You should upgrade or use an alternative browser.
You should upgrade or use an alternative browser.
What happened at your workbench today?
- Thread starter Henri
- Start date
Steve Manners
Registered
GRSUK do some coach roofs. They are vac formed plastic I think, maybe imported from Canada. They are about 105mm wide side to side, just wide enough for Bachmann but not LGB stuff. They once had some a bit wider, I think for vans but they didn't have that in last time I looked. They cost money though. You could score lines along thin MDF or plastic sheet with a Stanley knife and steel rule about 5mm apart then fill the grooves that form when you glue it on. Wear a glove on the hand that isn't holding the knife. Remember the golden rule, you always cut yourself when you put a new blade in! Have some elastoplast strips ready with the backing peeled off ready to use. Of course that never happened to me, someone must have given me that advice.After more stops than starts I am finally getting around to modifying Bachmann Claribelle, Annie and Emily coaches to something vaguely resembling GN coaches to run behind a modified Emily. Even slower going on that part of the project.
After hunting endlessly for a spirit varnish to emulate teak I had to give up and use Revell Reddish Brown acrylic. which had been sitting next to me throughout! It still needs varnish which I am hoping will show up the gold lining better. Handrails are still needed.
I have more or less given up trying to create the correct roof shape. All efforts to carve wood, shape balsa or plastic sheet have met with failure.
The difficulty of seeing materials and paints “in the flesh” due to Flu has not helped progress.
Steve Manners
Registered
HI again, another thought re roofs. Took some 2mm Foamex to an engineer mate who has one of those metalworking roller/press/guillotine machines. You can buy them in Machine Mart.
He set the rollers and rolled a nice roofy curve on 3 sheets for me. Length limit on this machine was about 295mm, just does an A4 sheet. Maybe not long enough for you.
A big engineering workshop would probably have longer rollers, just a question of whether they could be bothered, and what they would charge. Foamex is fairly cheap on Ebay but you have to look closely to get the best price.
It would work on ABS plastic or aluminium sheet, brass etc.
KeithT
Hillwalking, chickens and - err - garden railways.
Thanks, I will follow up your lead.GRSUK do some coach roofs. They are vac formed plastic I think, maybe imported from Canada. They are about 105mm wide side to side, just wide enough for Bachmann but not LGB stuff. They once had some a bit wider, I think for vans but they didn't have that in last time I looked. They cost money though. You could score lines along thin MDF or plastic sheet with a Stanley knife and steel rule about 5mm apart then fill the grooves that form when you glue it on. Wear a glove on the hand that isn't holding the knife. Remember the golden rule, you always cut yourself when you put a new blade in! Have some elastoplast strips ready with the backing peeled off ready to use. Of course that never happened to me, someone must have given me that advice.
Many moons ago I trained as a draughtsman and am aware of the perils of scalpels and straightedges. I shall never forget our elderly “I can do that” typist who despite warnings cut some paper herself and lost the end of an index finger. As a consequence she could never type as well.
SevenOfDiamonds
Registered
I have more or less given up trying to create the correct roof shape
GRSUK do some coach roofs.
Don't the GRS roofs (made of plastikard) have a constant curve? Maybe their vacuum-formed ones might offer more variety.
Do I presume the roofs you aspire to are like this . . .
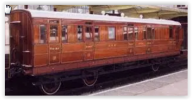
If so, they are quite like the roofs on LGB 3062 (etc.) carriages, with a variable curve, being much steeper at the edges . . .
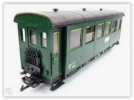
Unfortunately, I've been looking out for examples on German eBay for several years (as I have a couple of coaches of that type which I've assembled from parts but which still need roofs). A couple did pop up during 2020 but the (then) high postage costs always meant I lost out to German bidders. Since the start of 2021, fewer German sellers are willing to post to the UK, and those that are are quoting even higher postage charges (let alone eBay adding 20% vat).
So, what is the solution? I haven't yet got to the point where I can share a foolproof solution but I can share the methodology I'm experimenting with. My raw material is a bamboo place mat. There are typically 30cm by 40cm, comprising bamboo "slats" that are typically 5.5mm wide, all mounted on a cotton scrim backing. As they are designed to be rolled up between meals, they can be bent to very tight curves (but only in one direction!). The roofs I want to make are 425mm long so I'm needing to join two pieces together (out of the 30cm dimension, because of the way the "slats" run) and I do this with two "L" shaped pieces, to give them the best longitudinal strength. To hold them in shape, I make four formers out of 10mm styrofoam (two to reinforce the offset joins and two positioned to prevent the roofs sliding lengthways. Further support is provided by the four compartment dividers on the 3062-type coaches. At this point, using pieces that consist of 24 "slats", I have a roof that fits well . . .
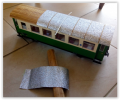
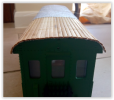
It is when I then apply a textured covering where things can go wrong. I've tried thin sandpaper (with PVA and spray adhesive) and glittery (for texture, not colour!) wrapping paper (self-adhesive and with spray adhesive) and, more often than not, this causes the "slats" to tighten up, so that there are small gaps between the roof and the coach body. My next attempt will be (somehow) to make the roof oversize (widthwise) by just the right amount that the "shrinkage" will make it the right size to sit snugly.
I'll let you know if I find a solution that works!
All the best
David
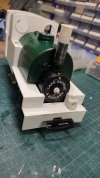
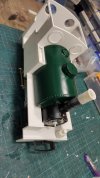
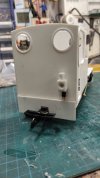
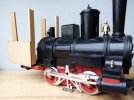
Out of interest, here's one I did earlier, well about 7 or eight years ago anyway. It is the roof from a very poorly made ( by me) W&U loco , the "chimney " is actually the metal insert you use on plastic plumbing jointsDon't the GRS roofs (made of plastikard) have a constant curve? Maybe their vacuum-formed ones might offer more variety.
Do I presume the roofs you aspire to are like this . . .
View attachment 287041
If so, they are quite like the roofs on LGB 3062 (etc.) carriages, with a variable curve, being much steeper at the edges . . .
View attachment 287043
Unfortunately, I've been looking out for examples on German eBay for several years (as I have a couple of coaches of that type which I've assembled from parts but which still need roofs). A couple did pop up during 2020 but the (then) high postage costs always meant I lost out to German bidders. Since the start of 2021, fewer German sellers are willing to post to the UK, and those that are are quoting even higher postage charges (let alone eBay adding 20% vat).
So, what is the solution? I haven't yet got to the point where I can share a foolproof solution but I can share the methodology I'm experimenting with. My raw material is a bamboo place mat. There are typically 30cm by 40cm, comprising bamboo "slats" that are typically 5.5mm wide, all mounted on a cotton scrim backing. As they are designed to be rolled up between meals, they can be bent to very tight curves (but only in one direction!). The roofs I want to make are 425mm long so I'm needing to join two pieces together (out of the 30cm dimension, because of the way the "slats" run) and I do this with two "L" shaped pieces, to give them the best longitudinal strength. To hold them in shape, I make four formers out of 10mm styrofoam (two to reinforce the offset joins and two positioned to prevent the roofs sliding lengthways. Further support is provided by the four compartment dividers on the 3062-type coaches. At this point, using pieces that consist of 24 "slats", I have a roof that fits well . . .
View attachment 287044View attachment 287045
It is when I then apply a textured covering where things can go wrong. I've tried thin sandpaper (with PVA and spray adhesive) and glittery (for texture, not colour!) wrapping paper (self-adhesive and with spray adhesive) and, more often than not, this causes the "slats" to tighten up, so that there are small gaps between the roof and the coach body. My next attempt will be (somehow) to make the roof oversize (widthwise) by just the right amount that the "shrinkage" will make it the right size to sit snugly.
I'll let you know if I find a solution that works!
All the best
David
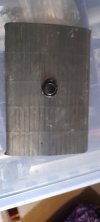
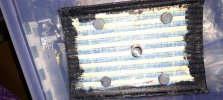
I found that by leaving draped in place and covering with fine wet and dry glued using wood glue/PVA, it has held it's shape pretty well. The magnets are a cunning plan to hold the roof in place, to enable battery changing. I'm not posting a picture of the loco as it is actually bad enough to be embarrassing!
Have you considered covering the shaped bamboo mat with fiberglass first? Glass mat impregnated with epoxy resin like used in boat building? The cured fiberglass layer will be very thin and transparent. You could then finish it with any of your other materials without concern about the roof holding its shape.It is when I then apply a textured covering where things can go wrong.
Gérard Baudoin
Registered
Chris Vernell
45.29 N, 75.75 W
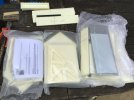
Yesterday, I CA'd two resin wall sections together using a corner clamp. Today, I tried removing the clamp ...
Yup, the CA had done a better job of attaching the clamp to the resin than it did holding the walls together
A chisel pried the clamp off, but the butt joint has come apart along 2/3 of its length.
I shall re-do it using gap filler CA and no corner clamp, then reinforce with epoxy glue and plastic L angle.
Judging by the incipient bowing of the wall sections, I shall have to apply lengths of alumin(i)um angle along the top and bottom to keep them straight.
Have you thought about UV Glue, very effective in most situations.Yesterday, I CA'd two resin wall sections together using a corner clamp. Today, I tried removing the clamp ...
Yup, the CA had done a better job of attaching the clamp to the resin than it did holding the walls together
A chisel pried the clamp off, but the butt joint has come apart along 2/3 of its length.
I shall re-do it using gap filler CA and no corner clamp, then reinforce with epoxy glue and plastic L angle.
Judging by the incipient bowing of the wall sections, I shall have to apply lengths of alumin(i)um angle along the top and bottom to keep them straight.
The Shed
Citizen of the Republic of the North East.
Continuing tinkering from this thread, Servo Controlled Points, post #56
Servo control via F1 key and F1 function output from a LGB 55021 decoder...........

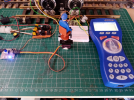
Servo control via F1 key and F1 function output from a LGB 55021 decoder...........


3 minutes of fame
3d printing, electronics and trams
I printed off a quick modification to the laser cutter today. I needed air assist so that I could cut some card for a project for my wife. Basically just a length of tube with a nozzle on the end. It is joined by a length of plastic flexible tubing to the little compressor I have, which feeds it air at about 3 PSI.
I wish I had done this months ago! The difference in cutting is incredible! much cleaner, less visible charring and better cutting depth for a given speed and power level.
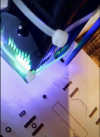
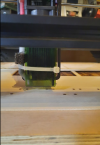
I wish I had done this months ago! The difference in cutting is incredible! much cleaner, less visible charring and better cutting depth for a given speed and power level.


3 minutes of fame
3d printing, electronics and trams
...And having improved the cutter, I put it to use cutting a set of bogies I designed this morning. These take the 24.5mm GRS wheels with 3mm axles in ball bearings and form a very robust bogie for coach stock. I 3D printed some spring detail, but at the moment I've no plans to build proper suspension units.
(I've also clamped the top beam into place now, I only noticed when I took the photo that it was not stuck fully into position!)
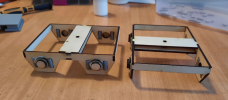
(I've also clamped the top beam into place now, I only noticed when I took the photo that it was not stuck fully into position!)

-bbbb
Registered
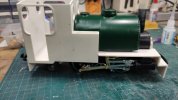
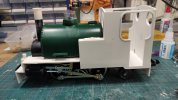
A Bachmann handcar connecting bar re-broke again:
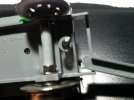
Instead of gluing it again, I tried a different solution which seems better... A new hole was added a little bit further down the bar, to use instead of the old broken hole:
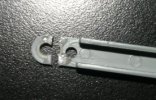
It works just as well as before and is a little more sturdy than the previously glued repair.

Instead of gluing it again, I tried a different solution which seems better... A new hole was added a little bit further down the bar, to use instead of the old broken hole:

It works just as well as before and is a little more sturdy than the previously glued repair.

