Southwestforests
Registered
Wishing y'all a fun and successful show. 
Is the grey loco 4 cylinder?
Is the grey loco 4 cylinder?
Yes it was a 4cylinder loco.Wishing y'all a fun and successful show.
Is the grey loco 4 cylinder?
There ya go, right there is what makes this hobby a thing.and it works, so I'm happy.
Not sure I get what you're doing and how it all fits together? I think more photos are requiredMaybe not the most interesting item I have posted but an important one.
I'm not sure where where the large scale tramway modelling is going to take me, I don't know if a layout will come of the baseboards, I don't even know if the track built so far will remain an in house test track or become something more in the workshop or loft.
Because of the unknown I decided I wanted to make the baseboards interchangeable, so a template would be required and I decided to make something as simple as possible and still be reliable.
So I made the simplest thing I could, and I built it with only one end blanked, and it works, so I'm happy.
David
If my eyes are not deceiving me it is a jig for drilling holes in baseboard end pieces.Not sure I get what you're doing and how it all fits together? I think more photos are required
Yes I think you're right Jon! Too early in the morning for me to recognise thatIf my eyes are not deceiving me it is a jig for drilling holes in baseboard end pieces.
End view of the baseboard with the jig above the board joint.Not sure I get what you're doing and how it all fits together? I think more photos are required
End view of the baseboard with the jig above the board joint.
The only thing I know for sure is that all double track baseboards will be 342mm wide. I have a suspicion the tram baseboards could end up in the loft or the workshop, when it gets built, and I want to have the flexibility to be able to add or remove boards between the two end corner boards.
David
Pedant's corner here ! It was a 3-cylinder arrangement, this being thought to help with the rapid acceleration needed. The centre connecting rod had to be a sort of A shape to clear the leading axles, one of which was cranked. A quick internet search will bring up drawings of the whole layout. It makes a magnificent model though.Yes it was a 4cylinder loco.
It was built by the Great Eastern Railway in 1902 to prove a steam loco could accelerate as fast as the new fangled electric trains of the time.
It never went into service, and was used just prove a point! It was to heavy and carried too little coal and water to be useful in real day to day service.
It was quietly put aside and later rebuilt into an 0-8-0 goods tender loco that was scrapped around about the end of WW1.
Quite right. No idea where I got the idea of 4 cylinders fromPedant's corner here ! It was a 3-cylinder arrangement, this being thought to help with the rapid acceleration needed. The centre connecting rod had to be a sort of A shape to clear the leading axles, one of which was cranked. A quick internet search will bring up drawings of the whole layout. It makes a magnificent model though.
Not being particularly familiar with UK locomotives, what search terms should I use for more information?Pedant's corner here ! It was a 3-cylinder arrangement, this being thought to help with the rapid acceleration needed. The centre connecting rod had to be a sort of A shape to clear the leading axles, one of which was cranked. A quick internet search will bring up drawings of the whole layout. It makes a magnificent model though.
GER 0-10-0 will do itNot being particularly familiar with UK locomotives, what search terms should I use for more information?
GER 0-10-0 will do it
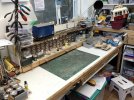
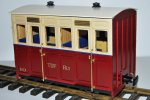
Varnished, wheels and roof added, just awaiting glazing, people and the last touch ups:Progress on the coach:
Bought some Tenmille 24 mm wheels from GRS to replace the plastic one supplied, however the 2 mm axles were a little small for the 3 mm axle box, but a piece of 3 mm tube did the job
Inside painted and seats covered in felt, however next time paint the inside before assembly, this wasn't easy
The outside sanding sealer, primer and top coat, new lovers, door handles, rear steps and lamp bracket, again GRS, decals by Stan Cedarleaf. Leat to dry and harden, next week varnish and chassis.

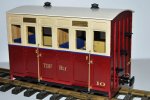
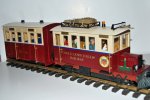
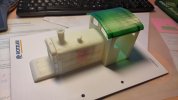
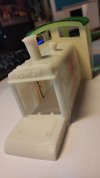
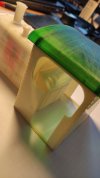
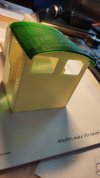
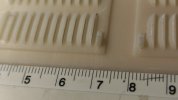
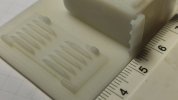
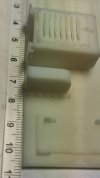
its going on,the first parts from the 3D printer, not quite easy, the cab is 1.5mm larger than the print area - but it was enoughHi,
Not directly at the workbench - more at the desk. My small, freely developed (Fowler) diesel locomotive is taking shape. The chassis and the cabin will be made of polystyrene. I want to 3D print the detailed parts. The drive is planned with a battery.
