You are using an out of date browser. It may not display this or other websites correctly.
You should upgrade or use an alternative browser.
You should upgrade or use an alternative browser.
What happened at your workbench today?
- Thread starter Henri
- Start date
The Shed
Citizen of the Republic of the North East.
3 minutes of fame
3d printing, electronics and trams
I think it should be possible to improve the quality of those. It looks like there's a bit of over extrusion or perhaps the retraction needs increasing. Failing that, maybe a clean up of the original file would help?P playmofire
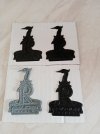
Printed a few more, sprayed one with primer, shows up in the picture better.
View attachment 291058
playmofire
Registered
Lookinng good; PM sent.P playmofire
Printed a few more, sprayed one with primer, shows up in the picture better.
View attachment 291058
Gérard Baudoin
Registered
Bonjour. I didn't know about the emblem of Franche Conté. I remember my father told us he had to go to Sochaux to buy his first new car in the 1950 (From Brittany!) She was a 203. then a 403, then a "Versailles".for Gérard Baudoin and other people interested in this question !
The initial home town of Peugeot is in Sochaux.
Sochaux is in the so called région Franche Comté in France.
The Franche Comté emblem is a lion.
I am now in Toulouse area but my family originated from Franche Comté and particularly close to Sochaux.
Several members of my family worked by Peugeot.
3 minutes of fame
3d printing, electronics and trams
ARIA31
Registered
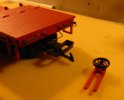
Today I repaired my USA trains depressed center flat car. As many other G Scaler I broke one of the brake wheel support.
After having tried glue which failed , I found another solution with 2 nails.
The first step was to bore the 4 holes 1.5 mm with care to make sure the support will be well aligned.
Fortunately it worked fine....
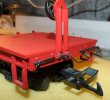
After having tried glue which failed , I found another solution with 2 nails.
The first step was to bore the 4 holes 1.5 mm with care to make sure the support will be well aligned.
Fortunately it worked fine....


JimmyB
Now retired - trains and fishing
Good solution, though i may have used a couple of small 10/12 BA nuts and bolts, but as long as it works for youToday I repaired my USA trains depressed center flat car. As many other G Scaler I broke one of the brake wheel support.
After having tried glue which failed , I found another solution with 2 nails.
The first step was to bore the 4 holes 1.5 mm with care to make sure the support will be well aligned.
Fortunately it worked fine....
playmofire
Registered
Yesterday at my workbench (a wobbly kitchen table in what passes for a conservatory, built so poorly for the previous owner of our place that there wasn't even sealing between the edges of the conservator and the wall) I started experimenting with reroofing my LGB Toy Train goods vans.
I like these short vans but would like a more European/UK roof line, i.e. curved rather than the present central walkway and angled roof line either side. (The end ladders on the van body don't bother me greatly and I will either leave them, or box them over in whole or in part. I know they can be cut off and the ends rescored for the planking, but I'm wanting to run stock rather than spend a lot of time altering it.) I have 10 of these goods vans (I think that's right, but the total could be one or two more), and I have thought of maybe having a 3D-printed roof made. Any takers out there?)
Anyway, back to the workbench.
David1226 has kindly provided me with six roofs surplus to his needs, but for a first run I used a roof from a weathered van off eBay.
Tools and materials first, a razor saw and a sheet of Evergreen Metal Roofing. There are very fine strips in the latter pack to fix in the pre-cut grooves, but these can be discarded. The pre-cut grooves make it easy to shape the roof and will probably mean it will hold its shape better once glued in place.
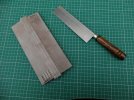
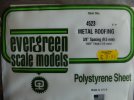
First. cut off the overhang of the central walkway at each end, smoothing the cut end as required.
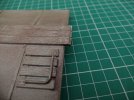
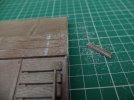
Then slice off the ventilators at each end of the roof. A bit of sanding might be needed to remove all traces but isn't really important.
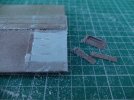
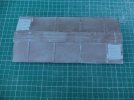
A trial fitting, firstly with a spacer between the walkway and the new roof and then without. I shall try removing the walkway entirely as well.
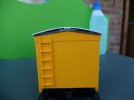
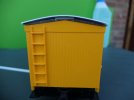
Clearly, there is a need for filling of some sort between the new roof and the old roof, so room for experimentation.
Lastly, an overall impression.
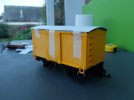
I think more of an overhang at each side is needed but if I remove the central walkway, that may give the extra overhang needed.
I like these short vans but would like a more European/UK roof line, i.e. curved rather than the present central walkway and angled roof line either side. (The end ladders on the van body don't bother me greatly and I will either leave them, or box them over in whole or in part. I know they can be cut off and the ends rescored for the planking, but I'm wanting to run stock rather than spend a lot of time altering it.) I have 10 of these goods vans (I think that's right, but the total could be one or two more), and I have thought of maybe having a 3D-printed roof made. Any takers out there?)
Anyway, back to the workbench.
David1226 has kindly provided me with six roofs surplus to his needs, but for a first run I used a roof from a weathered van off eBay.
Tools and materials first, a razor saw and a sheet of Evergreen Metal Roofing. There are very fine strips in the latter pack to fix in the pre-cut grooves, but these can be discarded. The pre-cut grooves make it easy to shape the roof and will probably mean it will hold its shape better once glued in place.


First. cut off the overhang of the central walkway at each end, smoothing the cut end as required.


Then slice off the ventilators at each end of the roof. A bit of sanding might be needed to remove all traces but isn't really important.


A trial fitting, firstly with a spacer between the walkway and the new roof and then without. I shall try removing the walkway entirely as well.


Clearly, there is a need for filling of some sort between the new roof and the old roof, so room for experimentation.
Lastly, an overall impression.

I think more of an overhang at each side is needed but if I remove the central walkway, that may give the extra overhang needed.
Last edited:
SevenOfDiamonds
Registered
There is always more than one way to achieve the same outcome but I do wonder whether trying to achieve a curved roof using the original "American-style" roof is necessarily the best starting point.I like these short vans but would like a more European/UK roof line, i.e. curved rather than the present central walkway and angled roof line either side
Like you I have a number of the ToyTrain box vans and I also wanted to "anglicise" them. At the time, Garden Railway Specialists offered a number of conversion kits for ToyTrain wagons, and one of these achieved what I wanted. It consisted of a pre-curved piece of thick plasticard (113 x 230mm), two rectangles of thinner plasticard with a template to shape the top edge to match the curve of the roof, two vacuum-formed roof supports (for sticking to the underside of the roof to slot inside the body) and two ventilators.
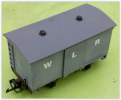
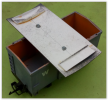
They stopped producing this"kit" some time ago but still offer the "Moulded Roof Supports" (SG1108), the ventilators (SG1128}, and a number of curved roofs (though most are not wide enough for this task).
On other wagons, I have fabricated a roof from scratch and topped it with "corregated iron sheet" also from GRS (LSA2, but I can't find it on their website today). This comes (came?) as a vacuum-formed sheet with two separate corrugated strips each of 405 x 113mm (so enough for three wagon roofs if you are prepared to join two bits together for the third one).
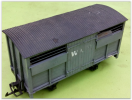
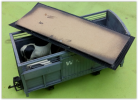
Of course, another method of creating a curved roof is to make it up from a number of narrow strips attached to an arched former. ge-rik (of this forum) has described this process (on the same wagon as yours!) on his blog (How I converted an LGB US style box car into a UK style closed van).
Food for thought?
All the best
David
Last edited:
playmofire
Registered
Much useful info there, David. Off now to GRS to search out what you mention. Their kits would have been my preferred option if they were still available.There is always more than one way to achieve the same outcome but I do wonder whether trying to achieve a curved roof using the original "American-style" roof is necessarily the best starting point.
Like you I have a number of the ToyTrain box vans and I also wanted to "anglicise" them. At the time, Garden Railway Specialists offered a number of conversion kits for ToyTrain wagons, and one of these achieved what I wanted. It consisted of a pre-curved piece of thick plasticard (113 x 230mm), two rectangles of thinner plasticard with a template to shape the top edge to match the curve of the roof, two vacuum-formed roof supports (for sticking to the underside of the roof to slot inside the body) and two ventilators.
View attachment 291168View attachment 291169
They stopped producing this"kit" some time ago but still offer the "Moulded Roof Supports" (SG1108), the ventilators (SG1128}, and a number of curved roofs (though most are not wide enough for this task).
On other wagons, I have fabricated a roof from scratch and topped it with "corregated iron sheet" also from GRS (LSA2, but I can't find it on their website today). This comes (came?) as a vacuum-formed sheet with two separate corrugated strips each of 405 x 113mm (so enough for three wagon roofs if you are prepared to join two bits together for the third one).
View attachment 291173View attachment 291174
Of course, another method of creating a curved roof is to make it up from a number of narrow strips attached to an arched former. ge-rik (of this forum) has described this process (on the same wagon as yours!) on his blog (How I converted an LGB US style box car into a UK style closed van).
Food for thought?
All the best
David
3 minutes of fame
3d printing, electronics and trams
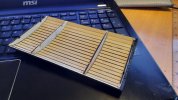
If it's of interest, I can laser cut roofs from 2mm ply, with the planking half cut, so bending to shape is easy. I've done this on my home built wagons and the end effect is excellent.
The one below has just been painted without any sanding or filler, but a layer of tissue will give a very realistic canvas finish.
The one below has just been painted without any sanding or filler, but a layer of tissue will give a very realistic canvas finish.


playmofire
Registered
Parts bought from GRSUK.
playmofire
Registered
Conversation started.If it's of interest, I can laser cut roofs from 2mm ply, with the planking half cut, so bending to shape is easy. I've done this on my home built wagons and the end effect is excellent.
The one below has just been painted without any sanding or filler, but a layer of tissue will give a very realistic canvas finish. View attachment 291193View attachment 291194
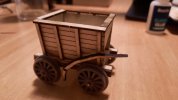
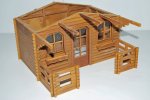
Busy, busy, busy!Currently I have 3 things on the go on my work bench:
View attachment 291355
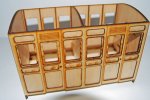
- Pola Garden Shed, my first Pola building and very impressed so far.
View attachment 291356
- A Timpdon 2 Compartment Coach
View attachment 291357
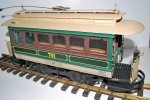
- Bachmann Tram conversion to battery RC
Just arrived a Kippo Signal Box, not started yet
Chris Vernell
45.29 N, 75.75 W
First, I must find my bench in the dungeon depths. This quest will require the assistance of a mage, a cleric, a hero and a thief.
Second, I must unsheath my vorpal blade and battle Shelob's offspring.
Third, should I survive, I must find the dark materials for the projects I have in mind. Further arachnid armageddon is anticipated.
Fourth ... now what was it I came in for?
Time to go and lie down.
Second, I must unsheath my vorpal blade and battle Shelob's offspring.
Third, should I survive, I must find the dark materials for the projects I have in mind. Further arachnid armageddon is anticipated.
Fourth ... now what was it I came in for?
Time to go and lie down.
korm kormsen
Registered
don't forget to tell the DM, that you are taking a break....
Time to go and lie down.
DafyddElvy
1:22.5 & 15mm Scale Trams, , NG Steam Railways
Something a little different.
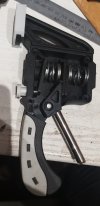
Like I'm guessing a few others I break modern plastic tools occasionally.
I need to fix a clamp on which the draw in handle (for want of a better word) so I could use the clamp to hold parts of the next baseboard while I glue and screw them, the tube forming the new handle is recycled from a defunct garden light flower thingy.
Time will tell if this fix becomes permanent, or this ham fisted modeller breaks it again.
David
Attachments
Southwestforests
Registered
What happened at my workbench last night was that I knocked over the bottle of what is left of my PollyScale 'steam power black' paint
and in what I'm going to classify as a minor miracle it stopped just short of flowing over the the proverbial "kitchen table's edge on to the apartment carpet.


This time the sad fact of it almost being all used up and being irreplaceable saved me from damaging someone else's property.
The other minor miracle is that the paint is still good after at least 15 years!
and in what I'm going to classify as a minor miracle it stopped just short of flowing over the the proverbial "kitchen table's edge on to the apartment carpet.
This time the sad fact of it almost being all used up and being irreplaceable saved me from damaging someone else's property.
The other minor miracle is that the paint is still good after at least 15 years!

