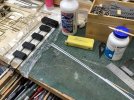
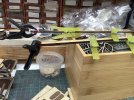
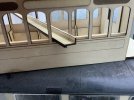
Before you ask I am not sure when this kit will be available or what it will cost, you will need to ask Matt (3 minutes of fame
 3 minutes of fame
)on this forum.
Matt approached me and asked if I would like to build and review this kit for him. I am happy to do this as he was happy to take a review of warts and all. I will also be doing some mods to the kit for my own needs as I get to keep it when work done, so I need it to be for what I want. I will point out these revisions as I go.
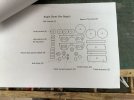
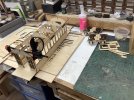
So what does the kit include, well 5 rather large lumps of what is I think 2mm quality ply with all the parts lazer fried. A couple of parts had popped out of the sheets that Matt had carefully put in the bag of 3d printed parts. These are sundry details including wheels. Some metal for the wheel axles and other detail, 8 very nice small ball bearing journals. A piece of brass and some comprehensive instructions which include copies of the ply parts and a sheet of glazing. Thus a complete ready to go with no additional parts to buy.
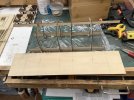
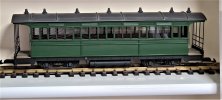
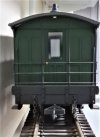
First up before I get to the build some pics of the kit.
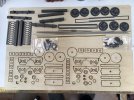
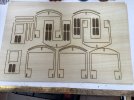
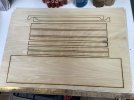
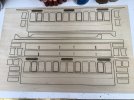
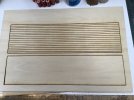
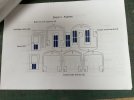

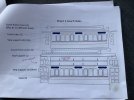
I have not shown all the Instructions but on reading they all appear to make some sense to me and are pretty comprehensive.
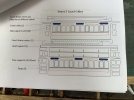
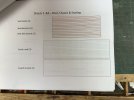
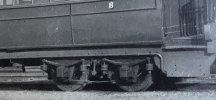
Thus to the nitty gritty. I decided to start up on what I felt may be the trickiest part to get right the bogies. I have to say here that this should not be a bogie coach, Matt obviously built one for himself and found that as a 4 wheeler it was too long for his curves. That is understandable as the kit is a G scale product thus not 100% accurate for either Gauge 3 or Gauge 1, if it were to scale for either if these then it would have been a 4 wheeler. But should you buy one be assured that it will fit in just right behind LGB, PIKO etc locomotives.
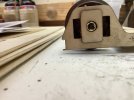
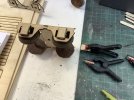
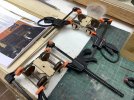
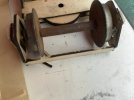
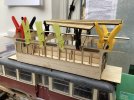
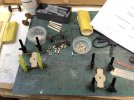
My original plan was to build the bogies with one side flexible thus giving the equivalent of 3 point suspension, but on carefully looking at the method of construction that would not have been possible. I was also a bit worried about the thickness between the Side Frame tabs where the Pivot Mounts fit for this as well. Thus here I have followed instructions. But I used the oblong cutouts from the Side Frames to strengthen the joint where the tabs are glued. I also cut some spare from from the ply to put additional strengthening in between the Pivots and the Side Frames. I have also elected to use Metal Wheels that were in stock so sadly the Ball Bearings will remain unused as they are for a much shorter Axle width. Below you can see where I am at just now, I have glued up the Pivots to the Side Frames and the pegs etc are holding in place the Hub Carriers that would hold the Ball Bearings in place. To enable a bearing I have cut short lengths of 3/16 KS Brass Tube that will hold the bearings in place and stop wear and tear to the wood hubs. I would have liked to put cast Axle Bearings here but only had 4 of any type in stock so have elected to use those supplied in the kit. Each side of each axle will also have a nylon and brass washer in place to get the spacing correct. Once this is all in place and the End Frames glued on the bogie should be pretty robust and heavy with the what I think are Gary Raymond Wheels. Matt suggeets in the instructions that if you want Metal Wheels you can get them from GRS with the correct axles ends for the Ball Bearings. I have not checked this out. But a GRS reference would be handy here.
EDIT have a look at post #24 if you are following this build, I should have used different parts between the bogies where the curved sections are.
Oh Matt at this stage would it be worthwhile you posting a print of your built coach to this thread?
Matt approached me and asked if I would like to build and review this kit for him. I am happy to do this as he was happy to take a review of warts and all. I will also be doing some mods to the kit for my own needs as I get to keep it when work done, so I need it to be for what I want. I will point out these revisions as I go.
So what does the kit include, well 5 rather large lumps of what is I think 2mm quality ply with all the parts lazer fried. A couple of parts had popped out of the sheets that Matt had carefully put in the bag of 3d printed parts. These are sundry details including wheels. Some metal for the wheel axles and other detail, 8 very nice small ball bearing journals. A piece of brass and some comprehensive instructions which include copies of the ply parts and a sheet of glazing. Thus a complete ready to go with no additional parts to buy.
First up before I get to the build some pics of the kit.


I have not shown all the Instructions but on reading they all appear to make some sense to me and are pretty comprehensive.


Thus to the nitty gritty. I decided to start up on what I felt may be the trickiest part to get right the bogies. I have to say here that this should not be a bogie coach, Matt obviously built one for himself and found that as a 4 wheeler it was too long for his curves. That is understandable as the kit is a G scale product thus not 100% accurate for either Gauge 3 or Gauge 1, if it were to scale for either if these then it would have been a 4 wheeler. But should you buy one be assured that it will fit in just right behind LGB, PIKO etc locomotives.
My original plan was to build the bogies with one side flexible thus giving the equivalent of 3 point suspension, but on carefully looking at the method of construction that would not have been possible. I was also a bit worried about the thickness between the Side Frame tabs where the Pivot Mounts fit for this as well. Thus here I have followed instructions. But I used the oblong cutouts from the Side Frames to strengthen the joint where the tabs are glued. I also cut some spare from from the ply to put additional strengthening in between the Pivots and the Side Frames. I have also elected to use Metal Wheels that were in stock so sadly the Ball Bearings will remain unused as they are for a much shorter Axle width. Below you can see where I am at just now, I have glued up the Pivots to the Side Frames and the pegs etc are holding in place the Hub Carriers that would hold the Ball Bearings in place. To enable a bearing I have cut short lengths of 3/16 KS Brass Tube that will hold the bearings in place and stop wear and tear to the wood hubs. I would have liked to put cast Axle Bearings here but only had 4 of any type in stock so have elected to use those supplied in the kit. Each side of each axle will also have a nylon and brass washer in place to get the spacing correct. Once this is all in place and the End Frames glued on the bogie should be pretty robust and heavy with the what I think are Gary Raymond Wheels. Matt suggeets in the instructions that if you want Metal Wheels you can get them from GRS with the correct axles ends for the Ball Bearings. I have not checked this out. But a GRS reference would be handy here.
EDIT have a look at post #24 if you are following this build, I should have used different parts between the bogies where the curved sections are.

Oh Matt at this stage would it be worthwhile you posting a print of your built coach to this thread?
Attachments
Last edited:

