That should please Gauge 3 bods who may also be a market for you.Thank you! I will do a scale 4 wheel version of the kit to match the GRS coach
You are using an out of date browser. It may not display this or other websites correctly.
You should upgrade or use an alternative browser.
You should upgrade or use an alternative browser.
Wisbech and Upwell Coach Kit.
- Thread starter dunnyrail
- Start date
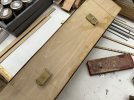
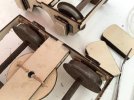
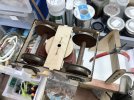
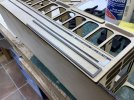
Today has been a riveting day. Cambrian Rivets have been added to the Under-frame components today. Oh a set of Cambrian Door handles have been fitted to each door. I think these doors may have been sliding ones so have not resorted to adding the locking mechanism. These will not be fitted till they have been sprayed black and the body sprayed. Noting Matts comments via PM about using the Pivot Spacers between to bogie Pivot Mounts I was left with a need to drop the bogies somewhat so that the wheels are clear of the Chassis. Fortunately lots of the window cut outs are spare so I have glued 4 of these together to drop the bogie down to clear the flanges of the wheels. This may not be necessary if you use the 3D printed wheels in the kit the 3 circles likely being sufficient. Seen below the window cutouts waiting for glue to dry.
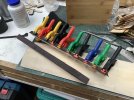
The footsteps have also been glued up again these will be sprayed black prior to fitting. To aid this process I have cut some kit sprue to aid separation 8mm x 14mm does the job.
The holes for the bogies have been drilled in the Chassis, these are 98mm back from each end, this allows the bogies to swing for sharpe curves with the Bogie side-frames clear of the Under-frame components when glued in place.
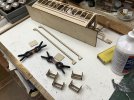
The card Beading has also been cut to length and glued in place. I used my metal rule to ensure the long pieces were nice and straight, to bottom the cut the 2 ends to size. One of the 3D components shown for comparison.
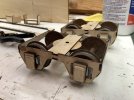
Finally I have started glueing the 3D printed Spring Detail to the gaps in the bogie, I used Speed Bond for this with a knife behind on first fit to ensure they do not go in too deep.
The little bit of wood sprue on the left has been removed,
The footsteps have also been glued up again these will be sprayed black prior to fitting. To aid this process I have cut some kit sprue to aid separation 8mm x 14mm does the job.
The holes for the bogies have been drilled in the Chassis, these are 98mm back from each end, this allows the bogies to swing for sharpe curves with the Bogie side-frames clear of the Under-frame components when glued in place.

The card Beading has also been cut to length and glued in place. I used my metal rule to ensure the long pieces were nice and straight, to bottom the cut the 2 ends to size. One of the 3D components shown for comparison.

Finally I have started glueing the 3D printed Spring Detail to the gaps in the bogie, I used Speed Bond for this with a knife behind on first fit to ensure they do not go in too deep.

The little bit of wood sprue on the left has been removed,
Riograndad
Model Railroading, boats and oil painting,
I have never built or for that matter ever thought of building such a kit so this makes very interesting reading and the step by step build is very informative with the little add ons and niggles you have overcome,thanks Jon and looking forward to the end result


You never know till you try, nobody starts out as an expert. We just pick up the knowledge from building things, I started with Airfix kits and used to marvel at scratch builders wishing that I could emulate them and never believing that I would ever be able to even contemplate scratch building or even talking a complex kit. This one has its complexities but if you read the instructions and take your time should not be beyond someone who wants this kit, yes even that beginner.
Starting is always the hardest part.
But first I want to show how I have added further compensation whilst also showing up my bo bo. Looking at the pic below you can see 2 small wood washers, these Pivot Mount Spacers should have gone between the Pivot Mounts, my fault I used the Spacers for Pivot instead. Thinking this error through I would probably were I to do it the right way strengthen the gap between the Pivot Mounts with a couple of off cuts each side of these tiny washers.
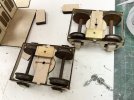
Below you can see the wire I have mounted either side of the Pivot hole, these will allow a little movement up and down over the length of the coach on this bogie. Note the other bogie does the same flex but to each side. In the second picture you can see the two Spacers for Pivot that I have knocked up and drilled from 2 window scrap pieces and a bit of Brass to act upon the wire on the bogie.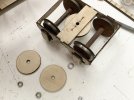
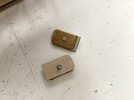
I have used captive nuts on these 2 parts to keep the bolt in position as I think the coach roof may be secured in place permanently, though as yet this has not been thought about over much.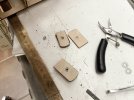
I have ended up with 3 bits of old window scrap and here it can be seen with a screw in place whilst the glue dries.
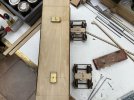
Below you can see how I have now mounted the plates on the chassis with the relavent bogie showing how they will mount onto the rubbing plates.
Starting is always the hardest part.
The last day or so have seen some more work undertaken. We are at a rolling body stage now.I have never built or for that matter ever thought of building such a kit so this makes very interesting reading and the step by step build is very informative with the little add ons and niggles you have overcome,thanks Jon and looking forward to the end result
But first I want to show how I have added further compensation whilst also showing up my bo bo. Looking at the pic below you can see 2 small wood washers, these Pivot Mount Spacers should have gone between the Pivot Mounts, my fault I used the Spacers for Pivot instead. Thinking this error through I would probably were I to do it the right way strengthen the gap between the Pivot Mounts with a couple of off cuts each side of these tiny washers.
Below you can see the wire I have mounted either side of the Pivot hole, these will allow a little movement up and down over the length of the coach on this bogie. Note the other bogie does the same flex but to each side. In the second picture you can see the two Spacers for Pivot that I have knocked up and drilled from 2 window scrap pieces and a bit of Brass to act upon the wire on the bogie.


I have used captive nuts on these 2 parts to keep the bolt in position as I think the coach roof may be secured in place permanently, though as yet this has not been thought about over much.

I have ended up with 3 bits of old window scrap and here it can be seen with a screw in place whilst the glue dries.

Below you can see how I have now mounted the plates on the chassis with the relavent bogie showing how they will mount onto the rubbing plates.

Attachments
Here I show the coach with the bogies in place, I had cut down the screws but too short so fortunately I had a few of the exact size in a parts bin so used these to mount the bogie in place. By the time a couple of lock nuts are put in place you will note that Matt has chosen the length with great forethought.
So here is the car at Silberhutte, it tracks through the Peco Points just fine, I have also tried it on Trainline 45 R2 points and it is fine on these as well. I am certain that the Metal Wheels help considerably.
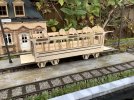
Finally some pics in Alexisbad showing next to an LGB Tram Car and Van. Oh the red and creme colour will be what this ends up with. I think these 3 pics show that Matt’s elastic ruler is completely compatible with LGB’s one.
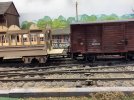
So here is the car at Silberhutte, it tracks through the Peco Points just fine, I have also tried it on Trainline 45 R2 points and it is fine on these as well. I am certain that the Metal Wheels help considerably.

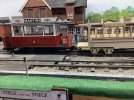
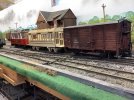
Finally some pics in Alexisbad showing next to an LGB Tram Car and Van. Oh the red and creme colour will be what this ends up with. I think these 3 pics show that Matt’s elastic ruler is completely compatible with LGB’s one.


3 minutes of fame
3d printing, electronics and trams
Looks great Jon, thank you for all your efforts.
Worth checking that the side frames don't restrict movement too much, but I can get the coach around my 2'6" radius curves without issue, so I'm sure you will be fine.
Worth checking that the side frames don't restrict movement too much, but I can get the coach around my 2'6" radius curves without issue, so I'm sure you will be fine.
Thanks Matt have mounted the bogies such that they do not hit the side frames when put in place.Looks great Jon, thank you for all your efforts.
Worth checking that the side frames don't restrict movement too much, but I can get the coach around my 2'6" radius curves without issue, so I'm sure you will be fine.
3 minutes of fame
3d printing, electronics and trams
One thing I've picked up from your photos is that you have aligned the body with the bottom of the chassis and when I built the prototype, I aligned to the tops of the frames, giving a step from the body to the chassis.
I think you may need to do a little bit of shaping to the roof to get a smooth transition, but let's see how you get on. I can easily extend the body slightly so that a flush fit can be achieved if required.
I think you may need to do a little bit of shaping to the roof to get a smooth transition, but let's see how you get on. I can easily extend the body slightly so that a flush fit can be achieved if required.
Yes I noticed that after I had put the body on the chassis, it also effected to tumble home a little and has lost the bottom frame. I think I will correct the gap with a long thin length of cut each side from the spare ply. I have just cut a similar thin piece to make right my small error on the steps in that the bottom step should have been closer to the front as you said in the instructions!One thing I've picked up from your photos is that you have aligned the body with the bottom of the chassis and when I built the prototype, I aligned to the tops of the frames, giving a step from the body to the chassis.
I think you may need to do a little bit of shaping to the roof to get a smooth transition, but let's see how you get on. I can easily extend the body slightly so that a flush fit can be achieved if required.
More work mostly to sort out an issue noted above but the roof has been constructed so some real work as well.
Noting Matts comments I have made a side raising panel for each side, here the 3mm strips being glued to each side. This has made up for the error but also raised the issue of roof overhang. More about this in a minute.
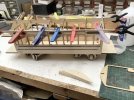
So here is the roof being glued up for removable possibilities. But first having cut the roof out from the moulding I scribed the lines down the plank lines, gently using these lines to curve the roof to its profile. To do this I have cut formers to fit between the Coach Body and End Frames. As there was a spare Coach Body Frame in the kit I have used it to create the formers. End and middle were glued on first with another 2 between those. This modifies the look of the coach giving a hard end to the roof not the open one as on the prototype. But as I regard this as a look alike rather than a slavish model for me this works nicely.
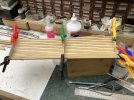
Having competed that I did a test fit of the roof and it sits exact on the sides not with a slight overhand each side as would be present on the prototype and indeed most coaches. So I hatched a plan with another couple of 3mm strips to glue on the edges of the roof. But this causes problems of how to glue it on thus a plan to glue some paper that will assist keeping the new edges in place whilst the glue dries. Of course these had to be cut to fit between the false hidden roof formers.
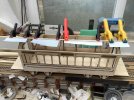
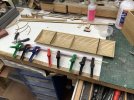
Noting Matts comments I have made a side raising panel for each side, here the 3mm strips being glued to each side. This has made up for the error but also raised the issue of roof overhang. More about this in a minute.

So here is the roof being glued up for removable possibilities. But first having cut the roof out from the moulding I scribed the lines down the plank lines, gently using these lines to curve the roof to its profile. To do this I have cut formers to fit between the Coach Body and End Frames. As there was a spare Coach Body Frame in the kit I have used it to create the formers. End and middle were glued on first with another 2 between those. This modifies the look of the coach giving a hard end to the roof not the open one as on the prototype. But as I regard this as a look alike rather than a slavish model for me this works nicely.

Having competed that I did a test fit of the roof and it sits exact on the sides not with a slight overhand each side as would be present on the prototype and indeed most coaches. So I hatched a plan with another couple of 3mm strips to glue on the edges of the roof. But this causes problems of how to glue it on thus a plan to glue some paper that will assist keeping the new edges in place whilst the glue dries. Of course these had to be cut to fit between the false hidden roof formers.


Last edited:
3 minutes of fame
3d printing, electronics and trams
Nice one Jon. The kit contains strengthening arches for the balcony roofs, so you could substitute your deep frames for these and still have the roof as removable. I'll include some roof supports in the kit to make it removable.
Yes thanks Matt have the strengthening arches to add, they will be next to do once the current side extensions dry off. Good plan to add the strengthening arches have you thought a bit about making the roof perhaps 2 thin planks wider as I have been working on?Nice one Jon. The kit contains strengthening arches for the balcony roofs, so you could substitute your deep frames for these and still have the roof as removable. I'll include some roof supports in the kit to make it removable.
3 minutes of fame
3d printing, electronics and trams
Yep, can easily adjust the width as required.Yes thanks Matt have the strengthening arches to add, they will be next to do once the current side extensions dry off. Good plan to add the strengthening arches have you thought a bit about making the roof perhaps 2 thin planks wider as I have been working on?
Have been doing lots of little jobs during the week and have got to the stage where the coach has started to be painted and my mind is pondering long and hard about couplings.
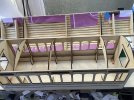
However first up was to extend the roof profile a little, this was mentioned in Post #30 where I showed the paper being attached to the narrow strips cut to extend the roof profile. Below you can see how that was all attached to the inside of the roof. Before spraying a little filler was added to the joints and sanded down to give a good flat roof profile on top.
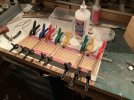
Here that can be seen after having been glued in place, I have also added shorter internal bracing where they will butt up to the Coach End Frames. I achieved fit location by placing the roof on the coach and marking a pencil line inside the Frames at each inside end of the coach. This has given a nice snug fit when they had dried and the roof was refitted. Removable roof will allow access for figures and bogie mounting plus of course at this stage painting and seat fitting. Should I wish it a screw could be fitted to the slot to attach the roof more permanently into the internal bracing.
Here I have started fitting leather strips to the seat units. Luxury indeed for the punters on my line.
Painting via Halfords Rattle cans has commenced with the body and inside having an initial spray of undercoat red. The windows will be masked inside for the external painting job as I feel that the red (oxide) will be fine inside.
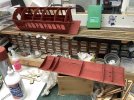
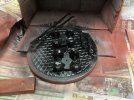
Various parts have been sprayed up black, some can be seen here with the wheels having been masked to preserve the genuine rust on the wheels.
However first up was to extend the roof profile a little, this was mentioned in Post #30 where I showed the paper being attached to the narrow strips cut to extend the roof profile. Below you can see how that was all attached to the inside of the roof. Before spraying a little filler was added to the joints and sanded down to give a good flat roof profile on top.

Here that can be seen after having been glued in place, I have also added shorter internal bracing where they will butt up to the Coach End Frames. I achieved fit location by placing the roof on the coach and marking a pencil line inside the Frames at each inside end of the coach. This has given a nice snug fit when they had dried and the roof was refitted. Removable roof will allow access for figures and bogie mounting plus of course at this stage painting and seat fitting. Should I wish it a screw could be fitted to the slot to attach the roof more permanently into the internal bracing.

Here I have started fitting leather strips to the seat units. Luxury indeed for the punters on my line.

Painting via Halfords Rattle cans has commenced with the body and inside having an initial spray of undercoat red. The windows will be masked inside for the external painting job as I feel that the red (oxide) will be fine inside.

Various parts have been sprayed up black, some can be seen here with the wheels having been masked to preserve the genuine rust on the wheels.

3 minutes of fame
3d printing, electronics and trams
Looking good Jon. It will be interesting to see what the final paint finish looks like. I brush painted mine with multiple coats of slightly watered down acrylic, but I feel I could have done more sanding to flatten the grain a little more.Have been doing lots of little jobs during the week and have got to the stage where the coach has started to be painted and my mind is pondering long and hard about couplings.
However first up was to extend the roof profile a little, this was mentioned in Post #30 where I showed the paper being attached to the narrow strips cut to extend the roof profile. Below you can see how that was all attached to the inside of the roof. Befor spraying a little filler was added to the joints and sanded down to give a good flat roof profile on top.
View attachment 292617
Here that can be seen after having been glued in place, I have also added shorter internal bracing where they will butt up to the Coach End Frames. I achieved fit location by placing the roof on the coach and marking a pencil line inside the Frames at each inside end of the coach. This has given a nice snug fit when they had dried and the roof was refitted. Removable roof will allow access for figures and bogie mounting plus of course at this stage painting and seat fitting. Should I wish it a screw could be fitted to the slot to attach the roof more permanently into the internal bracing.
View attachment 292619
Here I have started fitting leather strips to the seat units. Luxury indeed for the punters on my line.
View attachment 292616
Painting via Halfords Rattle cans has commenced with the body and inside having an initial spray of undercoat red. The windows will be masked inside for the external painting job as I feel that the red (oxide) will be fine inside.
View attachment 292620
Various parts have been sprayed up black, some can be seen here with the wheels having been masked to preserve the genuine rust on the wheels.
View attachment 292618
Thanks Matt. Primer/Sealer will do the job pretty well but on this I have given the light dusting that had not raised the grain overmuch. I am hoping that the next sprays of colour will keep things pretty flat.Looking good Jon. It will be interesting to see what the final paint finish looks like. I brush painted mine with multiple coats of slightly watered down acrylic, but I feel I could have done more sanding to flatten the grain a little more.
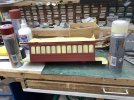
This morning I have started the body colour spraying process. 1st up was masking, this being an important job as I want to keep the inside, ends and platform brown. To apply the masking tape inside I cut strips then put those on the scissors to place the strips as it is pretty well impossible to get more than a finger inside to place the masking tape. The pic below shows all in place for hopefully little bleed through. A good light clean off with a clean brush ensures no hairs or dust to spoil the finish. You can also see the Halfords Colours to be used as the finish colours.
Here is the first application of Arum White which will be on the top half of the body. The turntable helps ensure that all angles and ridges are covered. This spray from all angles also gives a good coat with little chance of tearing whilst mounted flat.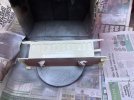

Here is the first application of Arum White which will be on the top half of the body. The turntable helps ensure that all angles and ridges are covered. This spray from all angles also gives a good coat with little chance of tearing whilst mounted flat.

I talked in Post 18 and 22 about using card beading, I got this very wrong and should have used Slater Microstrip instead, annoying thing is I have some in stock and considered using it but though card would work out better. How wrong can you be? The other thing I have done wrong was to not use Block to seal the wood prior to spraying, this would have sealed the wood and help prevent the ply roughing as the grain does tend to lift a little, it would also have helped with the card possibly. But keep on never minding and onwards.
Having allowed the White/Creme to dry it is time to do the Red.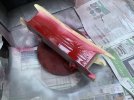
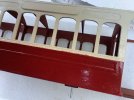
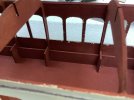
Inevitably there is likely to be some slight bleed through with wood, I fix with this by spraying some of the base colour into the tin lid and brushing it on the offending bleed places. As you can see after a very light sand the 4-5 coats have given a pretty good covering.
Having come up with a stunning plan I am now onto coupling fit and adding the sundry details.
Having allowed the White/Creme to dry it is time to do the Red.

Inevitably there is likely to be some slight bleed through with wood, I fix with this by spraying some of the base colour into the tin lid and brushing it on the offending bleed places. As you can see after a very light sand the 4-5 coats have given a pretty good covering.


Having come up with a stunning plan I am now onto coupling fit and adding the sundry details.
JimmyB
Now retired - trains and fishing
Jon I use this, and find very little if any bleed is used according to the instructions, only use the paper stuff for general masking:I talked in Post 18 and 22 about using card beading, I got this very wrong and should have used Slater Microstrip instead, annoying thing is I have some in stock and considered using it but though card would work out better. How wrong can you be? The other thing I have done wrong was to not use Block to seal the wood prior to spraying, this would have sealed the wood and help prevent the ply roughing as the grain does tend to lift a little, it would also have helped with the card possibly. But keep on never minding and onwards.
Having allowed the White/Creme to dry it is time to do the Red.
Inevitably there is likely to be some slight bleed through with wood, I fix with this by spraying some of the base colour into the tin lid and brushing it on the offending bleed places. As you can see after a very light sand the 4-5 coats have given a pretty good covering.
Having come up with a stunning plan I am now onto coupling fit and adding the sundry details.

